51 slides extracted.
Slide 1 — 0:54 (watch)
 | Hello, everyone. Today, we will discuss building AI agents in Kotlin using the Koog framework. My name is Vadim, and I am the technical lead of Koog. Joining me is Andrey Bragin, a senior developer on the Koog team. Andrey is one of the first members of our team. Could you briefly share your background, Andrey? Sure. Before joining Koog, I worked in native engineering and backend services. I have been with JetBrains for about five years. And I have been with JetBrains for around eight years. I started my career as a Kotlin developer, working on the Kotlin IDE and libraries. I was also part of the Ktor team and worked as a backend developer on Kadana, a cloud-based code analysis tool. After several AI initiatives, I began working on Koog. Now, let’s jump straight to the point. |
Slide 2 — 1:56 (watch)
 | Today marks the first of two planned episodes. This session will provide a basic introduction to building AI agents with Koog, while the next will delve into more advanced topics. We will begin by discussing the overall vision of Koog and the higher-level plans for the framework and ecosystem. Following that, we will cover the architecture involved in building AI agents using the Koog framework. |
Slide 3 — 2:18 (watch)
 | After that, we will engage in some live coding together. Finally, if time permits, we will have a Q&A session. Let's get started. |
Slide 4 — 2:48 (watch)
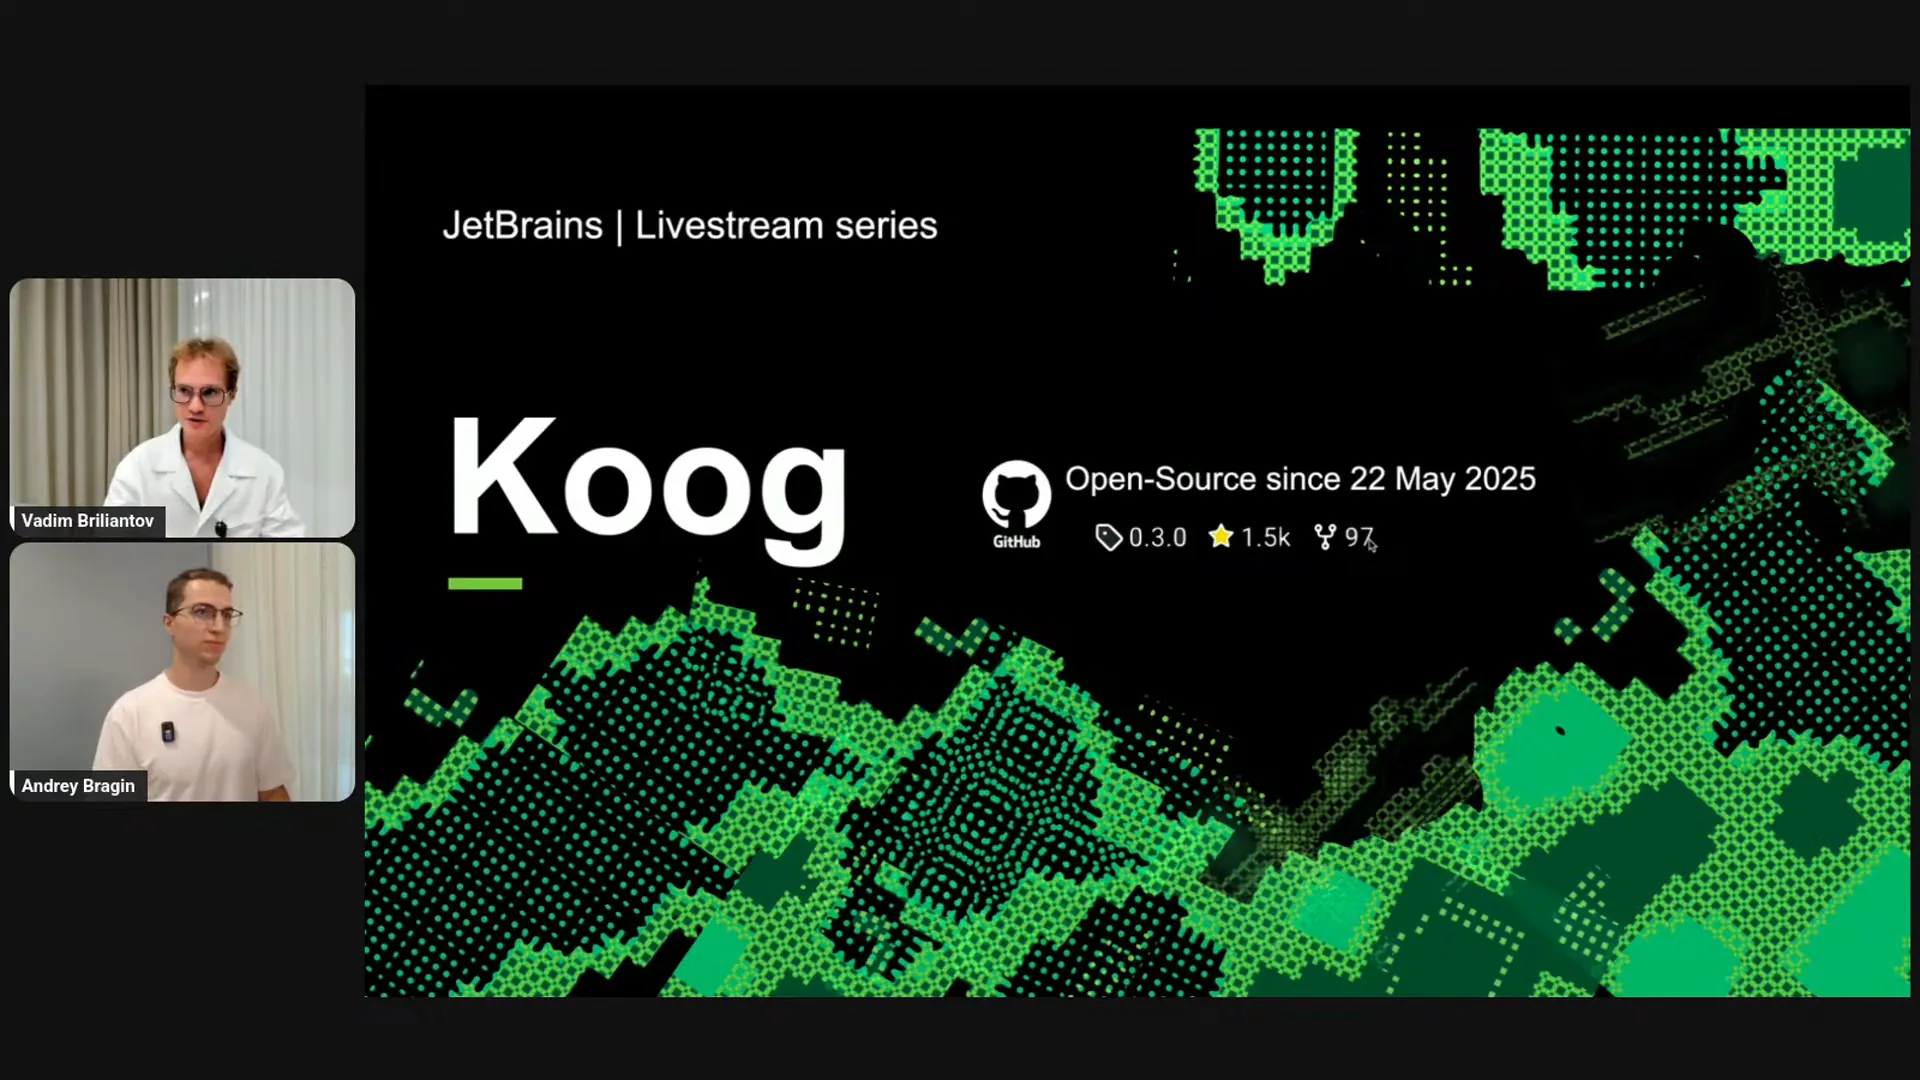 | Koog is the framework for building AI agents in Kotlin, which was open-sourced during KotlinConf on May 22nd. Since then, it has gained significant attention from the community. If I recall correctly, we received around 800 stars in the first week after KotlinConf, which made the whole team very happy. Our work has continued to attract interest and is growing steadily. |
Slide 5 — 3:28 (watch)
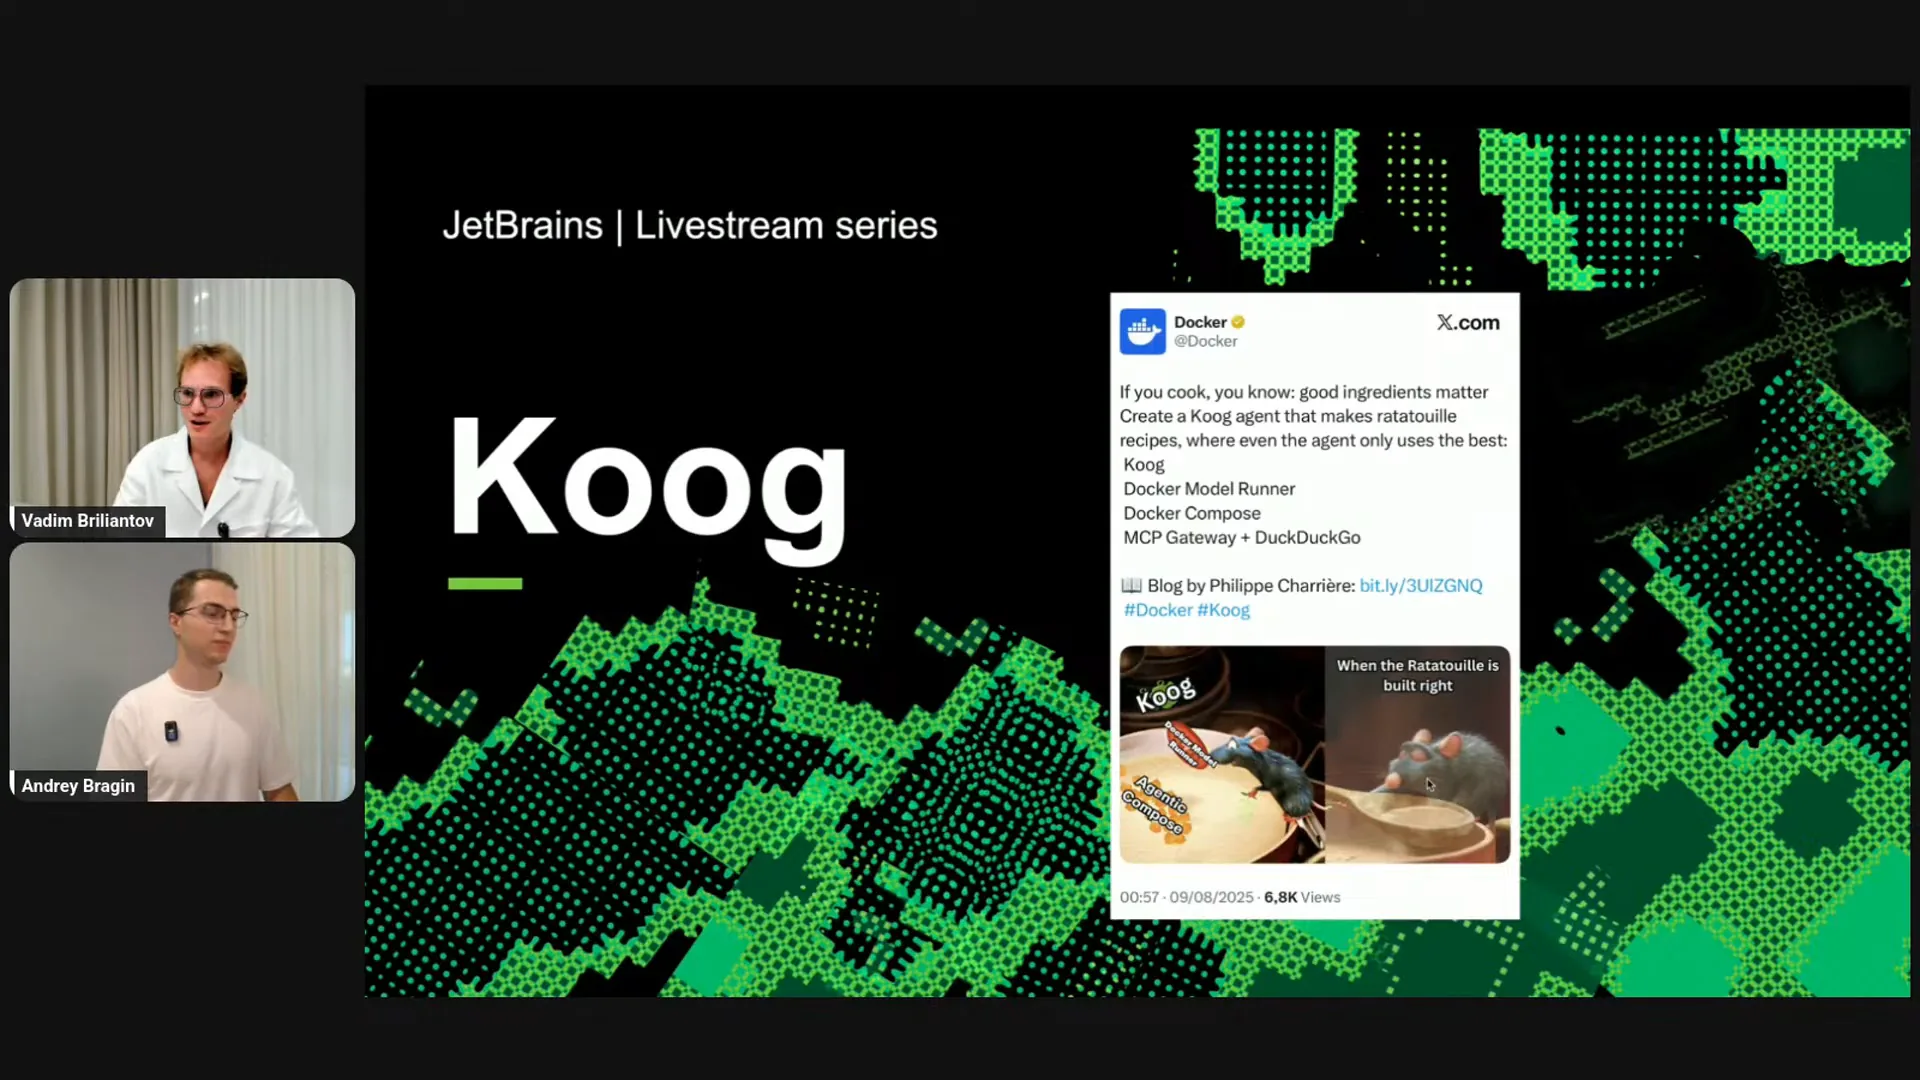 | Recently, we gained the attention of Docker, which featured a blog post on their official account highlighting Koog and its ability to build scalable, production-ready agents with Docker. I particularly enjoyed their metaphor regarding our name; Koog is essentially for cooking AI agents. The reference to the cartoon "Ratatouille" is charming and aligns well with the framework's purpose of enabling users to "cook" agents. Shall we discuss the vision a bit? Vadim, what do you think? |
Slide 6 — 5:14 (watch)
 | Koog aims to cover the entire spectrum of AI development in Kotlin, extending beyond just building AI agents to encompass the creation of AI applications. While some frameworks focus on specific paradigms or provide basic components for connecting to LLMs and vector storage, others offer a seamless demo or onboarding experience, allowing users to build from scratch with default agents. However, these approaches often lack scalability and control for real-world use cases. Some frameworks concentrate on particular paradigms, such as graph workflows or specific algorithms like planning. In contrast, Koog provides a comprehensive range of tools, starting with basic LLM connections and including out-of-the-box building blocks and agents that can be easily used and run. It also allows for customization through complex graph workflows. We plan to expand Koog further by enabling the development of non-graph-based strategies for agents and offering additional out-of-the-box solutions, including prompts and techniques developed in collaboration with our machine learning colleagues. Our vision for Koog is informed by the understanding that there is no one-size-fits-all solution. We have explored various products and approaches, discovering that while some work well in certain scenarios, they may fail in others. Therefore, instead of focusing on a single paradigm, we aim to empower developers with a diverse set of tools to ensure flexibility. Now, let’s briefly cover some benefits of Koog. |
Slide 7 — 7:56 (watch)
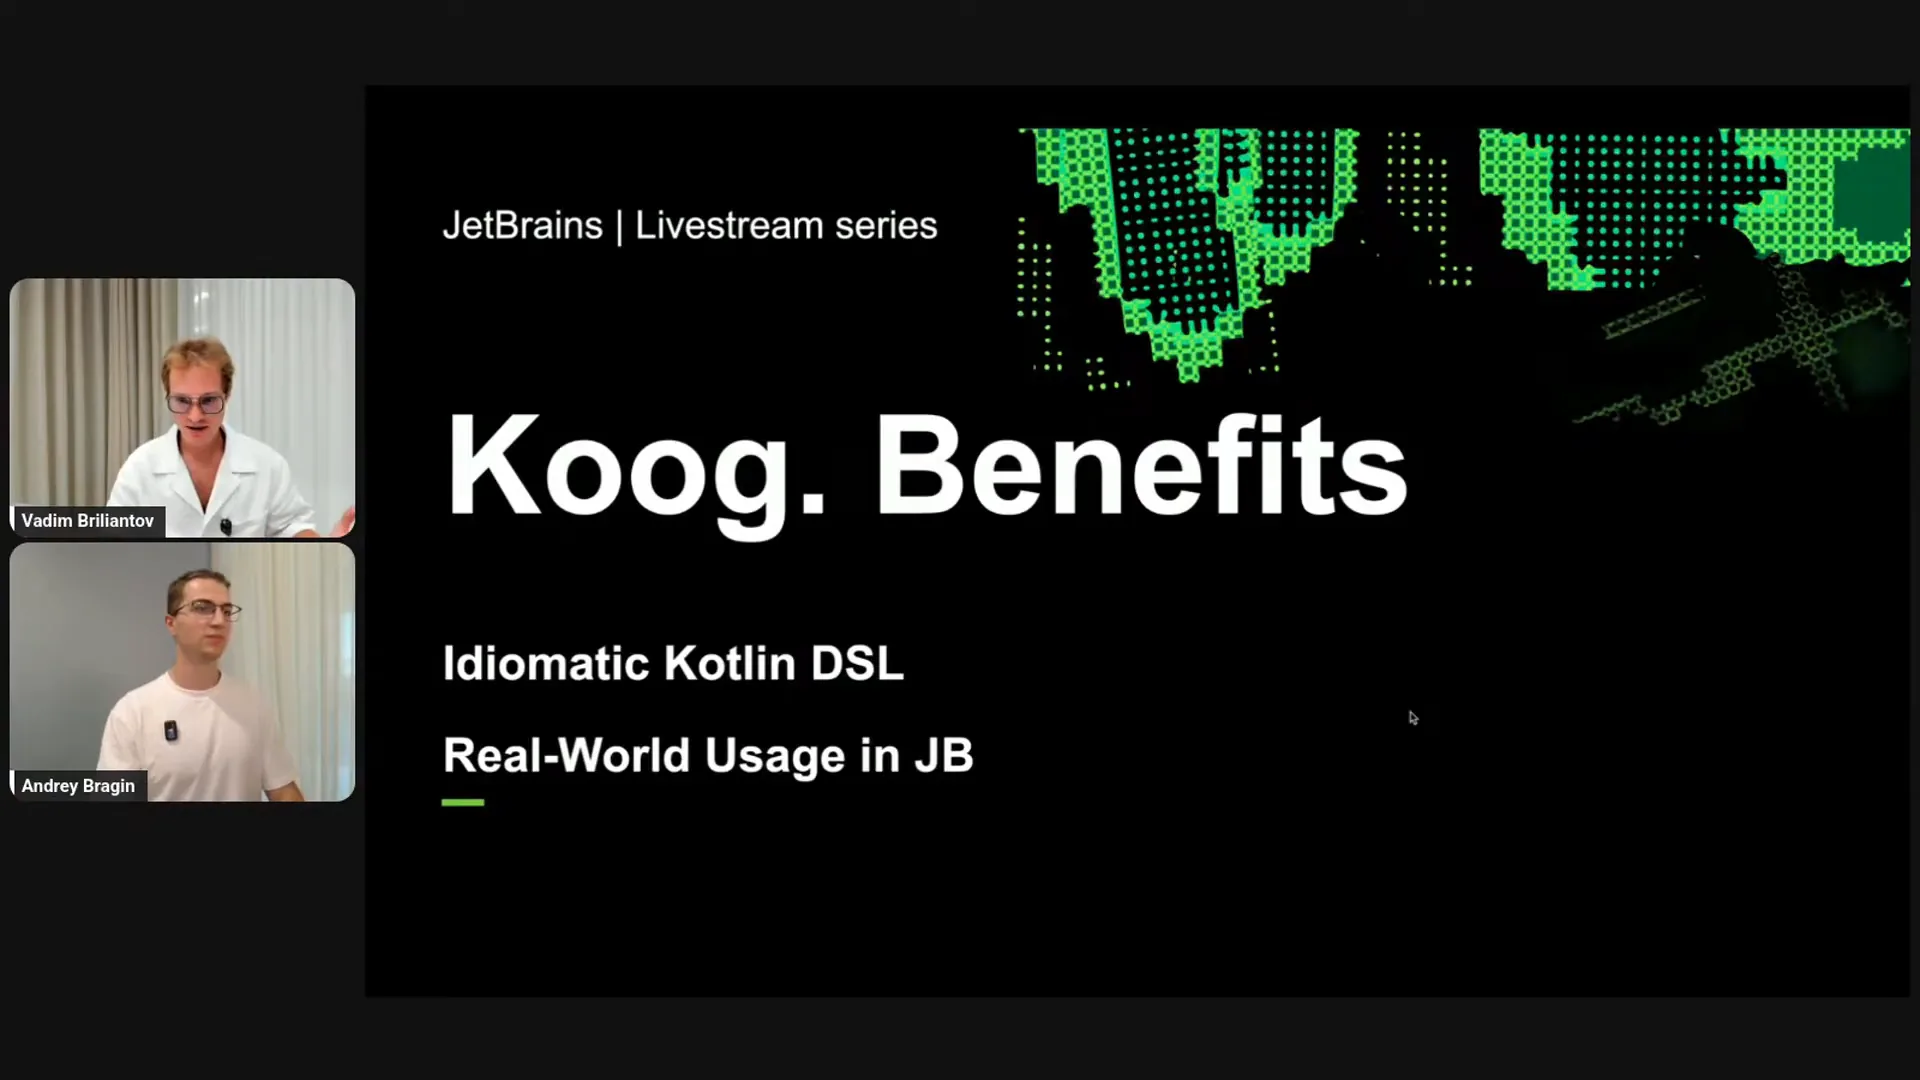 | I love domain-specific languages (DSLs) because they allow you to create a tailored language for a specific task without the overhead of developing an entirely new language. With Koog, you get a set of APIs and shortcuts specifically designed for AI workflow development, which is quite impressive. Koog is also integral to real product development at JetBrains. This is significant because, in a recent episode of the Talking Kotlin YouTube channel featuring Rod Johnson, the creator of the Spring Framework, he discussed the reasons behind Spring’s success. He noted that their team was composed of practitioners rather than framework developers. They were focused on building practical solutions for real companies and creating production-ready microservices. This hands-on experience informed their framework’s development, making it both popular and useful. I believe we are experiencing something similar with Koog. We are actively building agents at JetBrains, conducting numerous experiments and product developments. As we gain experience, we refine our approaches, retaining only what works in the framework. This process leads us to what we refer to as high-level solutions. Let me elaborate on that. |
Slide 8 — 10:42 (watch)
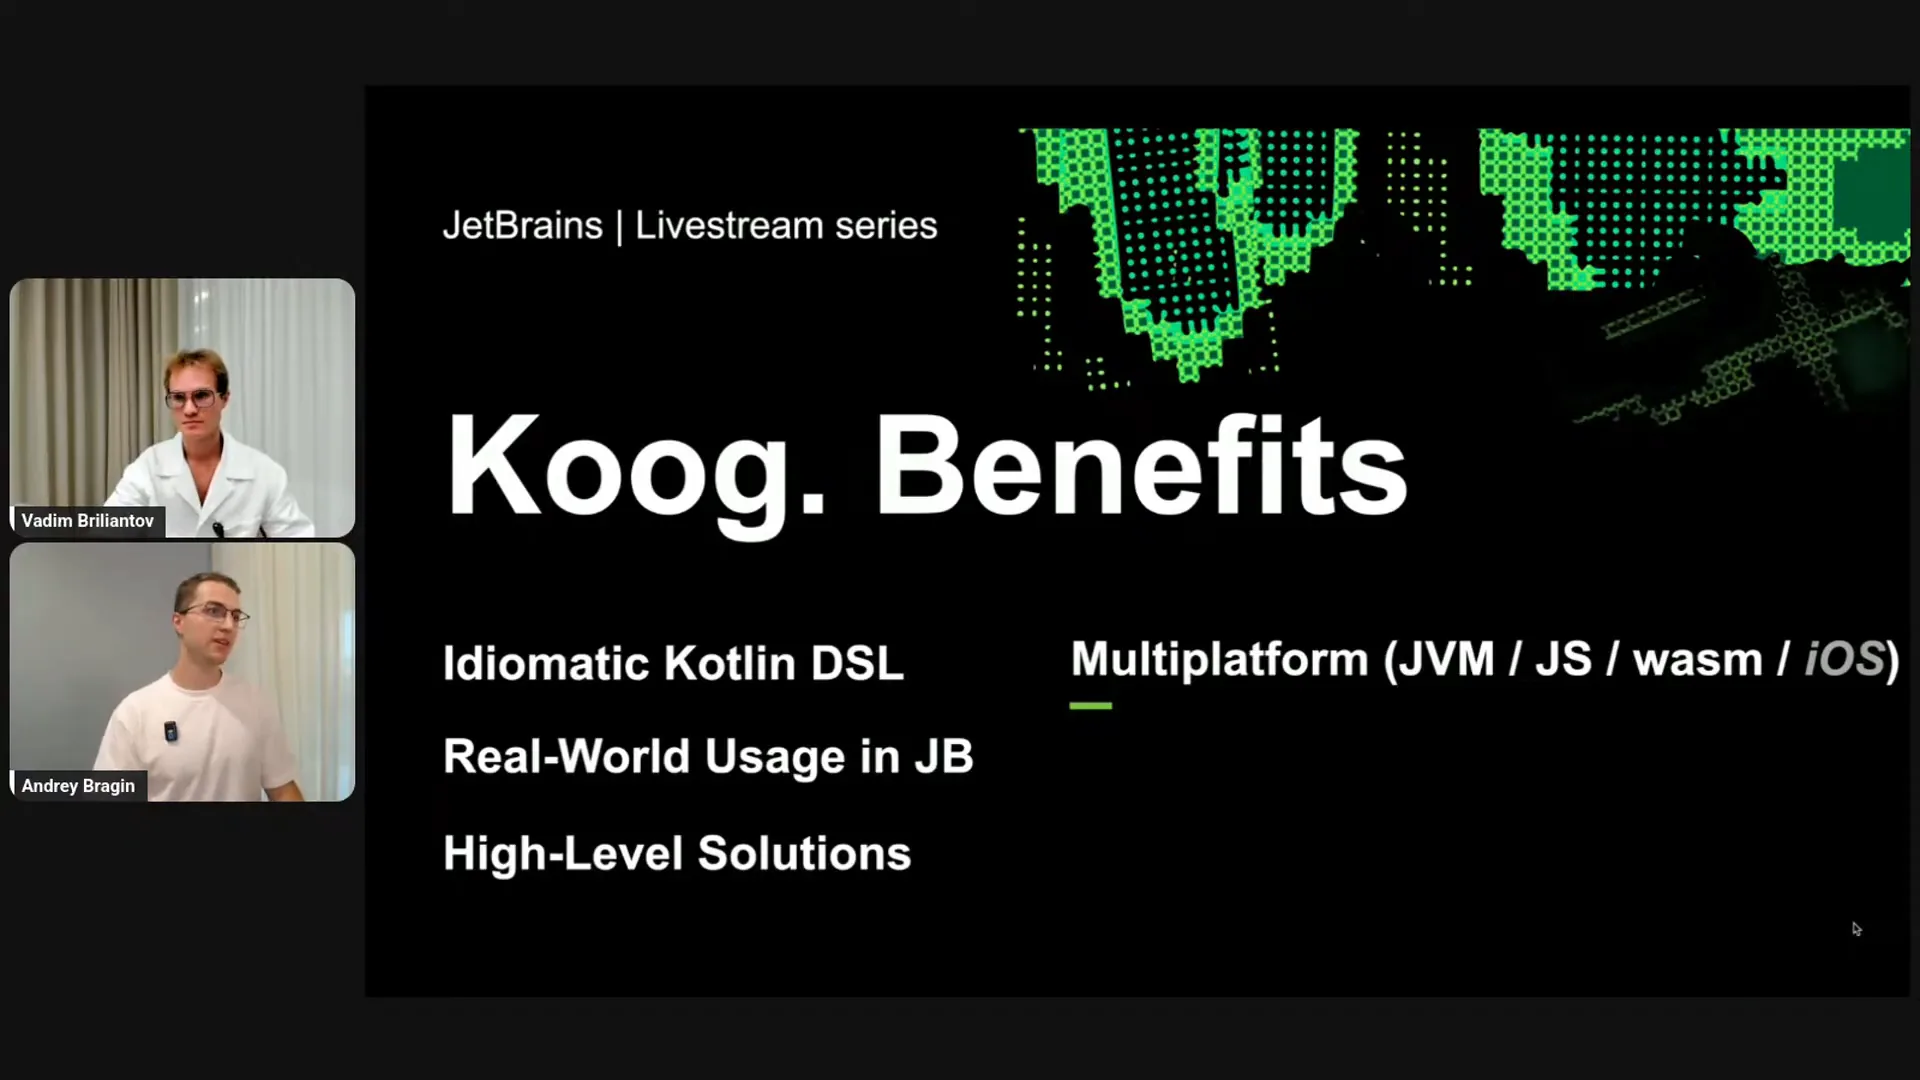 | By high-level solutions, I mean that we explore various techniques in collaboration with our products, machine learners, and researchers, retaining only what works in the framework. This encompasses not just basic building blocks, but also prompts, approaches, techniques, and algorithms. Our goal is for users, both internal at JetBrains and in the external open-source community, to focus on building real products that provide tangible value, rather than on experimentation. We handle the experimentation for you. I also want to highlight Kotlin Multiplatform. With the power of Kotlin Multiplatform and Koog, you can develop AI solutions not only for the JVM and server-side but also for end-user devices like browsers, iOS, and Android devices, with more features coming soon. Koog is the first AI framework with native deep IDE integration, and we are actively working on extensive IDE support, including an AI debugger and advanced code analysis. We are heavily invested in this aspect, which I believe is a significant benefit of Koog. It’s important to note that this is still in progress, and we will soon publish something exciting. While it is not yet ready for trial, we believe it is crucial to build agents with IDE support. Lastly, Koog enables you to create flexible and predictable systems by defining specific steps in workflows, ensuring that only what you programmed occurs in your system. Instead of building a random guesser, Koog allows you to create reliable systems you can trust. This is a key advantage of Koog, enhanced by Kotlin as a language. |
Slide 9 — 13:24 (watch)
 | The first benefit is access to enterprise capabilities. Unlike many other languages, Kotlin is ideally positioned for AI because it allows you to reuse existing infrastructure and data pipelines from your JVM enterprise-level applications and integrate them into your agents. You don't need to build everything from scratch, as smaller startups might. You can leverage your existing code, users, and applications to create AI solutions. Kotlin excels in this area. Additionally, Kotlin provides type safety, which helps prevent errors and ensures stable workflows. This allows us to share code with our ML researchers, enabling them to read, understand, and contribute without prior knowledge of JVM languages. This has been confirmed in our team during AI development; our researcher colleagues easily understood the code we shared in Koog and quickly engaged in the development process. Another significant advantage is Kotlin's multi-platform support. Kotlin extends beyond Java, allowing you to write AI solutions not only for JVM servers but also for mobile and embedded devices. |
Slide 10 — 16:14 (watch)
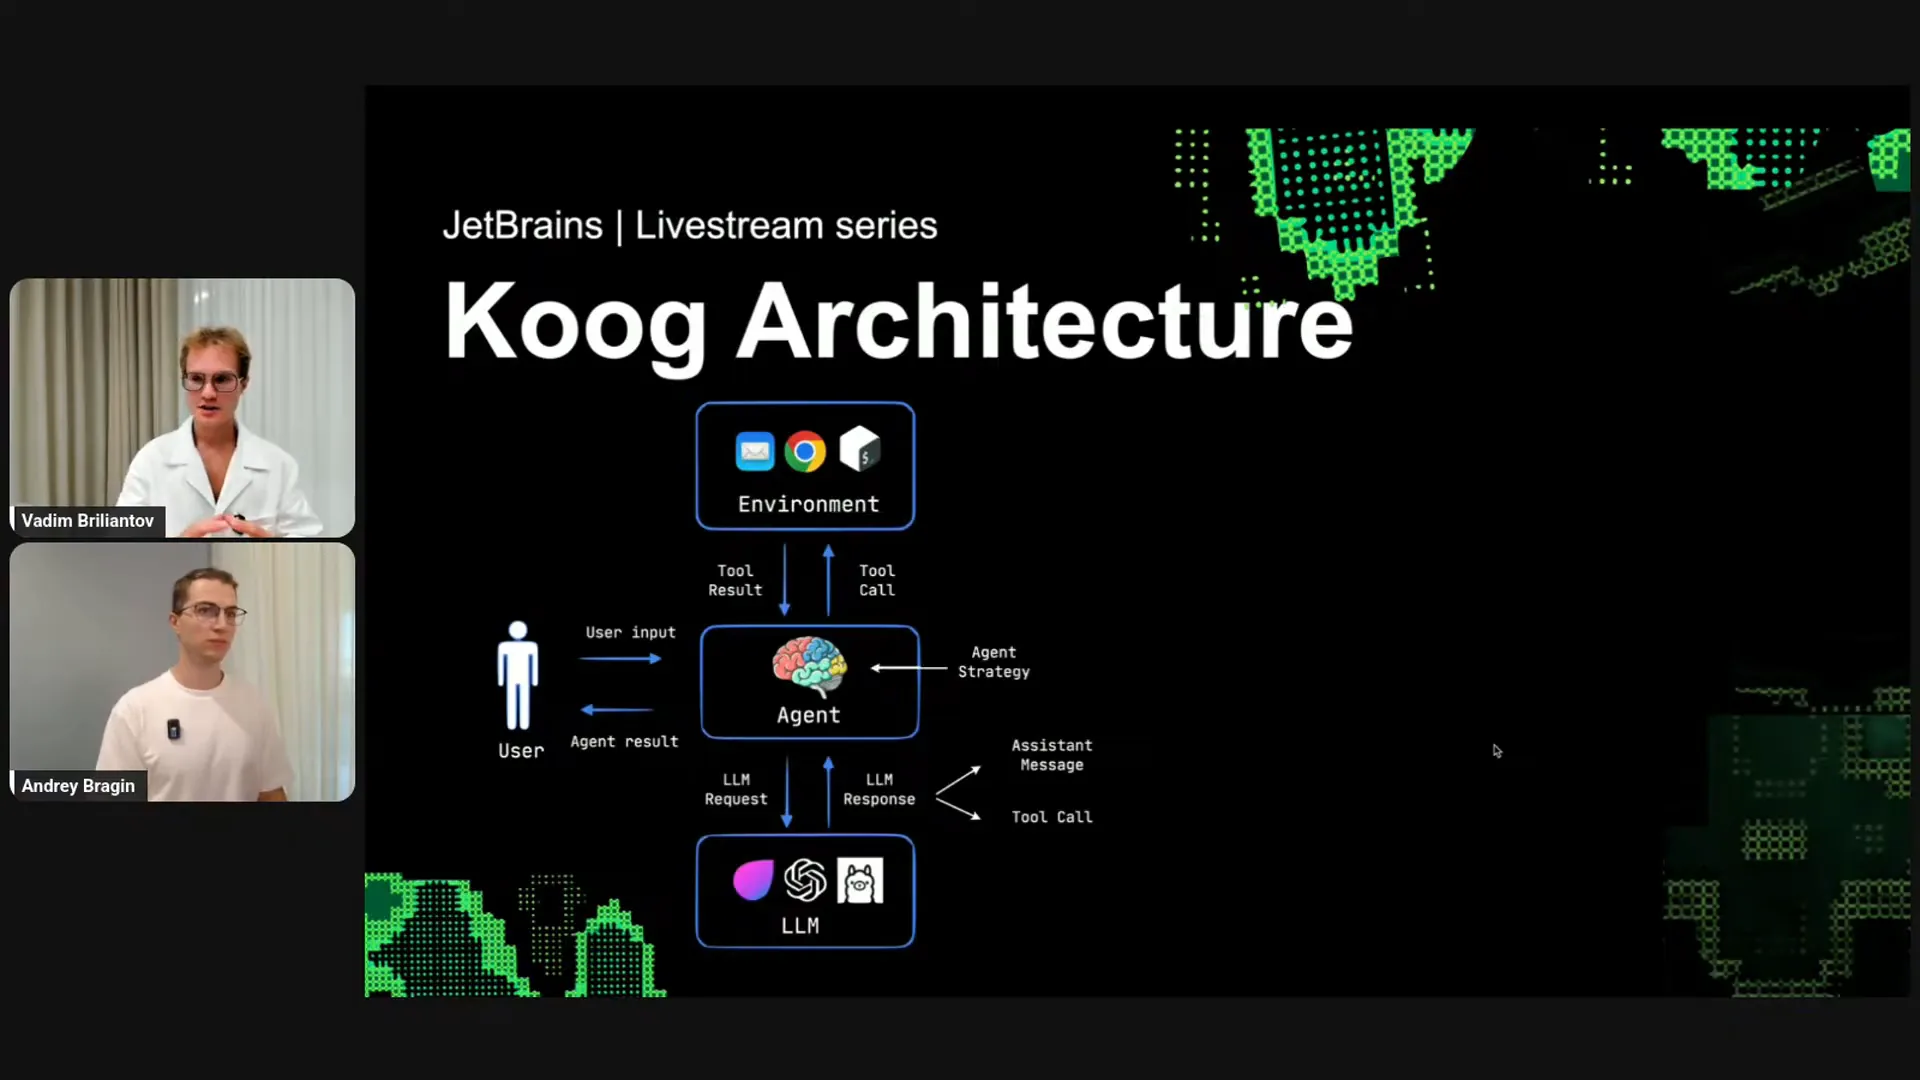 | That covers the benefits of Cook. Now, let's move on to the technical aspects, starting with some theory about Cook architecture. In our vision, an agent consists of three components. The first is the environment, which is any application you have. The second component is the agent logic, which serves as the brain and defines the strategy. The third component is the connection to one or multiple large language models (LLMs). With Cook, you can build agents that utilize not just one LLM but also more complex agents that delegate different tasks to various LLMs. From the user’s perspective, the agent functions as a black box. Users provide input and receive the final result. Internally, the agent communicates with the LLM by sending requests and receiving responses, which can be one of two types: assistant messages, which are plain text, or tool calls. If the LLM provides a tool call, the agent logic delegates this to the environment, calls the tool, and retrieves the tool’s result. Within the agent, the strategy component is available for immediate use; you don’t need to create it from scratch, as Cook provides working strategies. However, Cook also allows for custom implementations tailored to your specific application. For example, to create an AI agent, you would connect it to your application, such as by integrating search and email functionalities. You would have a search function in your code that you bind to the tool registry and register the sending email tool from your application. Next, you provide the agent strategy, which you can implement yourself or leave out since Cook includes some strategies by default. You also define the agent configuration, which includes the prompt, the task for the agent, the specific model connection, and parameters like maximum agent iterations. Finally, you establish connections to the LLMs, such as connecting to OpenAI. Now, let’s look at a concrete and simple example. |
Slide 11 — 18:20 (watch)
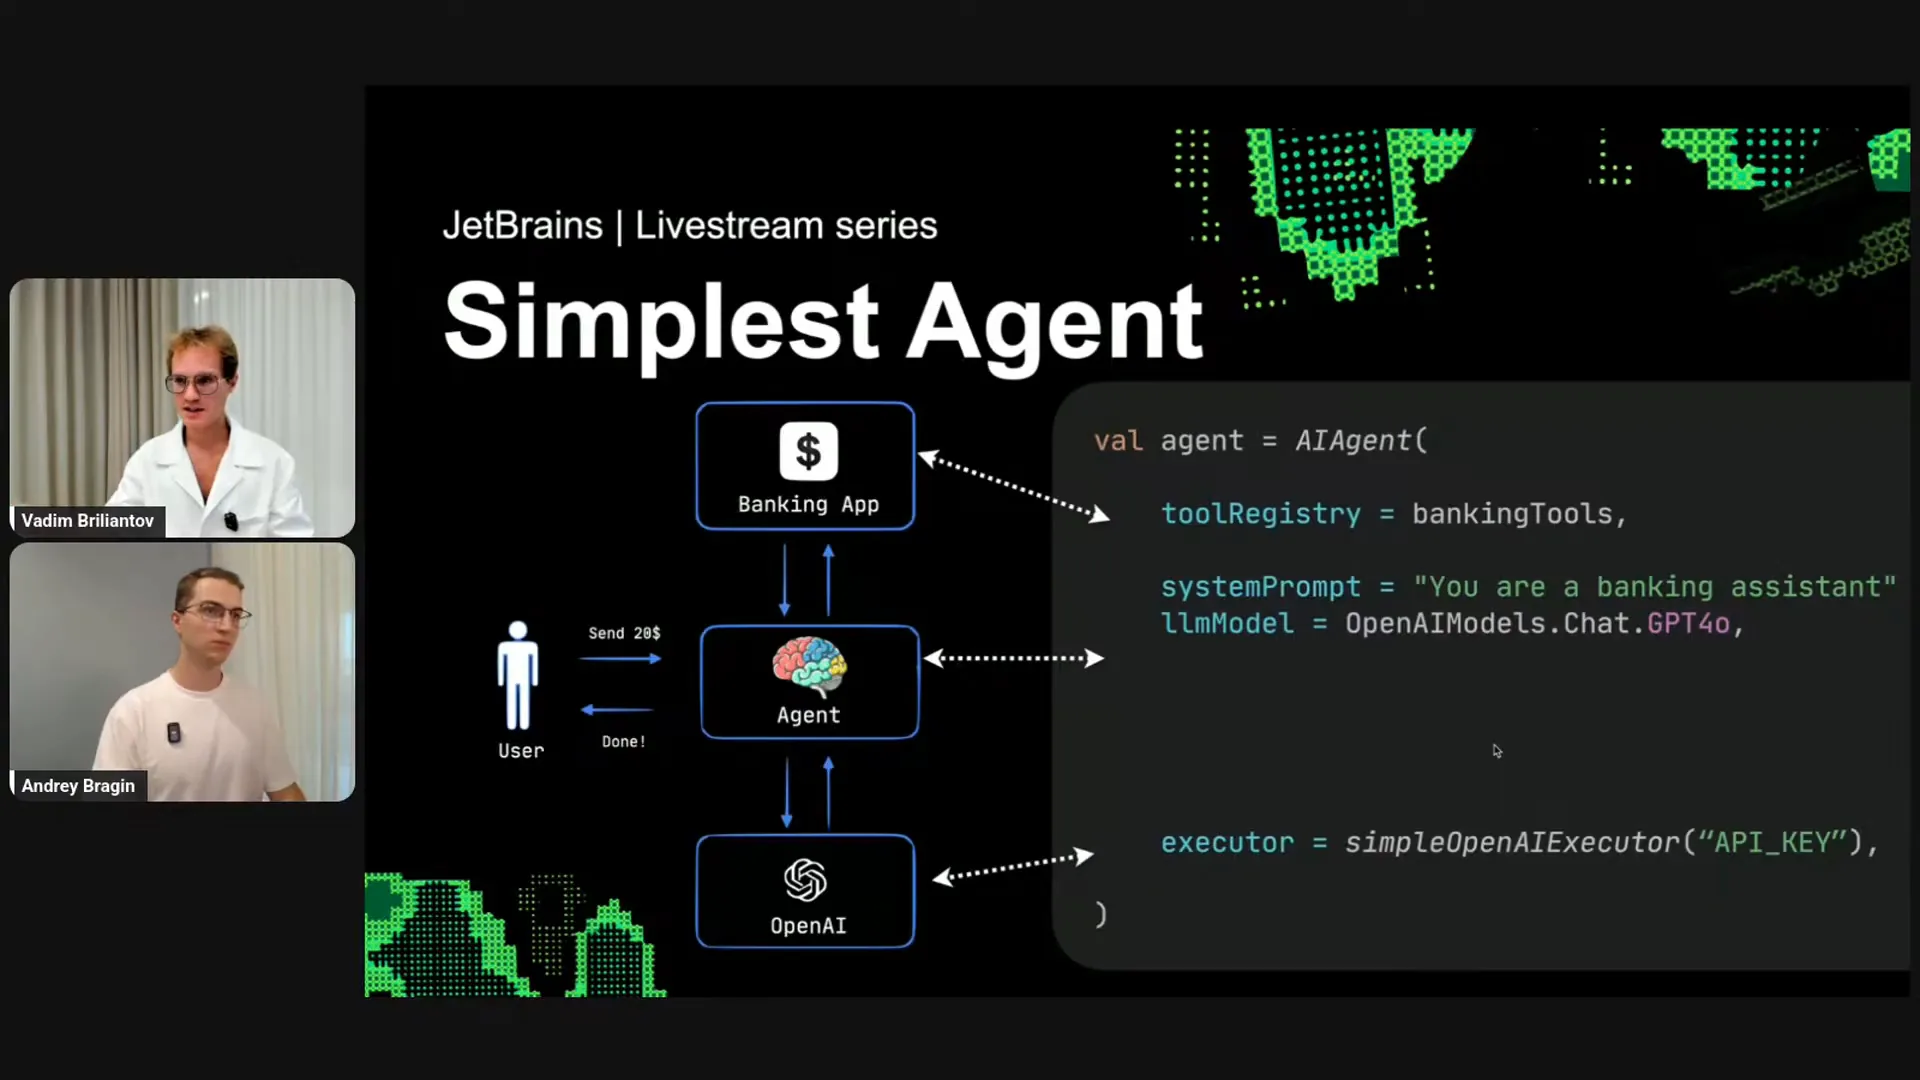 | The simplest agent involves building a banking agent to automate banking operations. You will provide some banking tools from your existing code, specify a task, such as banking assistance, and select a model like GPT-4.0. Then, you will connect to OpenAI. This can be accomplished in just a few lines of code. Additionally, it's important to note that there is no need to define a strategy manually, as there is a well-functioning default strategy available out of the box. |
Slide 12 — 18:48 (watch)
 | Let me elaborate on the tools. What are tools? |
Slide 13 — 18:54 (watch)
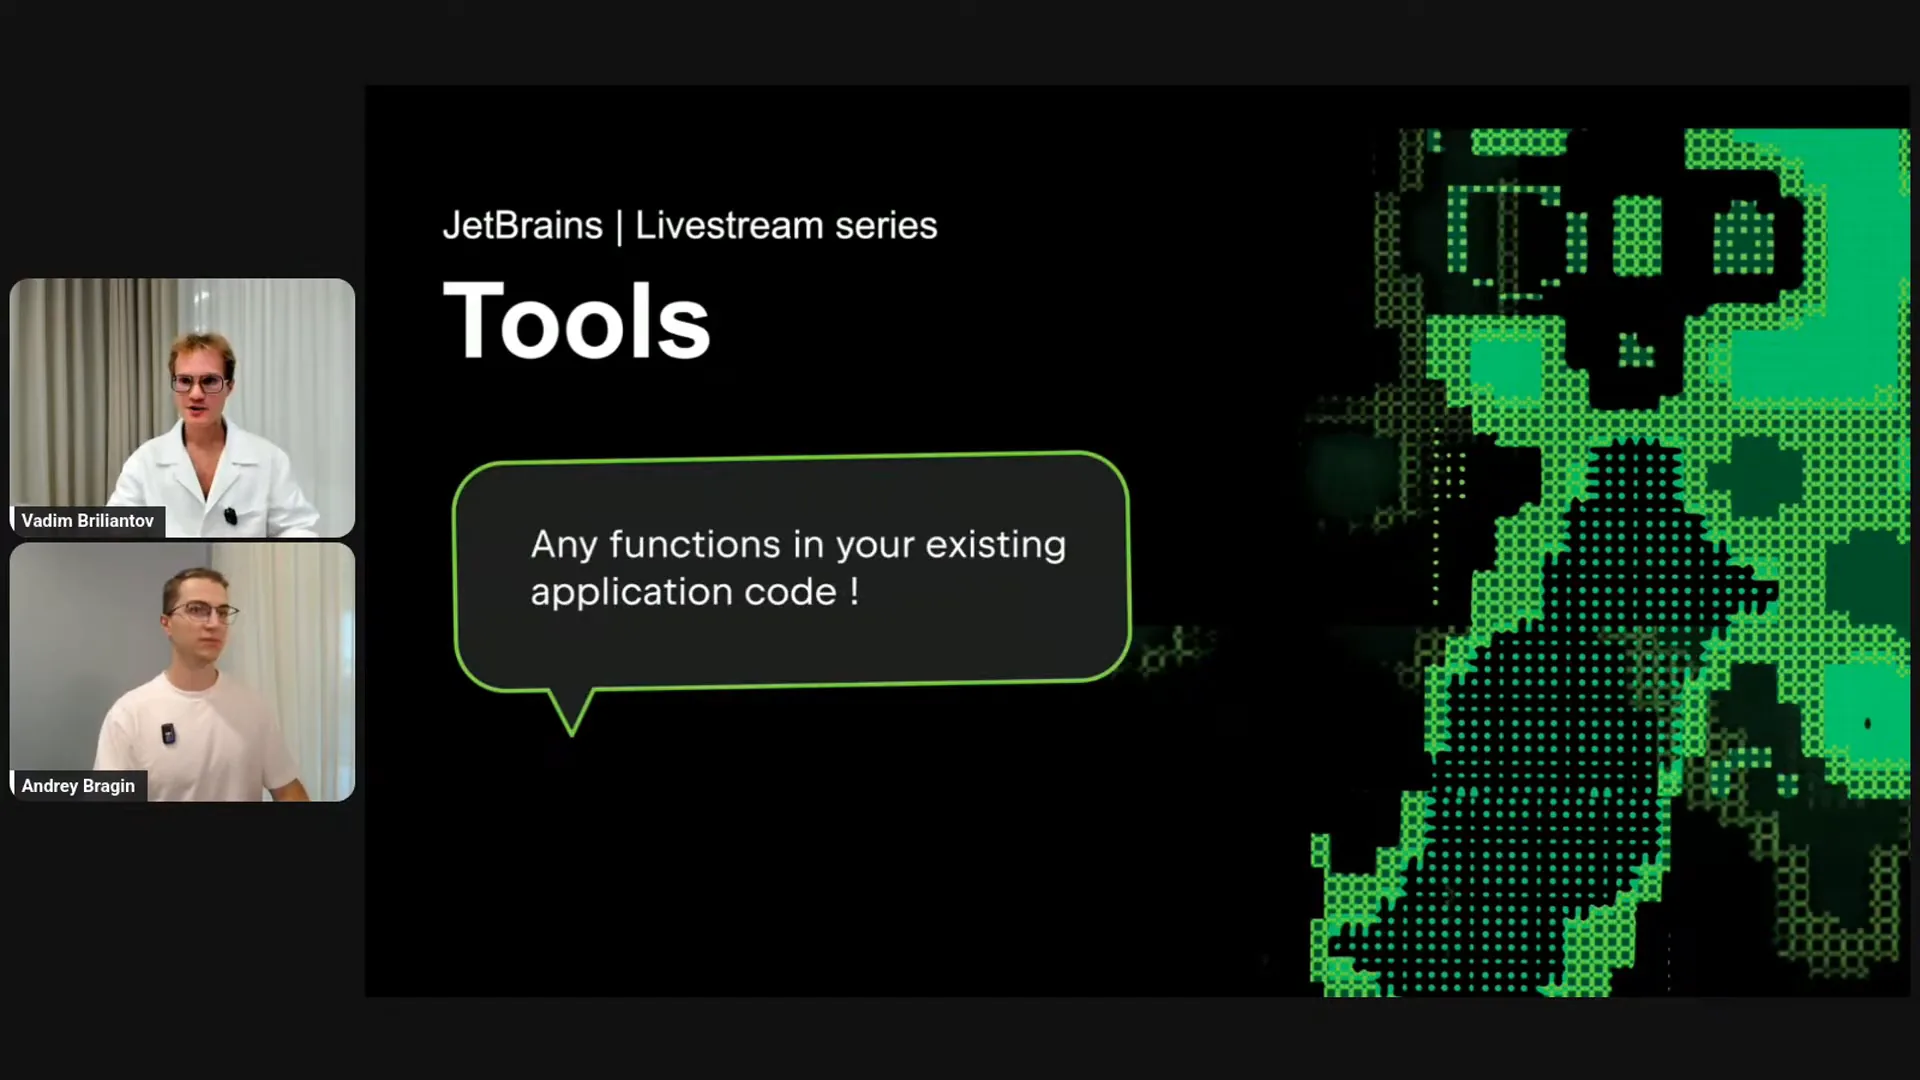 | Tools are essentially any functions in your existing code. |
Slide 14 — 19:16 (watch)
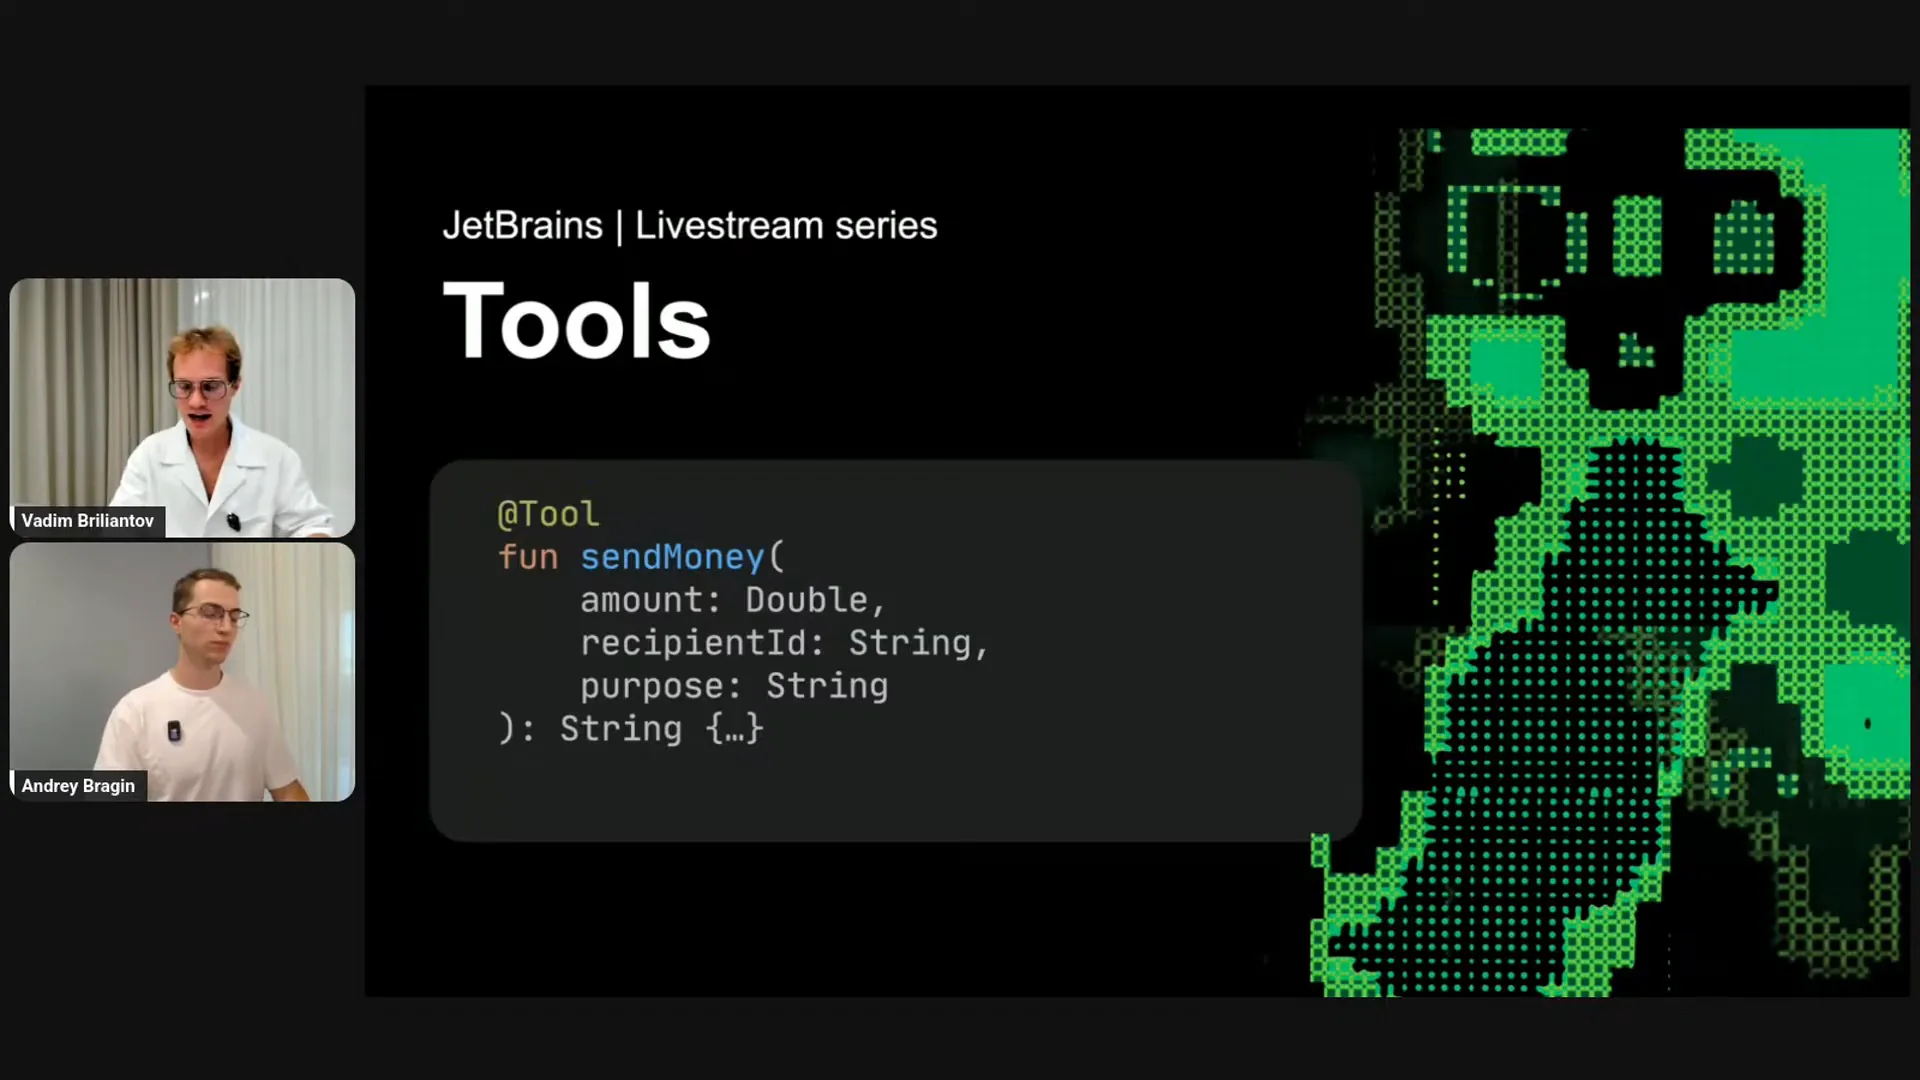 | In a banking application, you might have a function like "send money." To make it a tool for Koog, you simply call it a tool. While that will work, to improve its functionality, you need to explain to the LLM what the tool does. This is similar to how you would explain the function's purpose to a colleague in your development team. You would document and clarify the meaning of the function and each parameter. You should do the same for the LLM to ensure it understands the meaning. |
Slide 15 — 19:42 (watch)
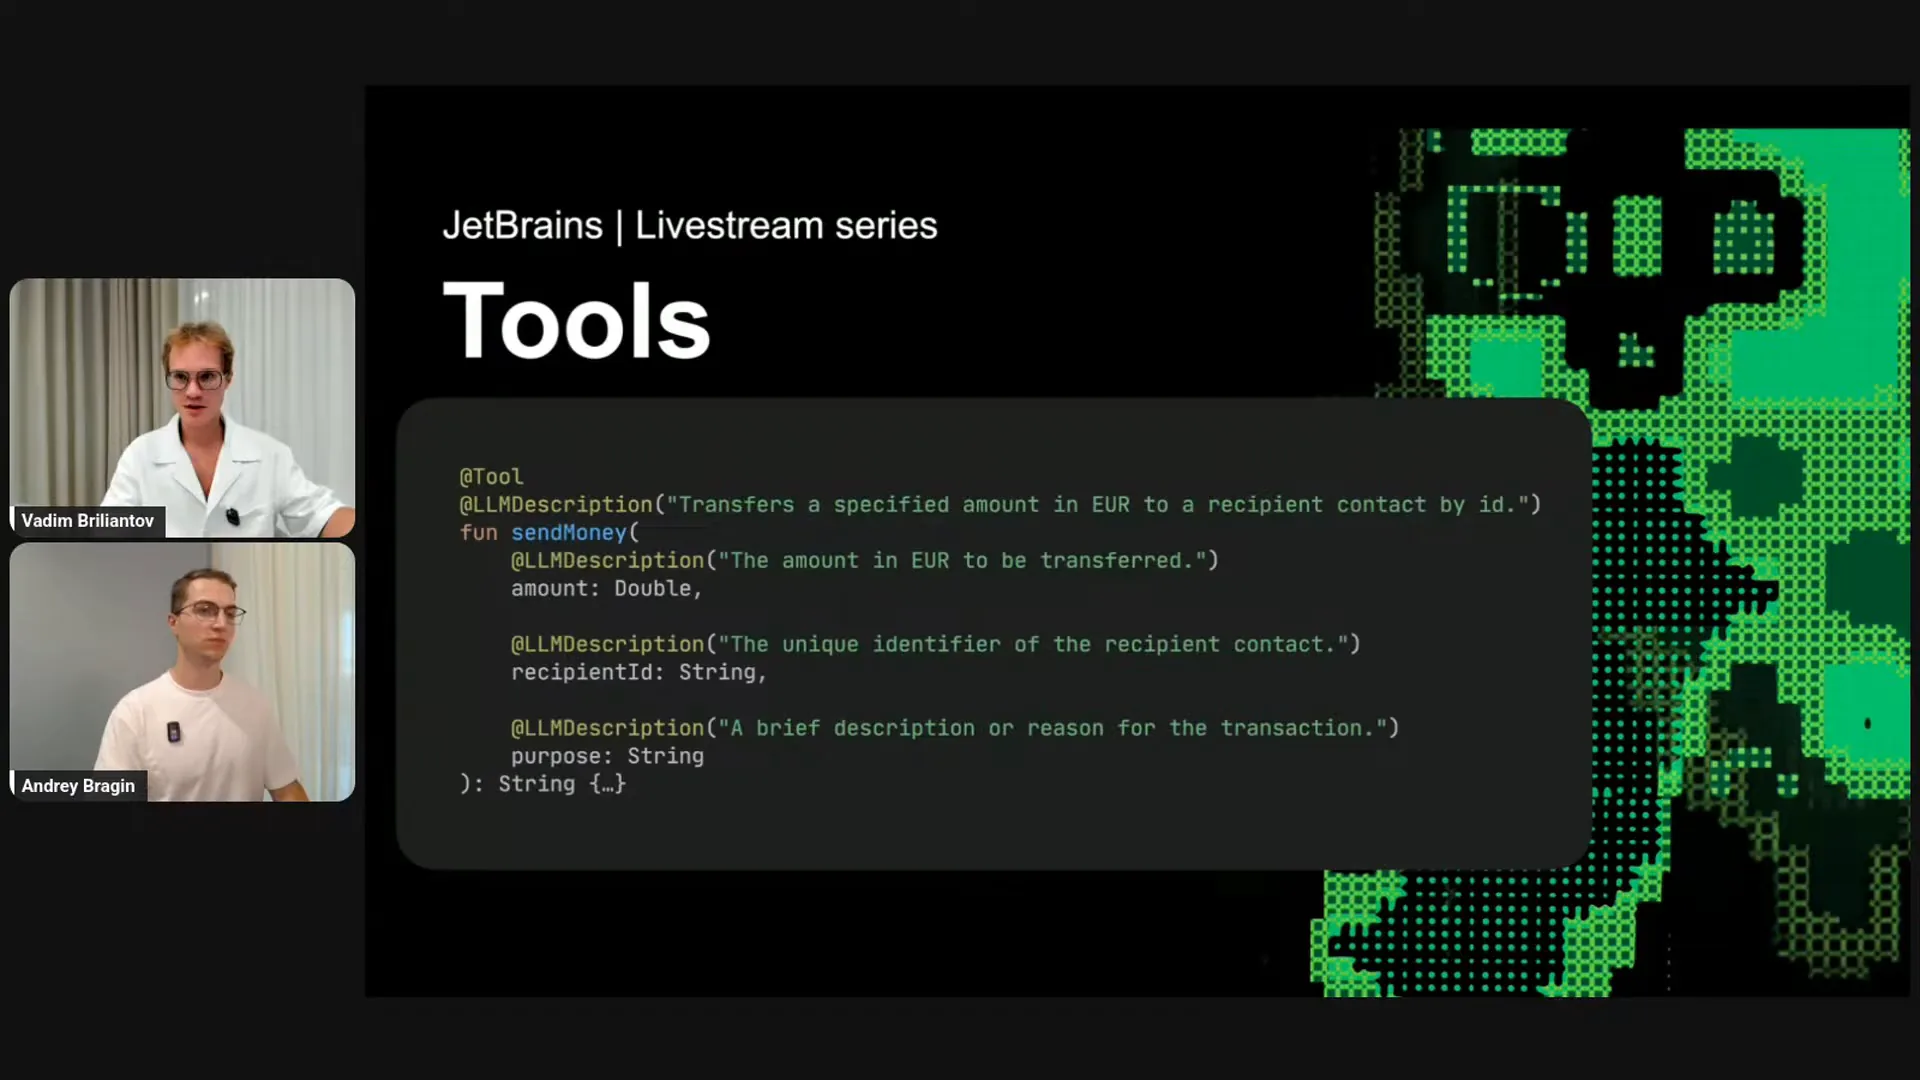 | We provide the LLM description parameter, which allows you to give an explanation for the LLM. That's all. |
Slide 16 — 19:58 (watch)
 | The final part focuses on agent strategy. Agent strategy refers to the approach you take when building an agent. Currently, Cook enables you to provide an agent strategy, which allows for the development of various types of strategies. At this moment, the graph paradigm is particularly effective. |
Slide 17 — 20:14 (watch)
 | Koog allows you to build strategy graphs. But what exactly are strategy graphs? |
Slide 18 — 20:48 (watch)
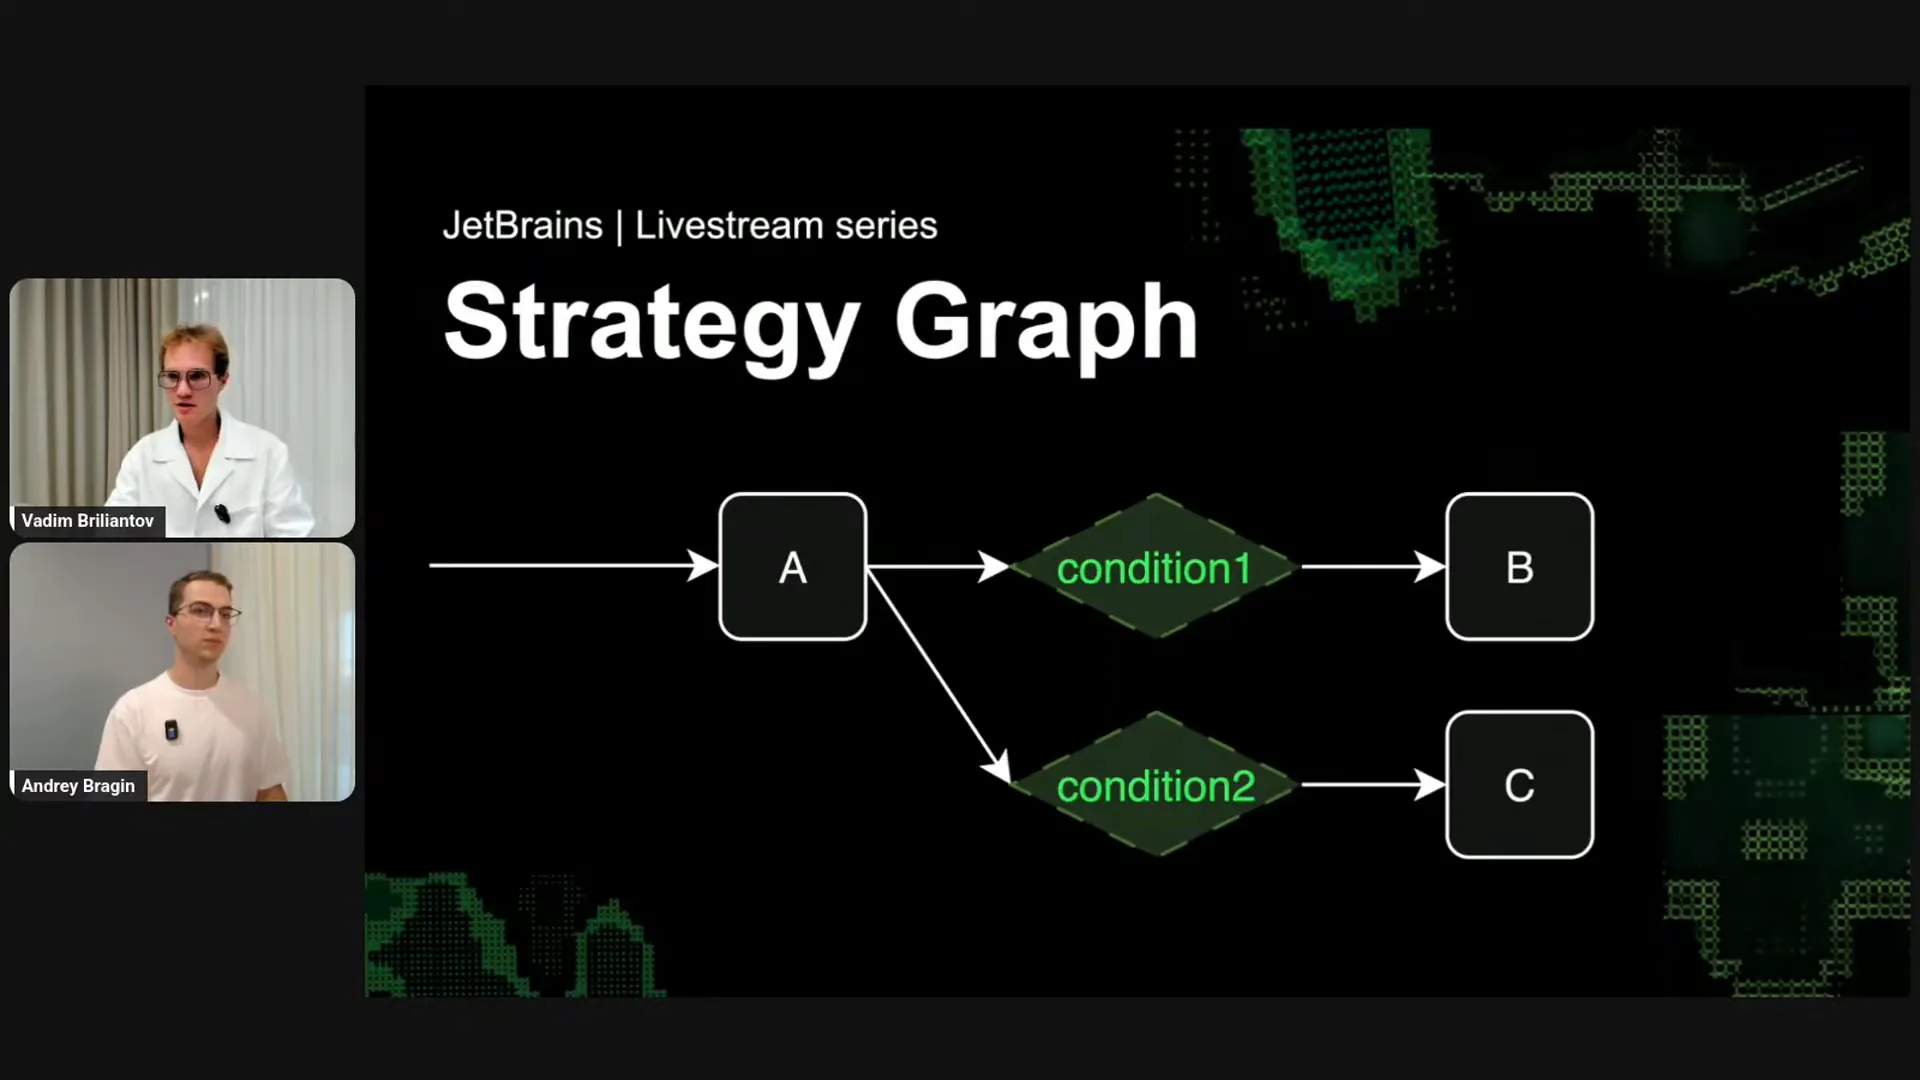 | A strategy graph for your agent consists of different nodes, where each node is a standard Kotlin function. Each node has inputs and outputs, detailing how to transform the input into the output. You can think of nodes as functions. Based on the outputs, you can establish various conditions. For example, if condition one is true, the agent orchestration logic will transition from node A to node B. If condition two is true, it will move to node C. Cycles are also permitted, enabling the construction of multiple state machines that govern the agent's logic. This structure guides the agent's behavior with LLMs and the environment. Let me provide some concrete examples. |
Slide 19 — 21:28 (watch)
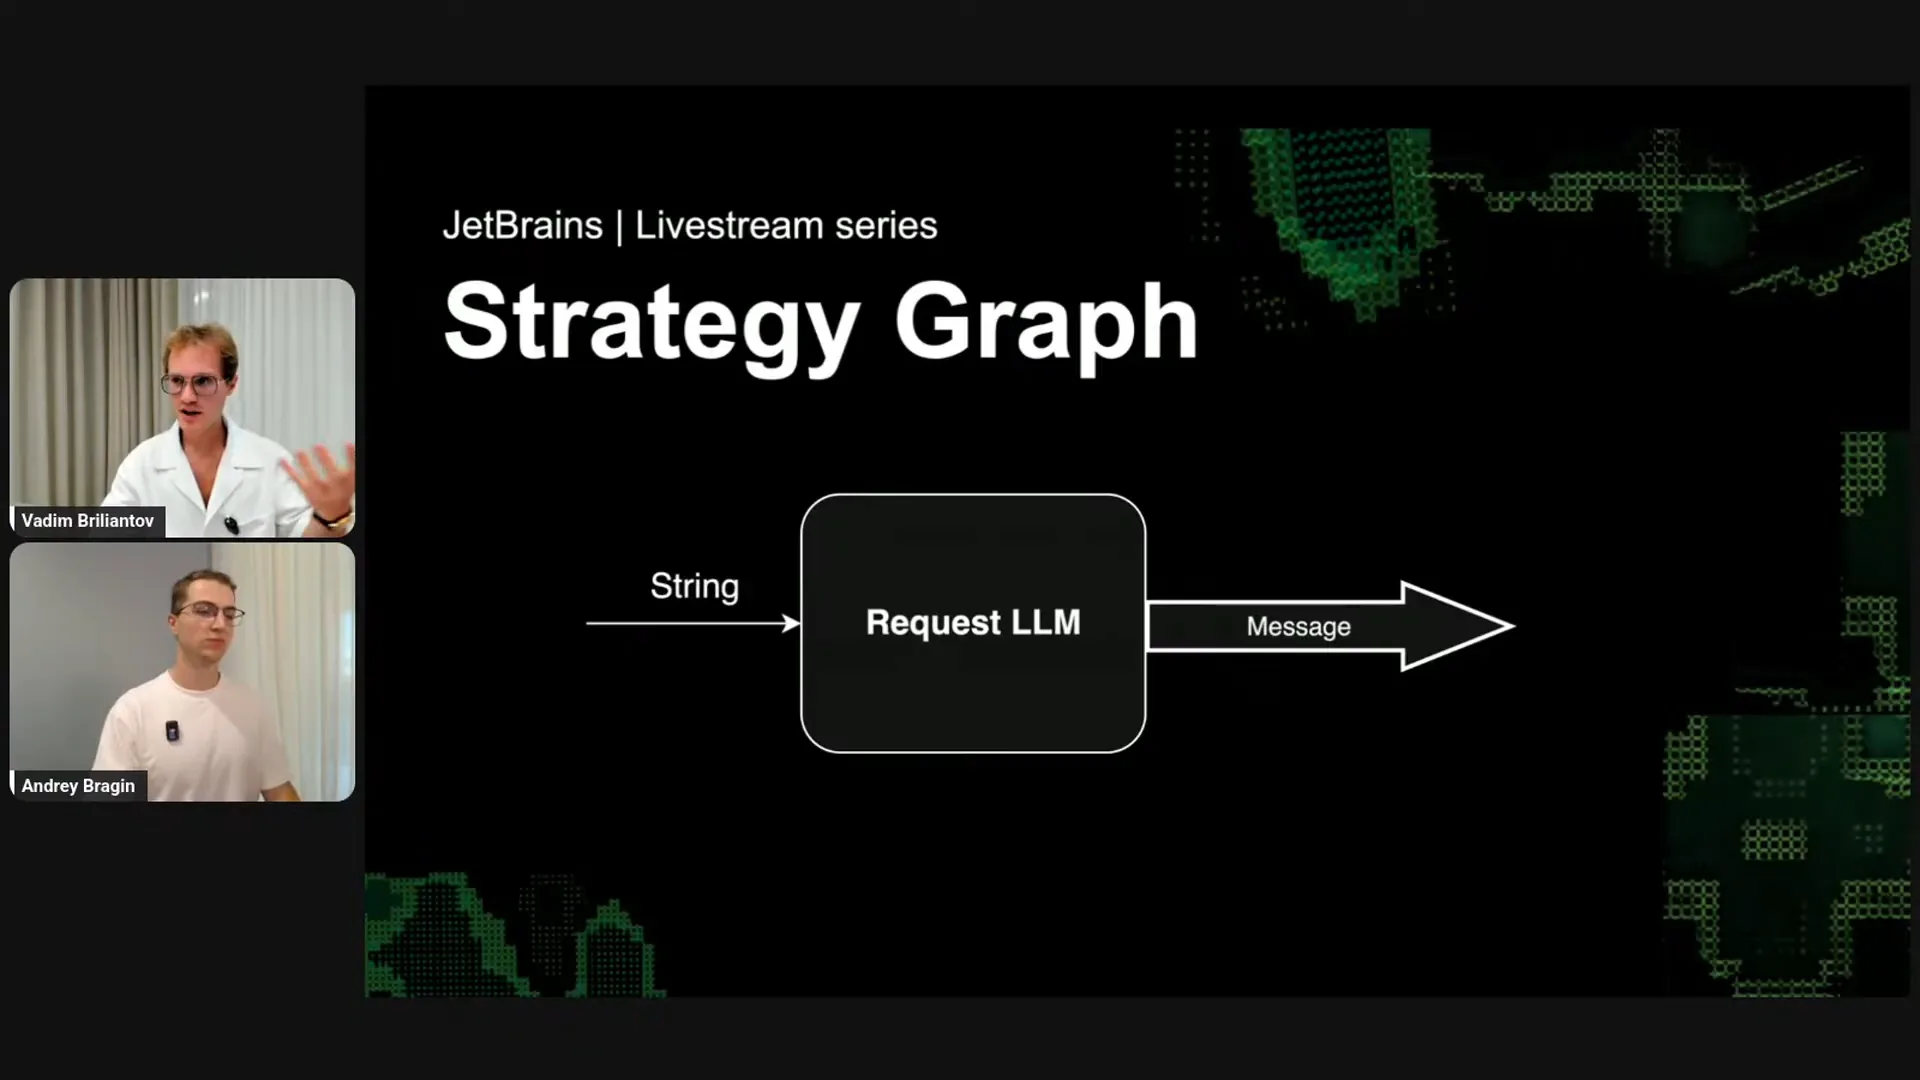 | Requesting an LLM is a node that takes a string, specifically the user message, and produces a response from the LLM. This response can be either a system message or a tool call. |
Slide 20 — 21:42 (watch)
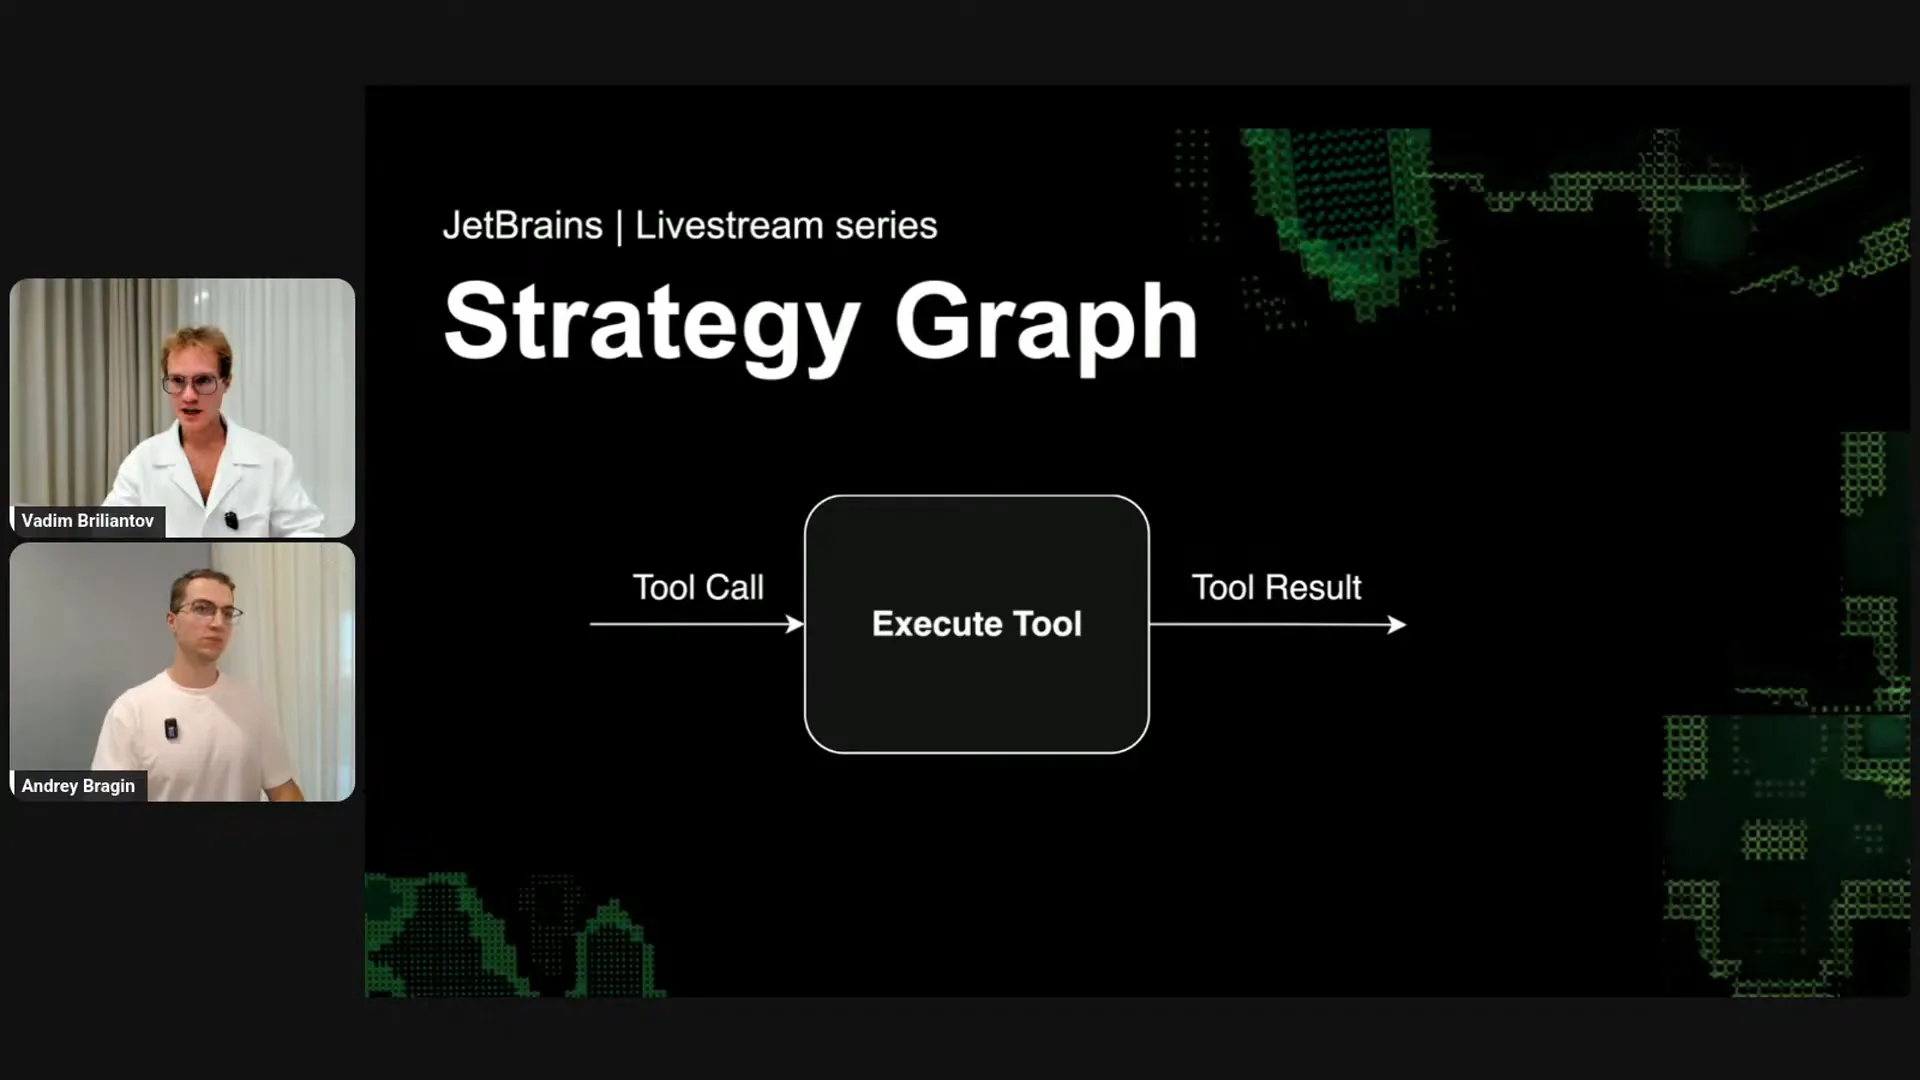 | Executing a tool is also a node. It takes any tool call and produces a tool result. |
Slide 21 — 21:54 (watch)
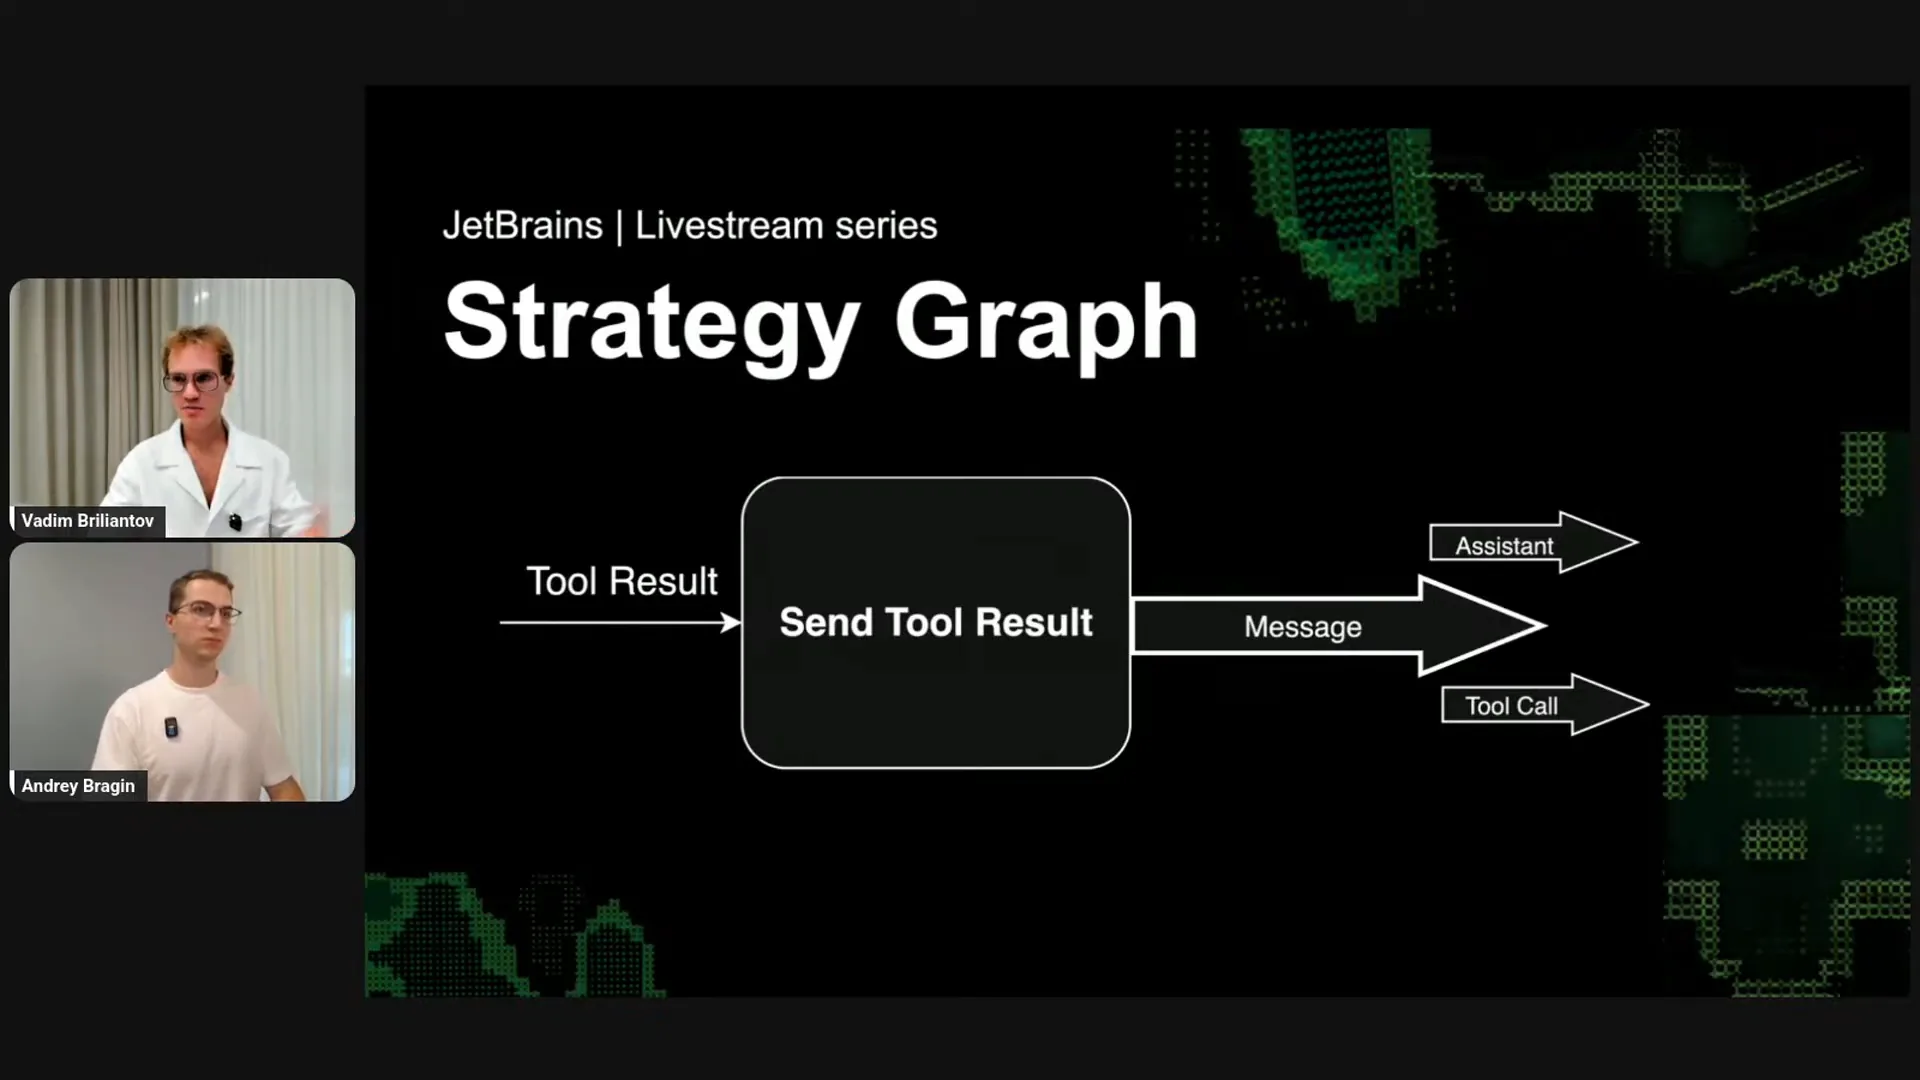 | Sending the tool result is also a node. It takes the tool results and produces a message, which can be either a system message or a tool call. |
Slide 22 — 23:02 (watch)
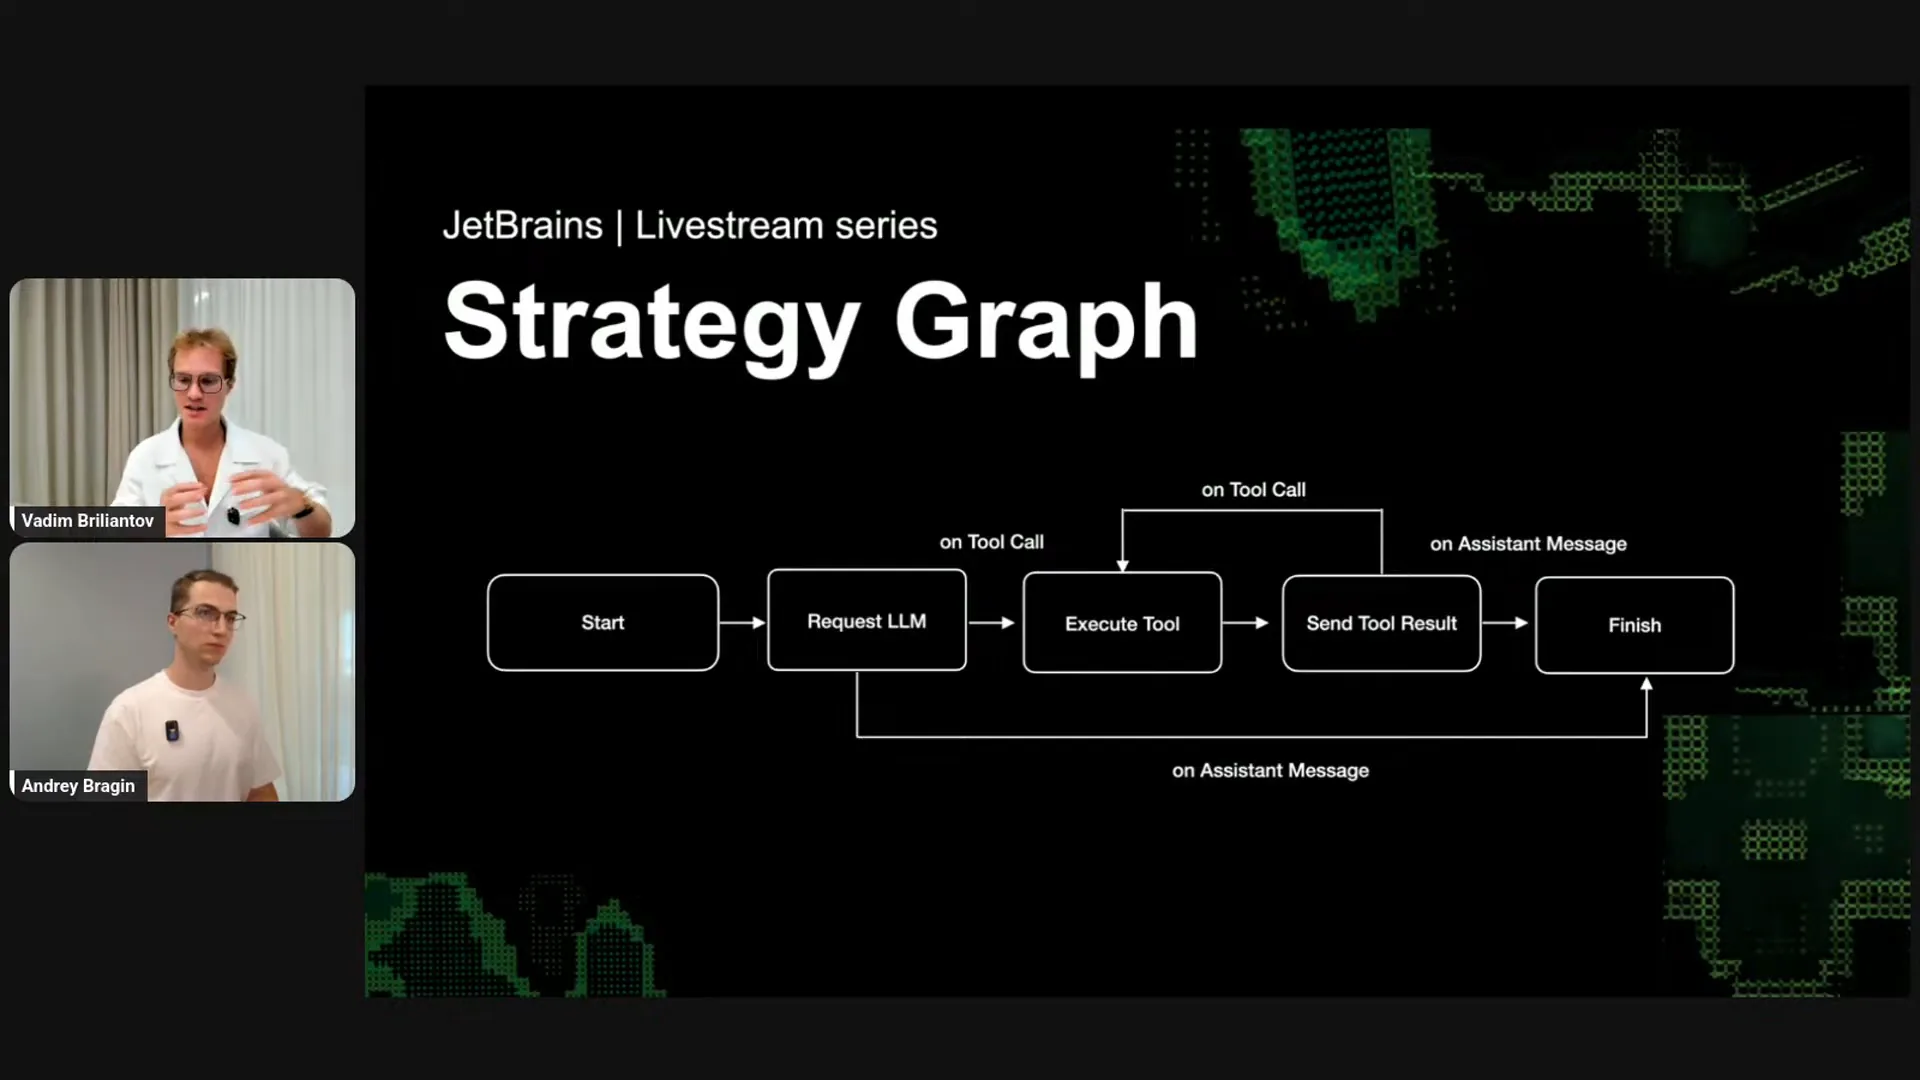 | You can think of these components as similar to Lego pieces or puzzle pieces that must be compatible to fit together. Consider these three components as three Lego bricks; you can visualize how to build with them. This represents the default out-of-the-box strategy that powers the simplest agents. You start your agent and request the LLM. If it’s a tool call, you execute the tool; otherwise, you finish your agent. After executing the tool, you send the tool result back to the LLM, and then you loop through the same logic again. You might wonder if you need to manage the state of the LLM, including the history and messages sent previously. The answer is no. When developing Cook applications, think of it like chatting with ChatGPT in a browser window, which remembers the conversation history. As a user, you focus on the last response and then formulate your next question, while the window manages the history automatically. You don’t need to close the window or copy the entire conversation; it happens seamlessly. Similarly, Cook handles all that logic, allowing you to think in a type-safe manner about previous and next steps and how to compose them. |
Slide 23 — 24:08 (watch)
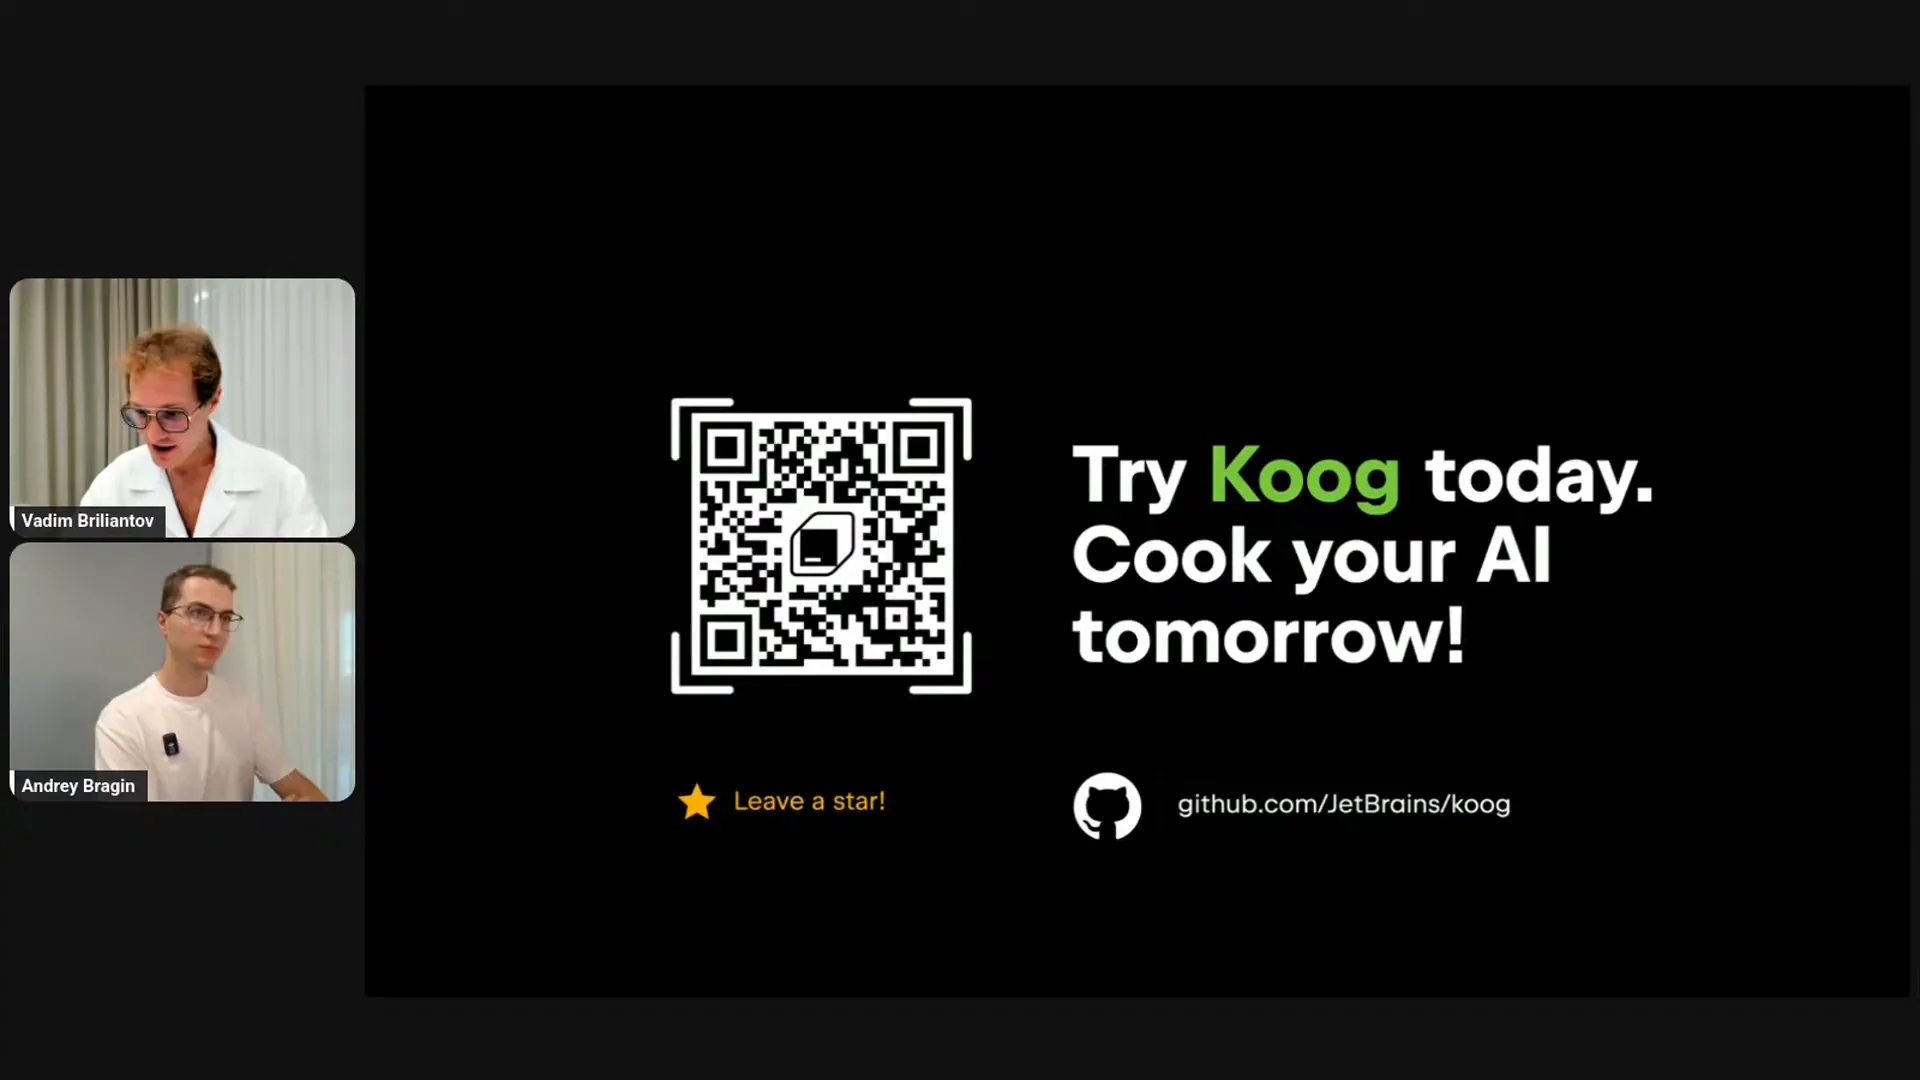
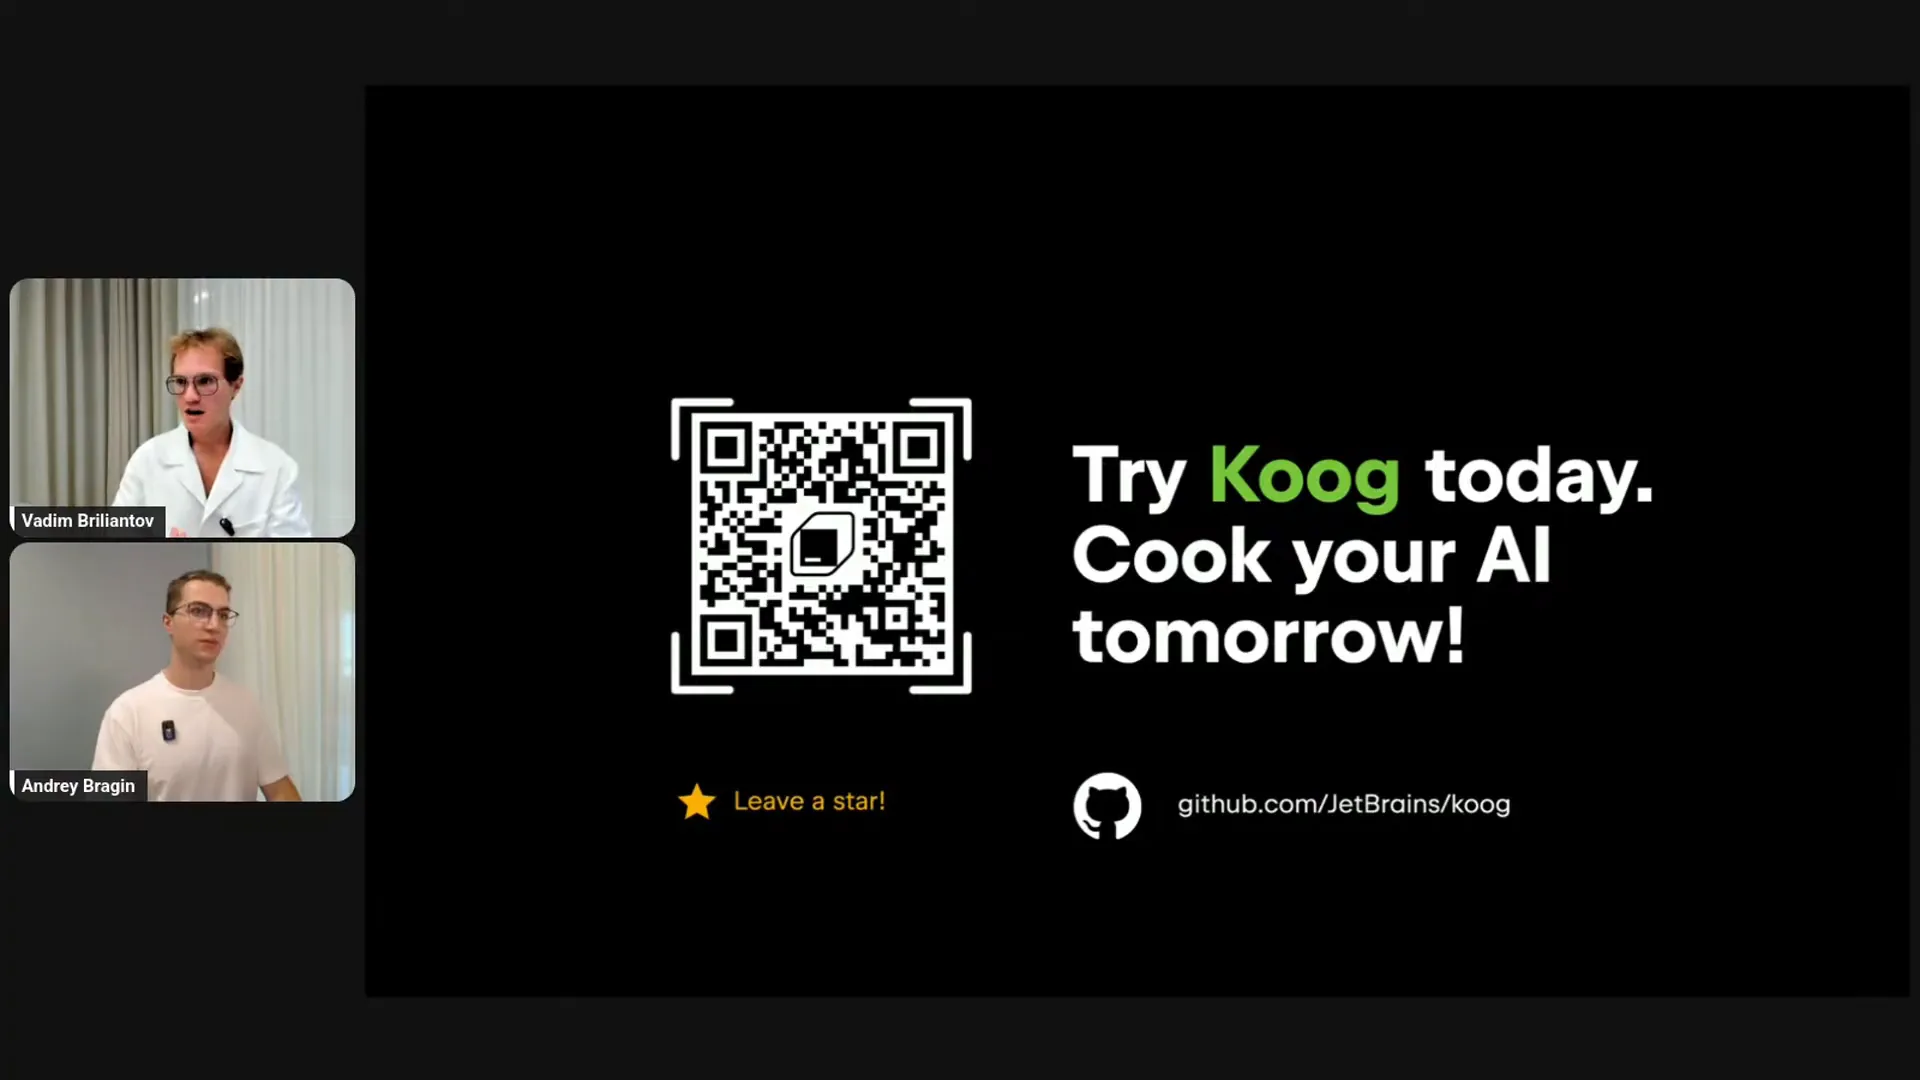 | Here is the link to our GitHub. If you're interested, please check it out. |
Slide 24 — 24:16 (watch)
 | Now, we'll move on to the live coding part. Andrei, it's your turn. |
Slide 25 — 25:42 (watch)
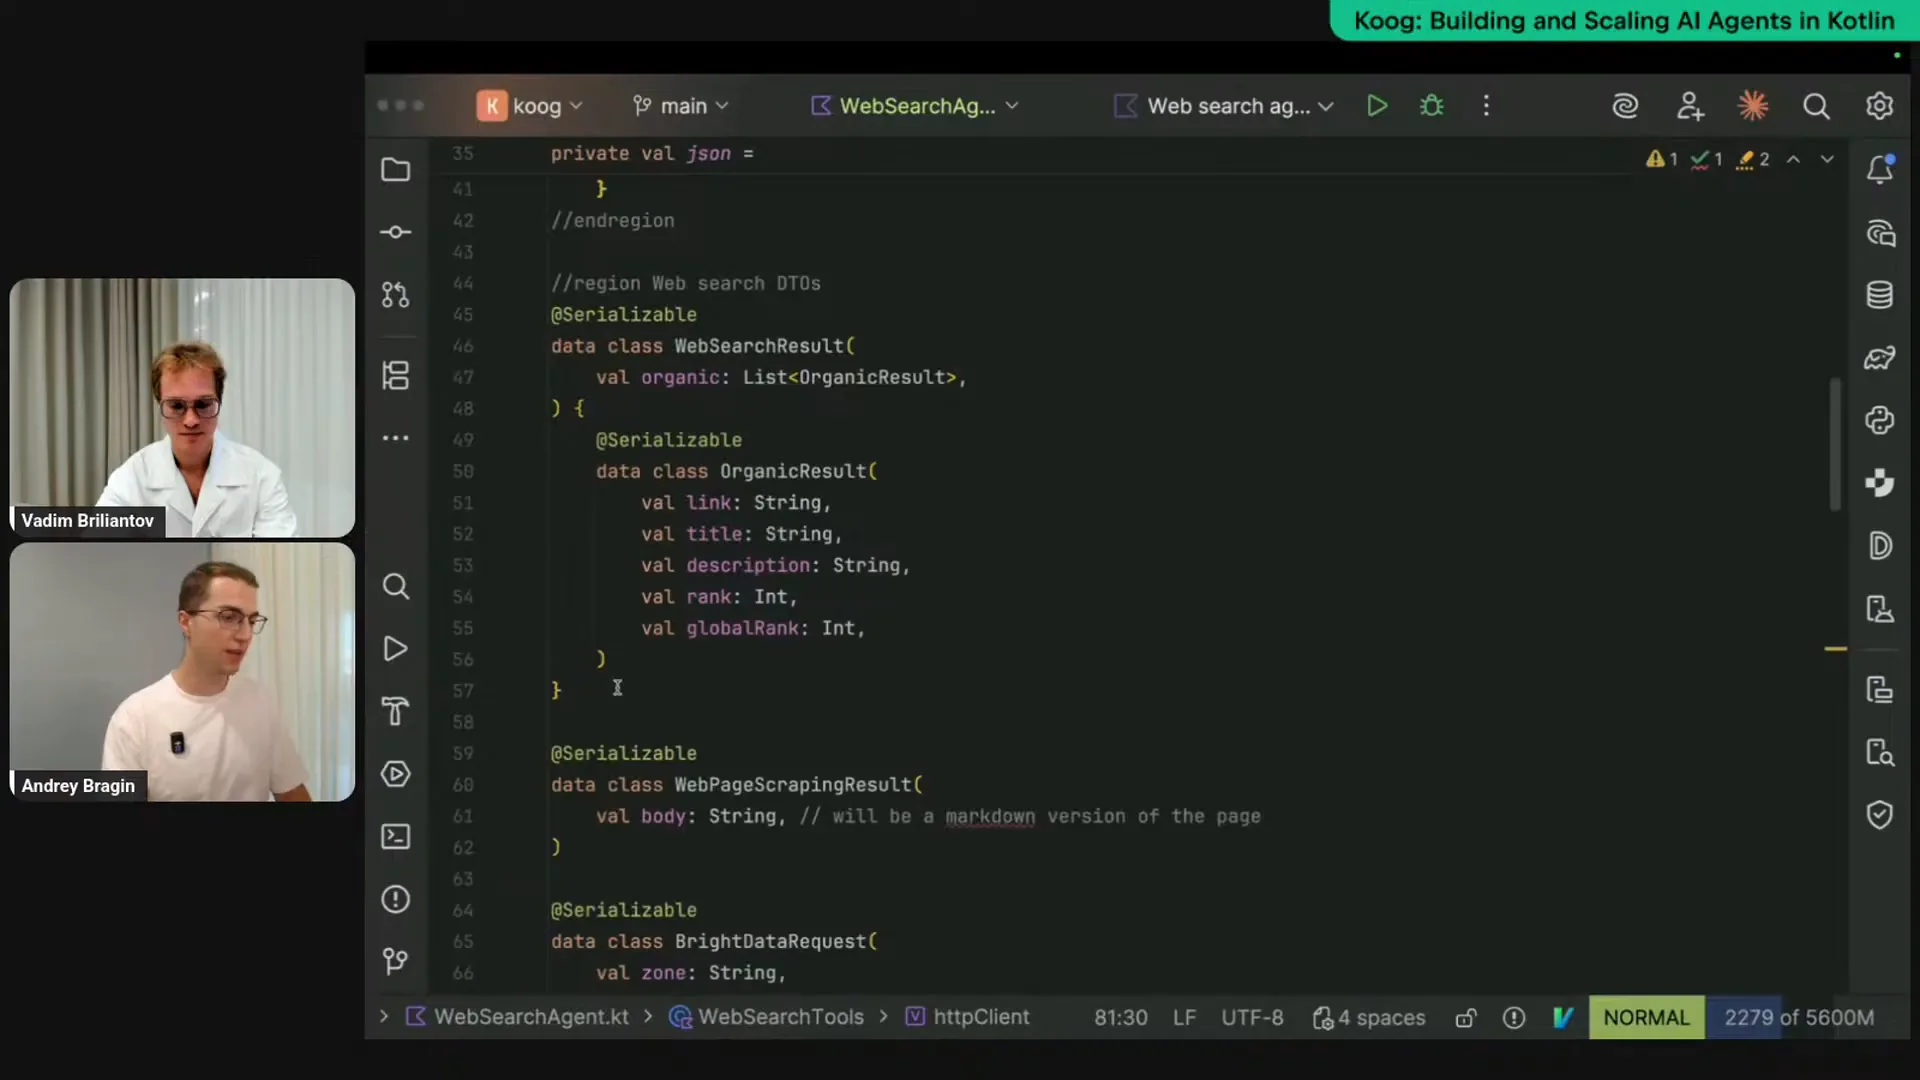 | We discussed some strategies today, but we won't delve into the details of their implementation. You can join the next live stream, where we'll disassemble these strategies and implement our own to better understand the craft strategy. For now, I want to introduce the Cook framework and demonstrate its capabilities. We'll look at a simple assistant that can access the web and help automate various web-related tasks, such as market or competitor research. We can implement this simple agent with Cook, so let me walk you through the code and then we'll test it to ensure it works. First, we need web access, which I’m achieving through pre-made APIs. I’m using Bright Data, but other providers offer similar functionalities. The code is straightforward. We define API schemas that we will receive as responses from Bright Data. We’ll use two tools: a search tool for Google searches and a page scraping tool that reads the page, removes HTML tags and JavaScript, and retains only the content. Essentially, we are defining response schemas here. The more interesting part is how we implement the web access logic. We have a simple class that takes an API key and the cater client. I’m making simple REST requests without using SDKs. We have two tools, and as mentioned earlier, tools are just functions. One function is a regular Kotlin suspend function called search, which takes a query parameter, for example, “pizza.” It’s about 10 to 20 lines of code, where we make an API request and receive a response. |
Slide 26 — 28:24 (watch)
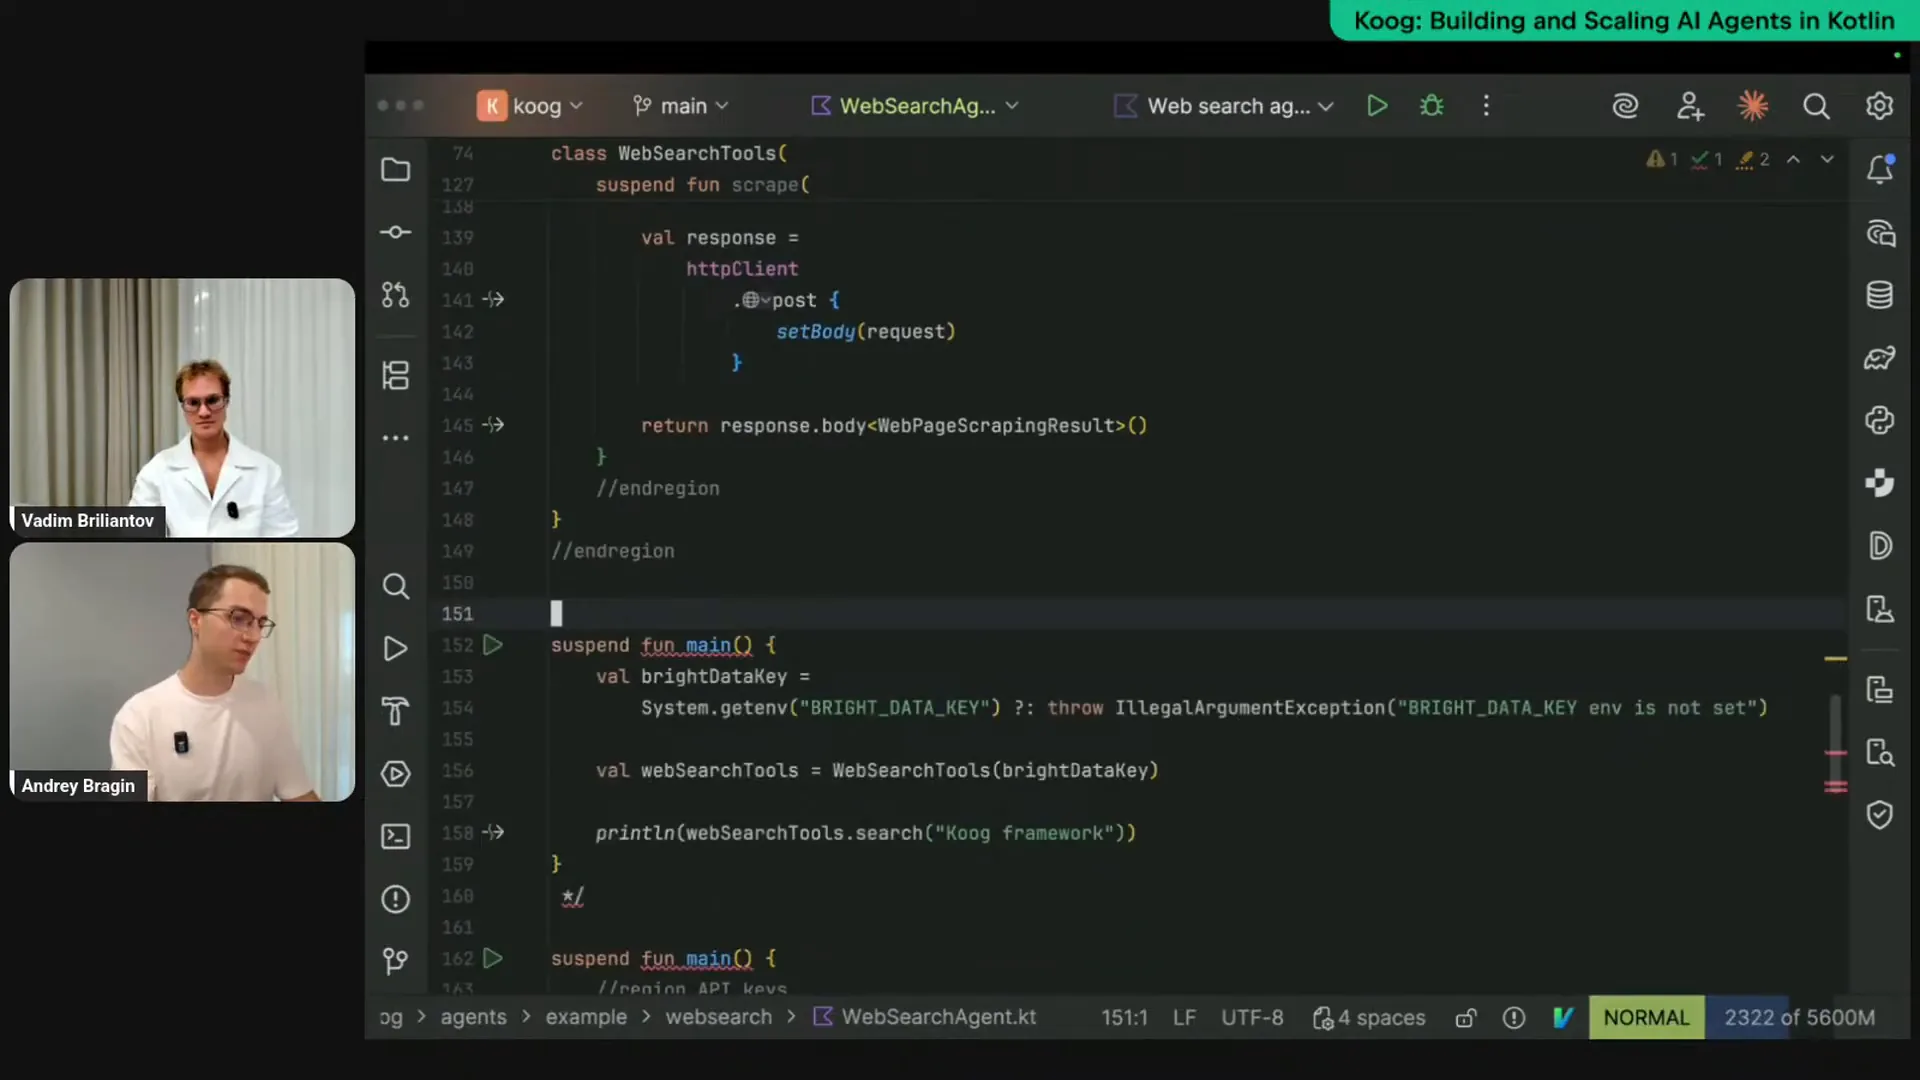 | The next tool is a page scraping tool, which is similar to the previous one but calls a different API. You provide a URL to the tool and receive page data in a markdown format that is easily digestible by LLMs. To make these functions actual tools, we need to annotate them specifically. We can use a tool annotation for that purpose. For improved results, it's beneficial to include LLM descriptions that explain what the tool does. Here, we provide a description for the tool, summarizing its function, such as searching for a query on Google. We can also describe all the parameters, including the query to search. We apply the same approach to the scraping tool, marking it in a specific way. These are regular functions, not magical entities, and we can call them directly to see their output. In the main function, I retrieve my API key from the environment and create an instance of the WebSearchTools class. For example, I call WebSearchTools.search("CookFramework"), similar to typing "CookFramework" into google.com. After running this, we receive an object as a response. We can format this response as JSON to make it more human-readable using encodeToString. When we rerun the code, we get a clearer output. Essentially, these tools return Google search results. |
Slide 27 — 30:28 (watch)
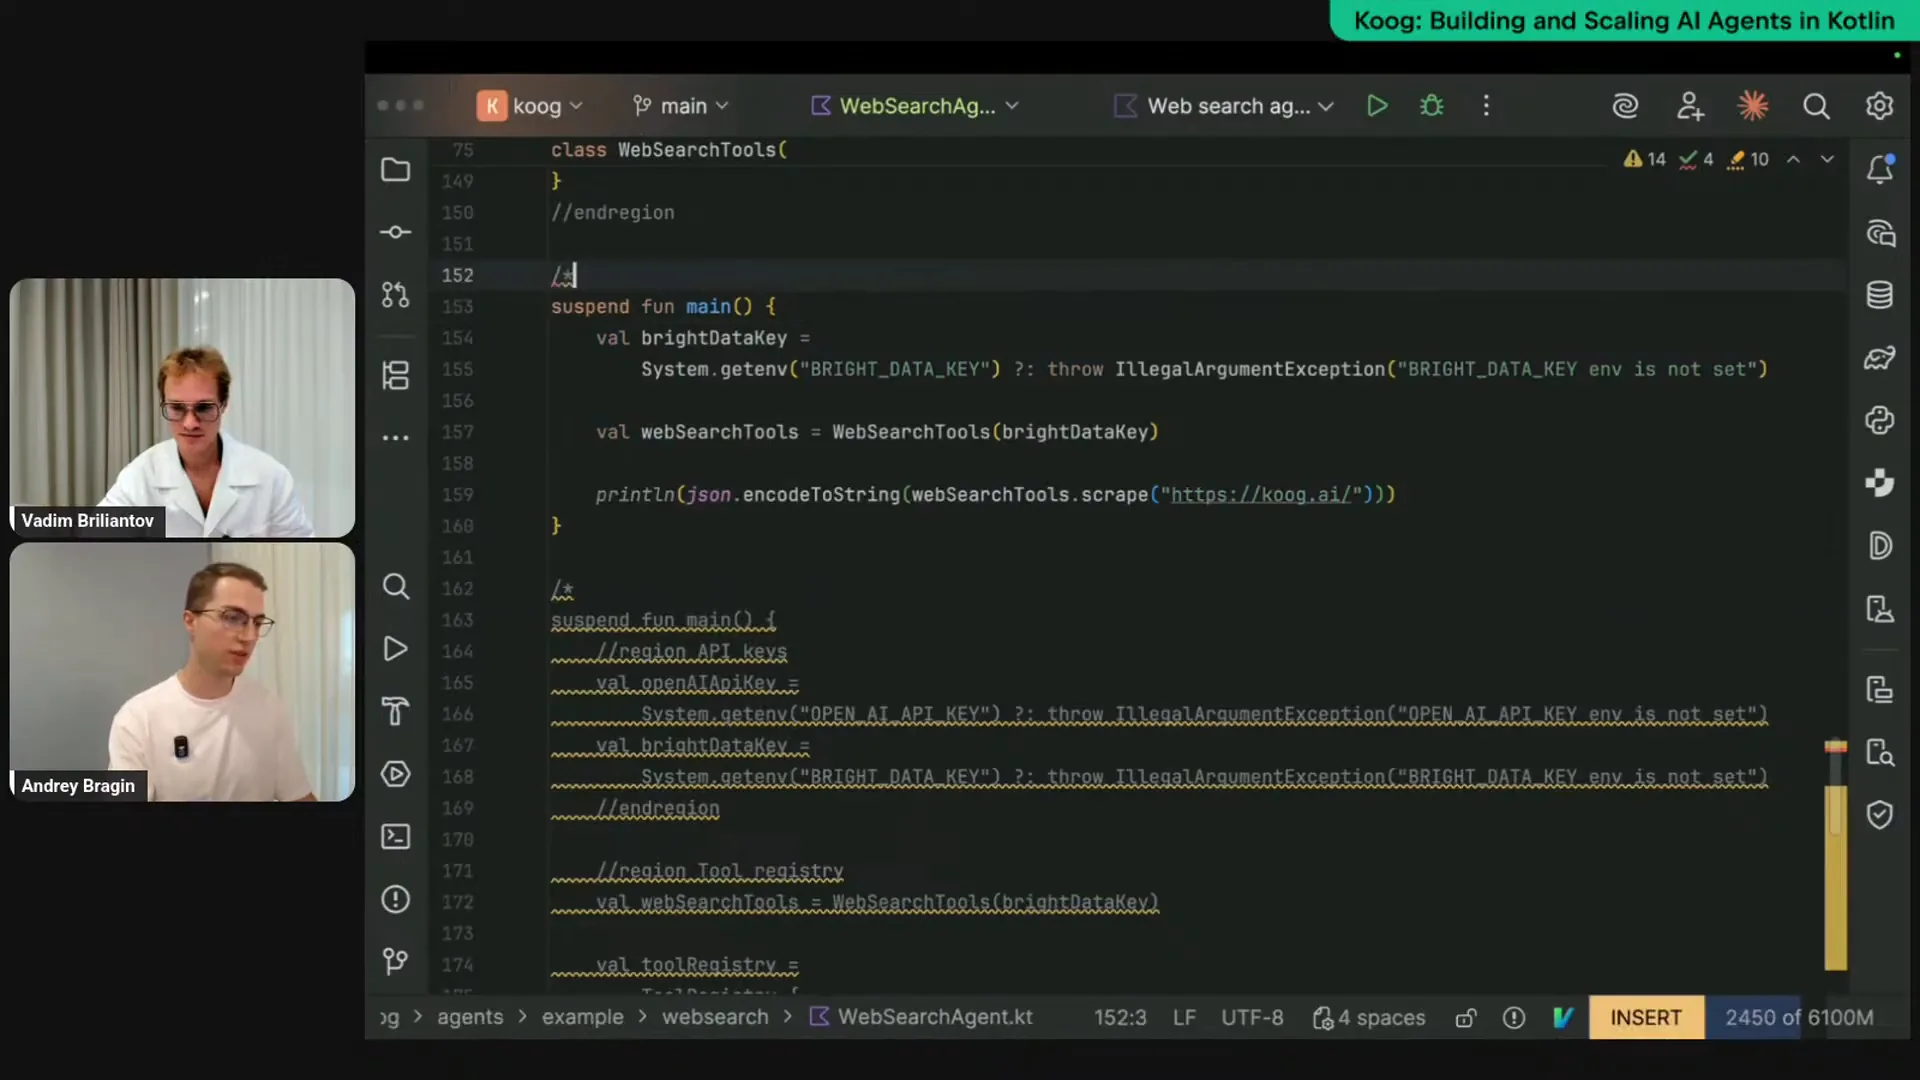 | We can also use a tool called Scrape to read a webpage, remove unnecessary markup, and extract the page data. As you can see, we receive a JSON response that contains markdown from the koog.ai page. This process involves regular functions—nothing magical. We can utilize these functions in our agents because we want LLMs to determine how and when to call them. To achieve this, you need to extend the WebSearchTools class from the specific toolset class, which serves as a marker interface. You must annotate all functions you want to expose as tools to your LLM with the tool annotation and provide descriptions. We have already completed this step, so we can proceed to the agent configuration. I have some configuration prepared here. |
Slide 28 — 34:26 (watch)
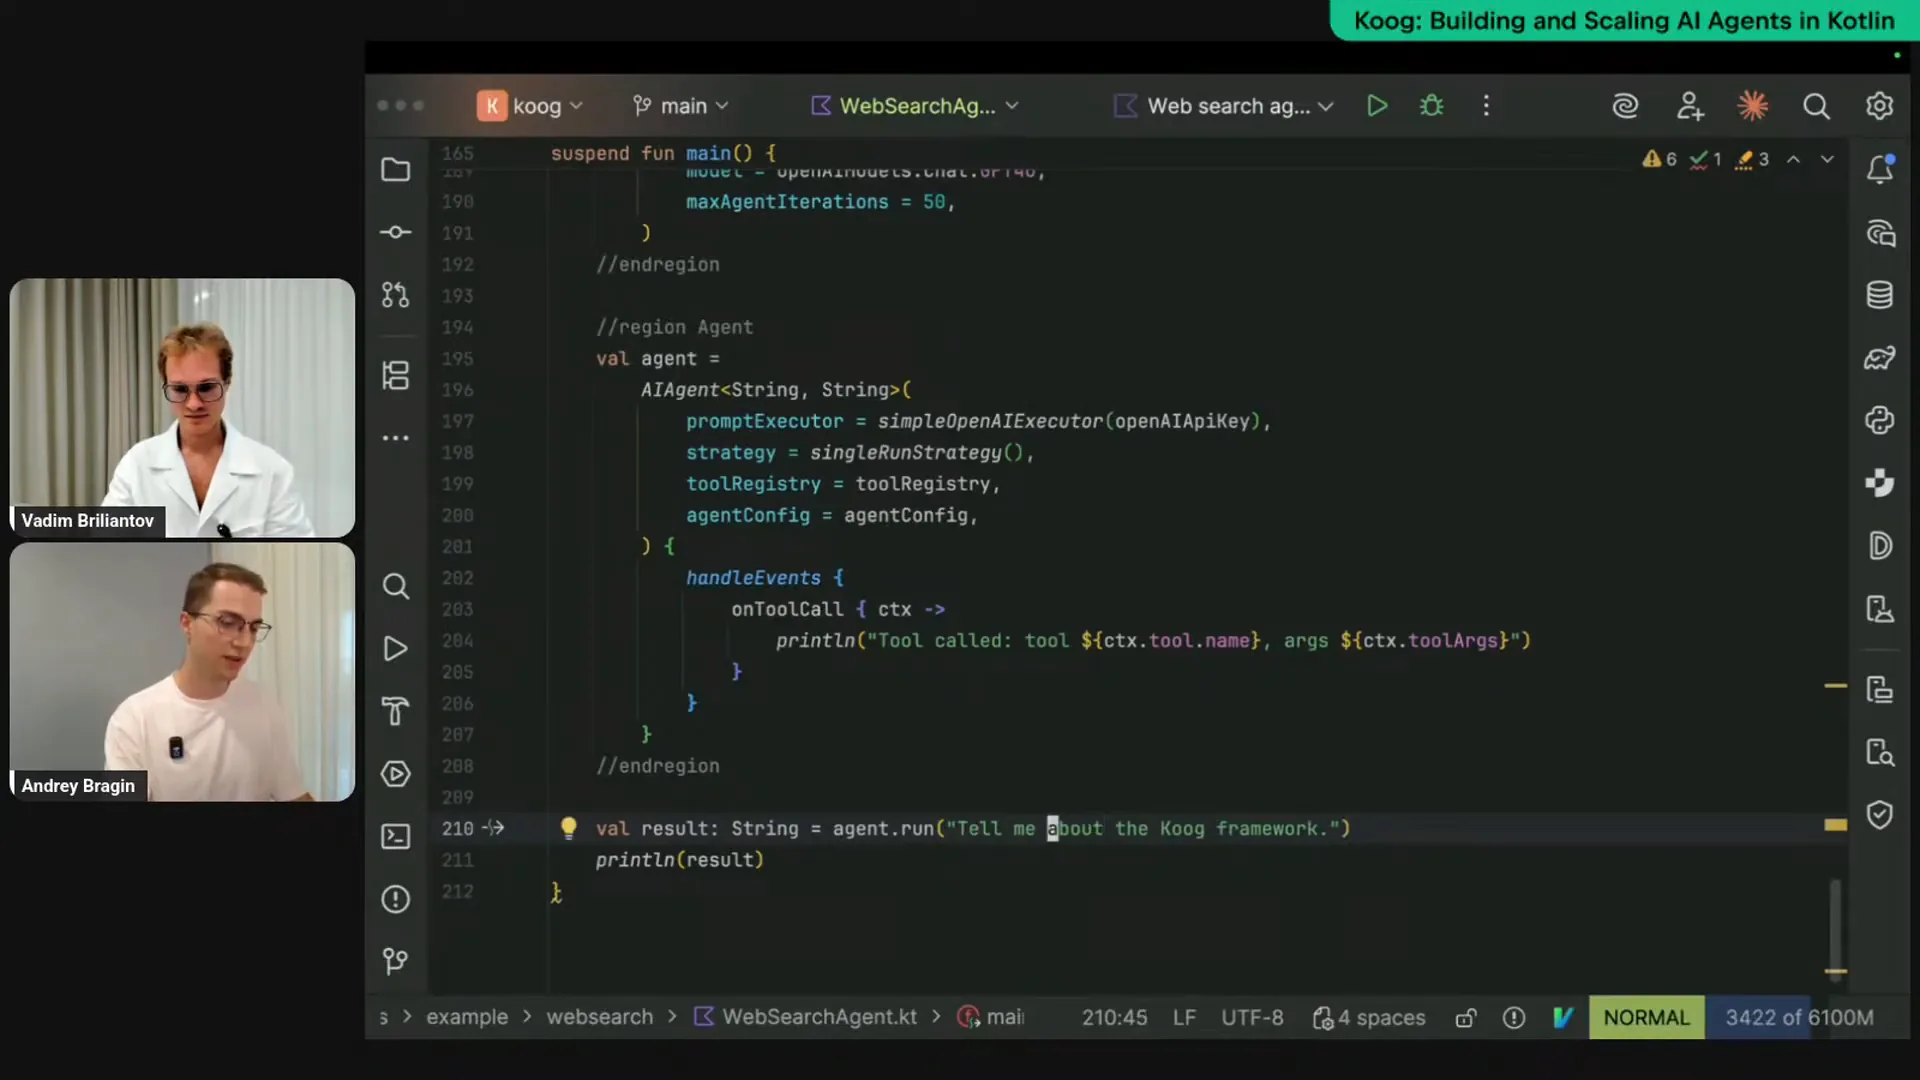
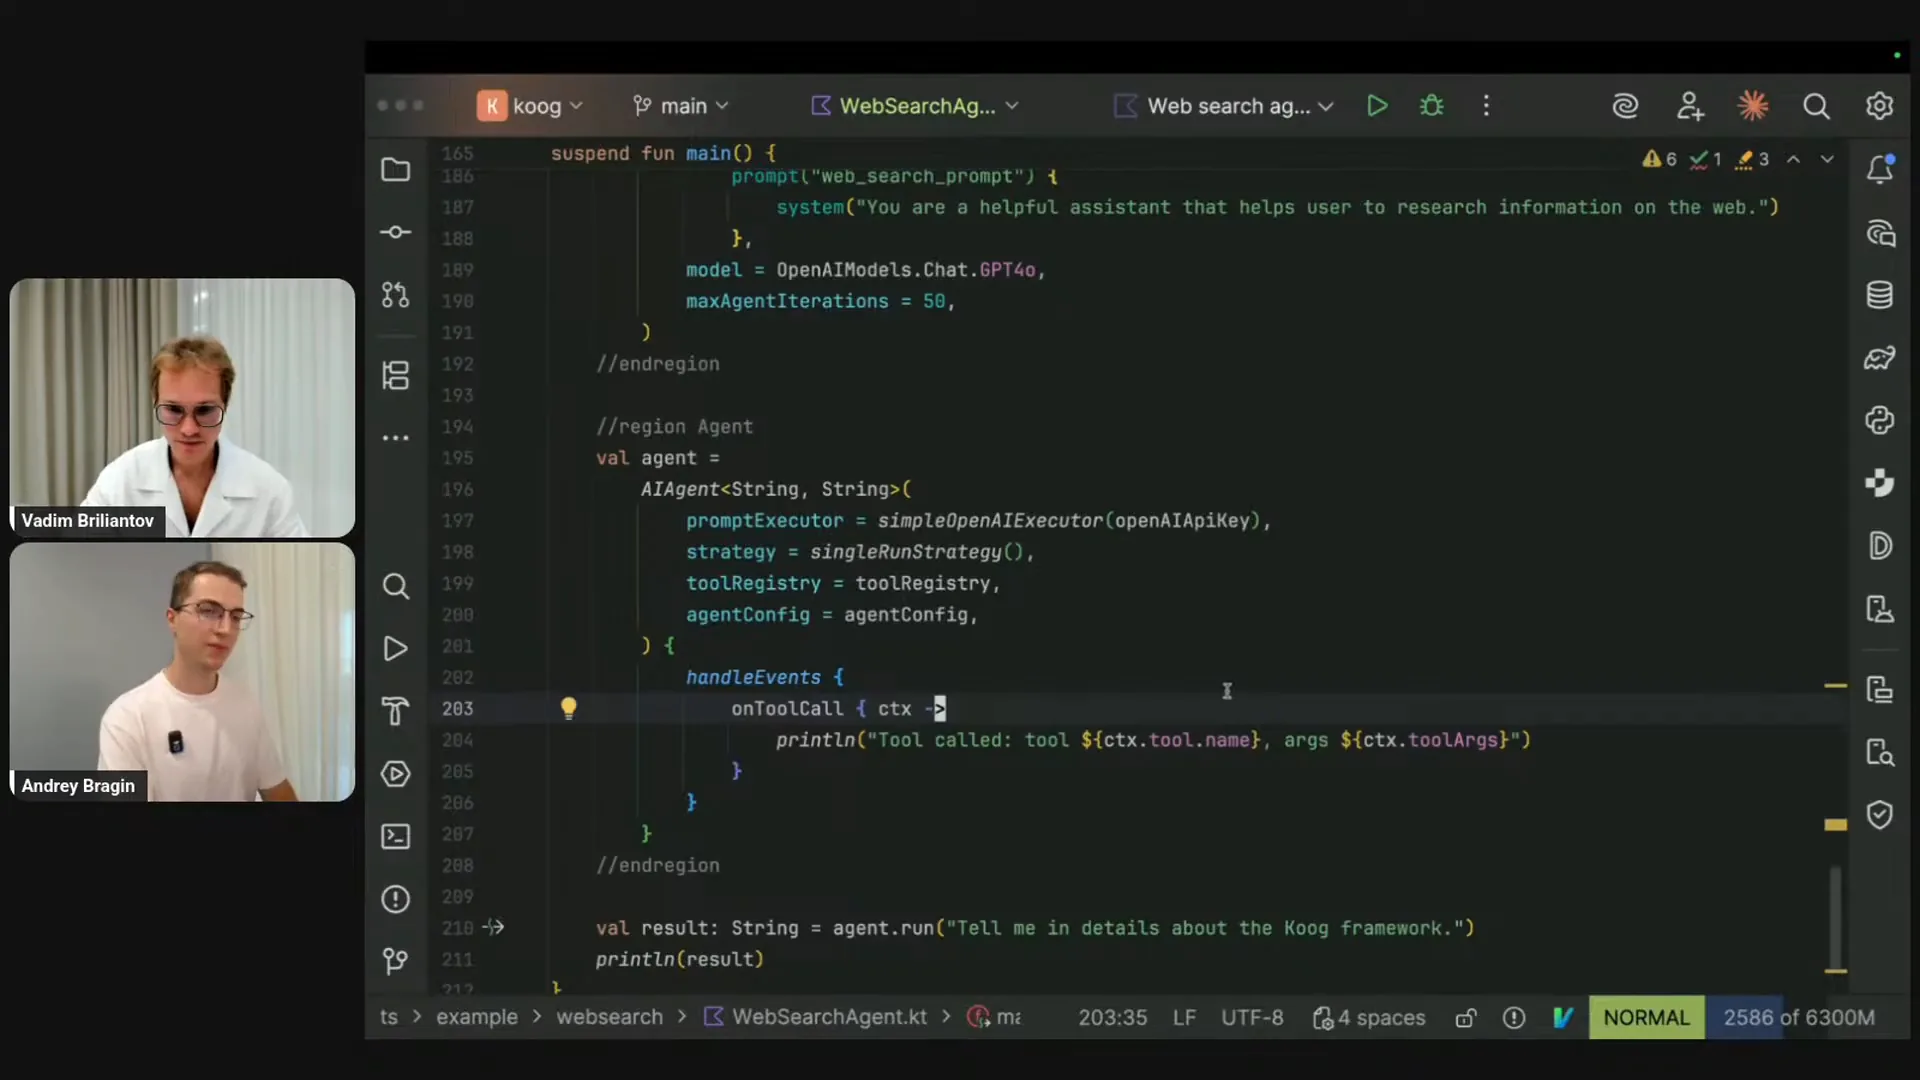
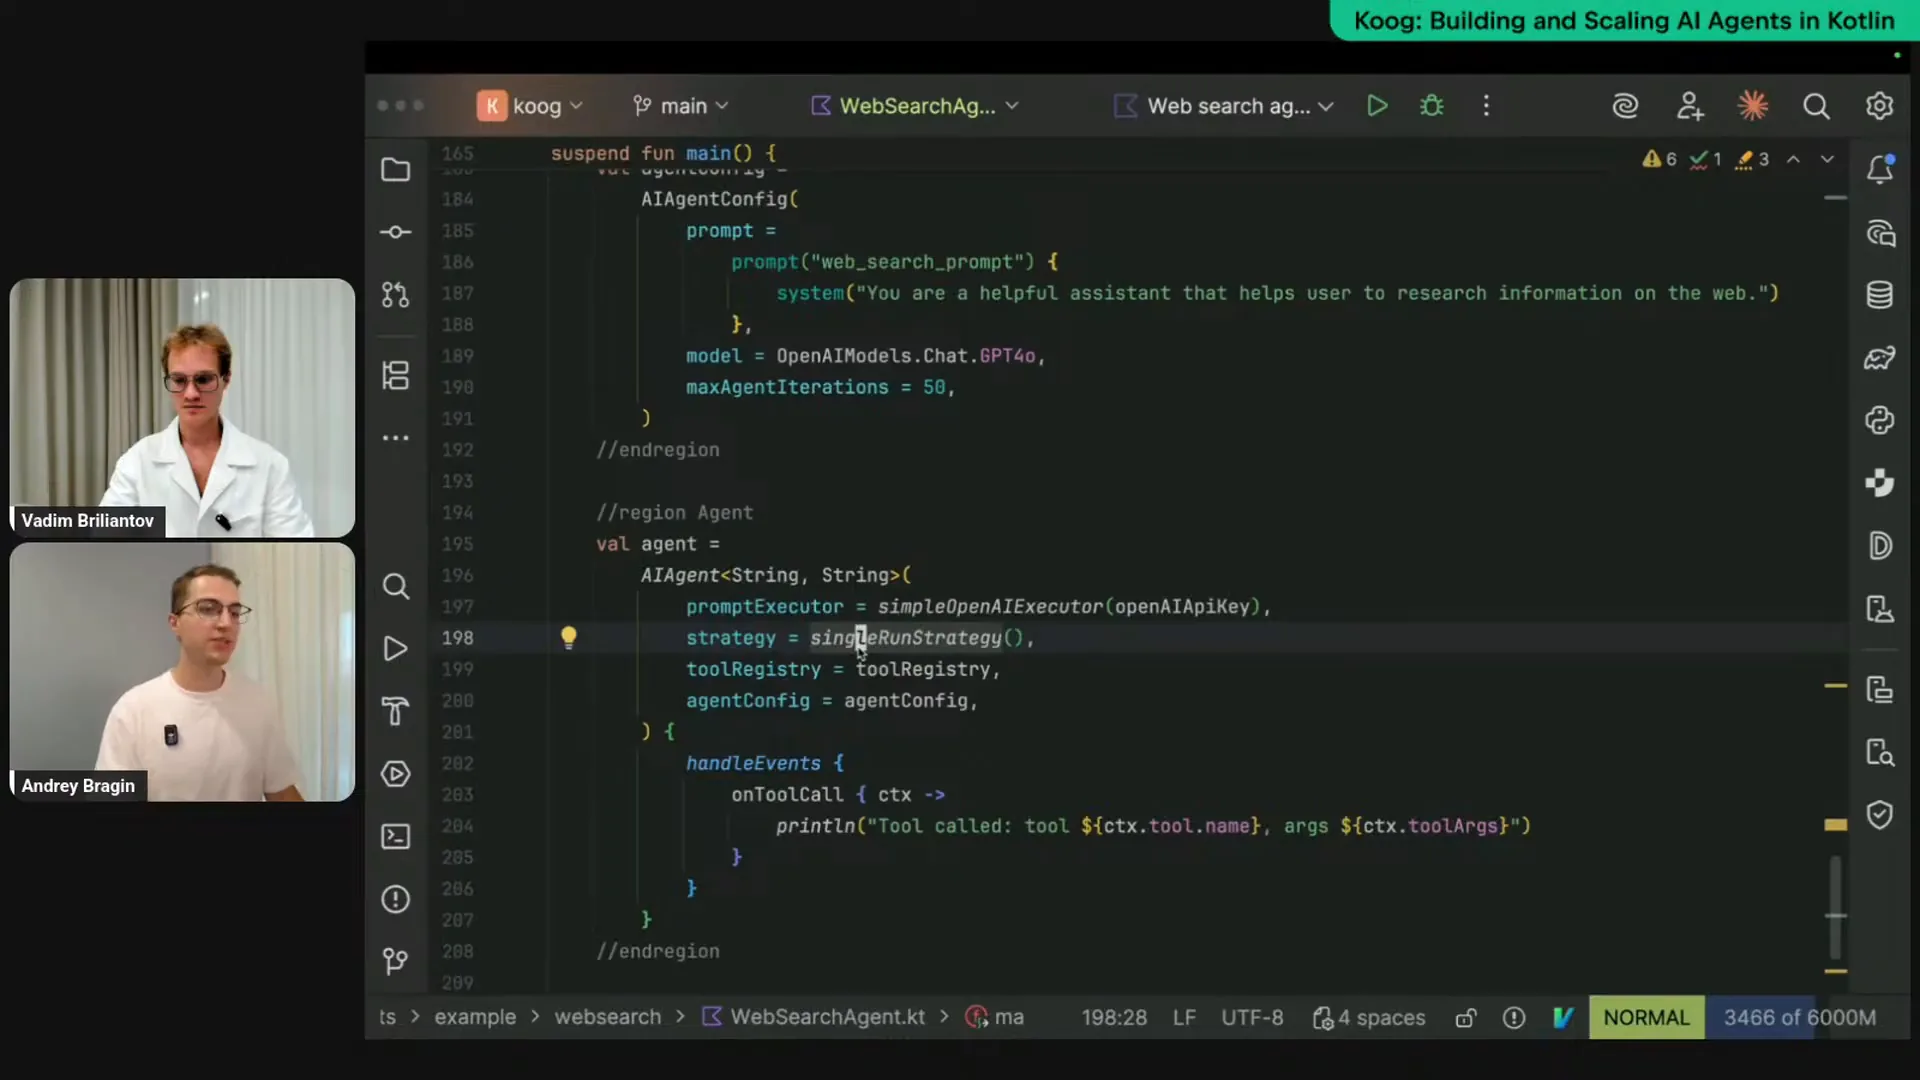 | Let me uncomment this part. First, we need to obtain our API keys. In this case, we're using OpenAI's LLM and prior data. I will retrieve my LLM keys and instantiate my WebSearchTools class. Next, I need to create a specific entity called ToolRegistry, which is essentially a collection of tools that will be exposed to our AI agent and the LLM. With each request to the LLM, we will send descriptions of these tools so that the LLM knows which ones are available and can call them if necessary. Since we extended our WebSearchTools class from the toolset interface, we can use the tools builder function and pass this instance to create a ToolRegistry. Now, we need to create an agent configuration. The agent configuration allows us to set presets, values, and settings for our agent. The most important aspect is the prompt itself, which defines what the agent does and what the LLM needs to accomplish. Here, I’m using a simple string: “You’re a helpful assistant that helps users research information on the web.” In real-world scenarios, you would likely expand on this and provide more examples. We also specify the initial model to be used, which in our case is GPT-4. The maxAgentIterations setting is important to prevent the agent from entering an infinite loop, which can happen during complex implementations. To avoid excessive credit usage and compute time, we can set a maximum limit for agent iterations, which I’m setting to 50. To finalize, we instantiate the agent itself, specifying input and output types. Although I’m explicitly mentioning the strategy here for clarity, we are using the default strategy, which is a tool calling loop. This means you provide input to the agent and a set of tools, and it queries the LLM, executes tools, and returns results until it decides it’s done. The default strategy is string-string, similar to a regular chat interface where you input a string and receive a string output. We provide our prompt executor, the connector to the LLM, along with the API key, the strategy, the tool registry, and the agent configuration. This is the final step to piece all these configurations together to create a ready-to-go instance of the agent. We can then call agent.run and provide a string input, which will yield a string output. I can specify this explicitly, and as you can see, it’s string in, string out, and we simply print the result. To enhance observability and confirm that the agent can call the provided tools, we can use the HandleEvents DSL to specify different event listeners, such as printing to the console or logging. In this case, I’m using the onToolCall listener to track which tools the LLM calls and when. I will print this information to the console each time the LLM calls a tool. Now, let me run this and see if it works; I’m asking the agent to tell me about the Kube framework. |
Slide 29 — 38:08 (watch)
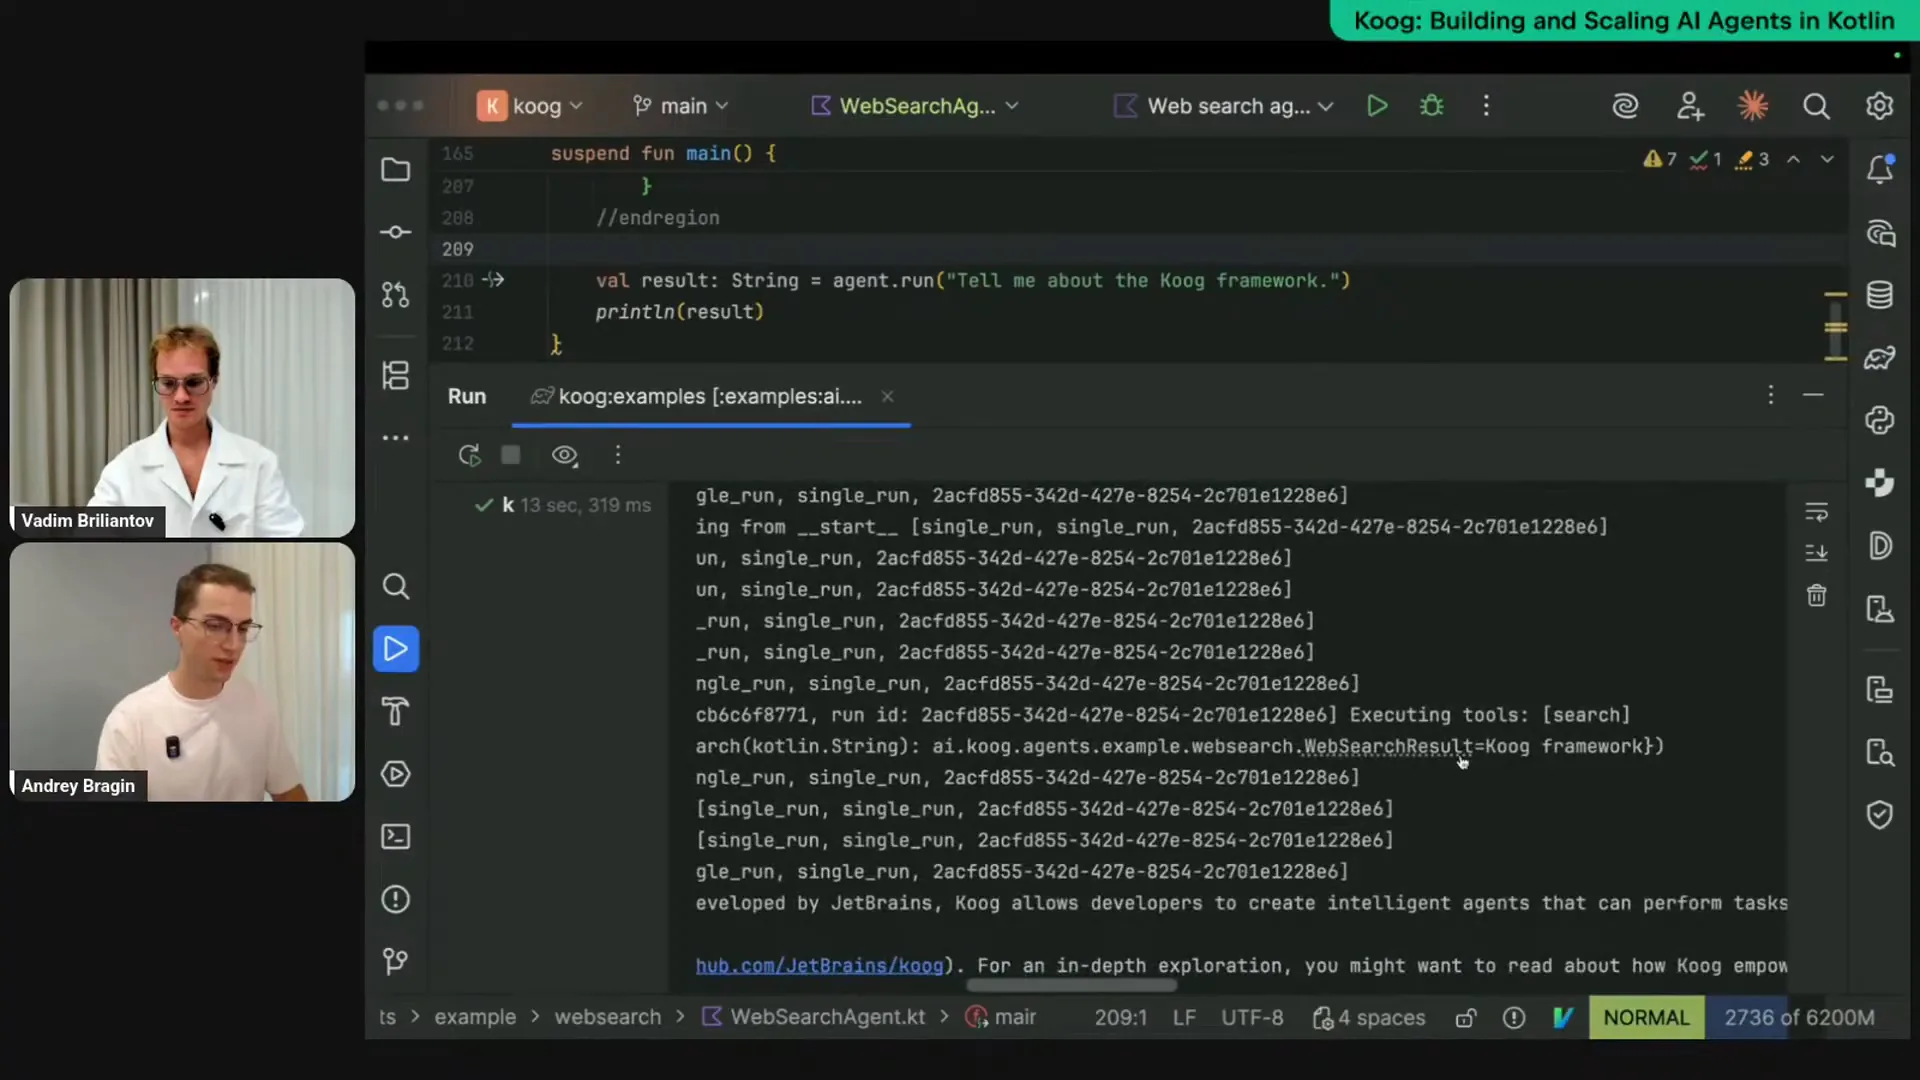 | I am running this, and we should see some logs in the output, which show the strategy in action. We can observe that some nodes are being executed, confirming that the agent is functioning correctly. The logs indicate that the tool was called, specifically the web search tool, with the Kube framework as a parameter. The agent determined that this was sufficient and provided a description of the Kube framework, stating that it is a Kotlin-based platform. Here is the output from our agent. |
Slide 30 — 38:54 (watch)
 | That's pretty short. For example, I want a more detailed explanation, so let's ask for it. I will request a detailed description of the Kube framework and observe how modifying the input affects the agent's execution. |
Slide 31 — 39:38 (watch)
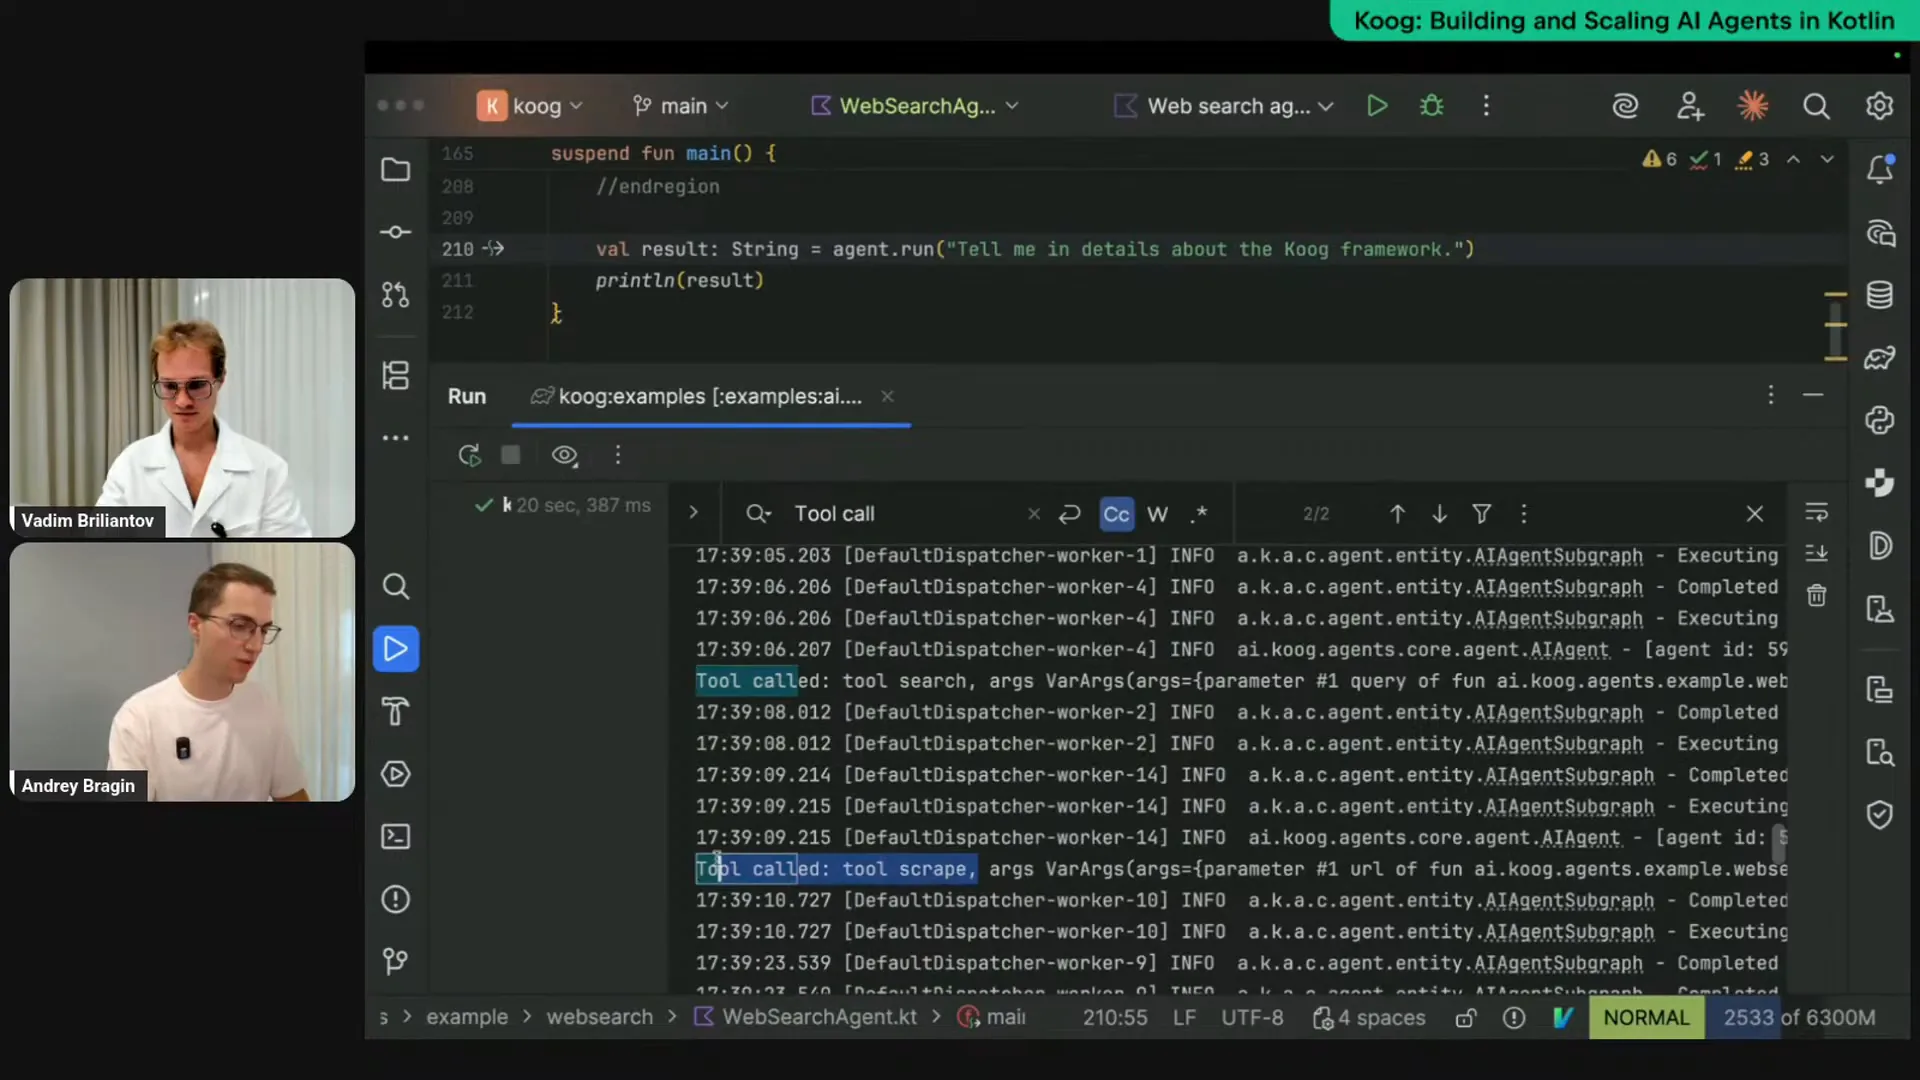 | I am rerunning the same agent, and we can see the output again. This time, it called the tool "search" first, which is logical since the agent wants to find information about the Kube framework. After that, it decided to call the tool "scrape" and provided the URL to the Kube website to gather more information. The agent read the website, analyzed it, and provided a detailed explanation. As a result, we received a more comprehensive response. It's quite lengthy, so I can copy it to a separate file for further review. |
Slide 32 — 40:20 (watch)
 | This is what the agent provided after conducting some research. |
Slide 33 — 41:40 (watch)
 | This is a simple agent, as we don't want to make it too complex at this stage. We're using a built-in strategy that operates as a loop. However, you can conduct various experiments by leveraging prompt engineering. You can craft intelligent prompts that explain to the LLM what types to check and which queries to run. There are limitations to this approach, as prompt engineering can be unpredictable. That's why we provide the option to specify a custom strategy, which we will explore in more detail in the next stream. Even with these small agents, you can perform real tasks, such as searching or conducting analysis using web searches. One advantage of this approach is that relying solely on LLMs for answering questions can lead to hallucinations and context limitations. Most LLMs were trained on past data, and for instance, the Cook example was released only two and a half months ago, so many LLMs may not be aware of it. Providing precise web searches enhances the capabilities of LLMs significantly. |
Slide 34 — 42:46 (watch)
 | Just a moment. |
Slide 35 — 42:56 (watch)
 | It seems we are still on my screen. Would you like to share more about the strategies? |
Slide 36 — 47:28 (watch)
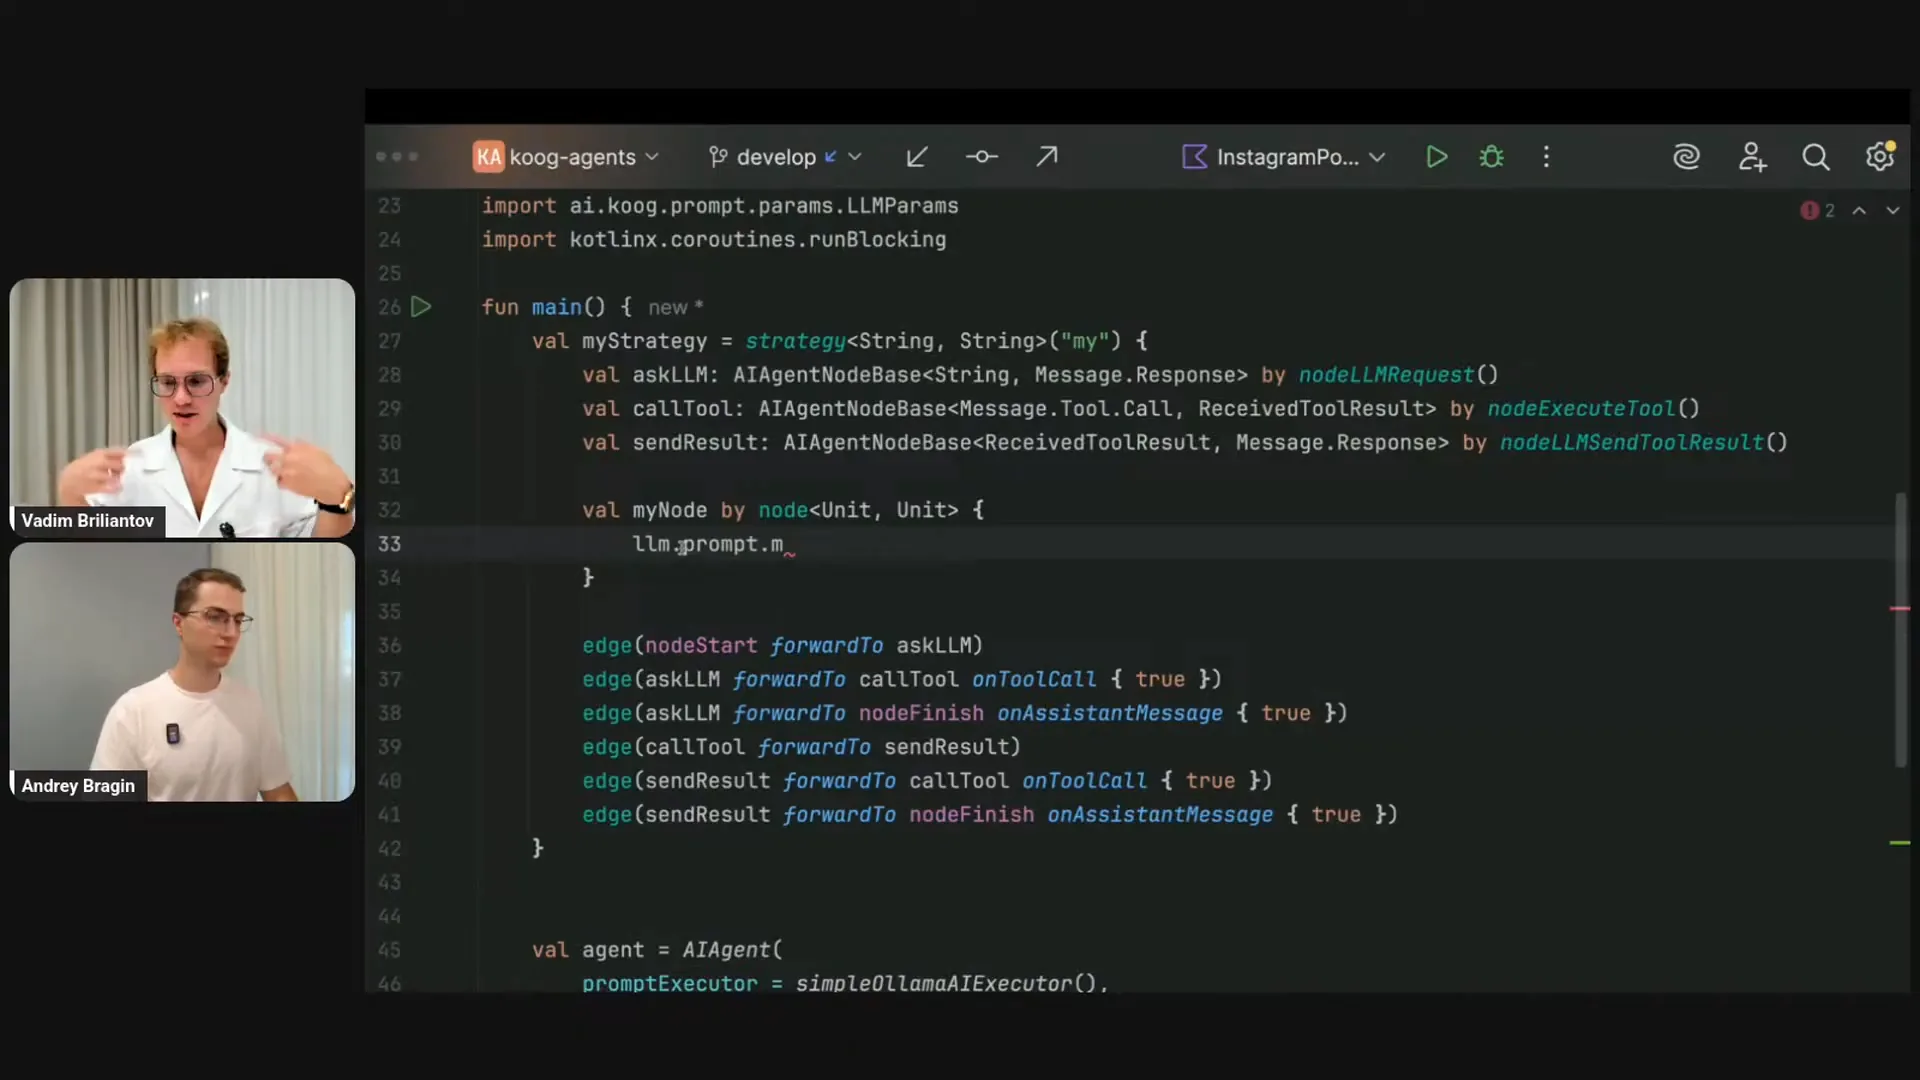
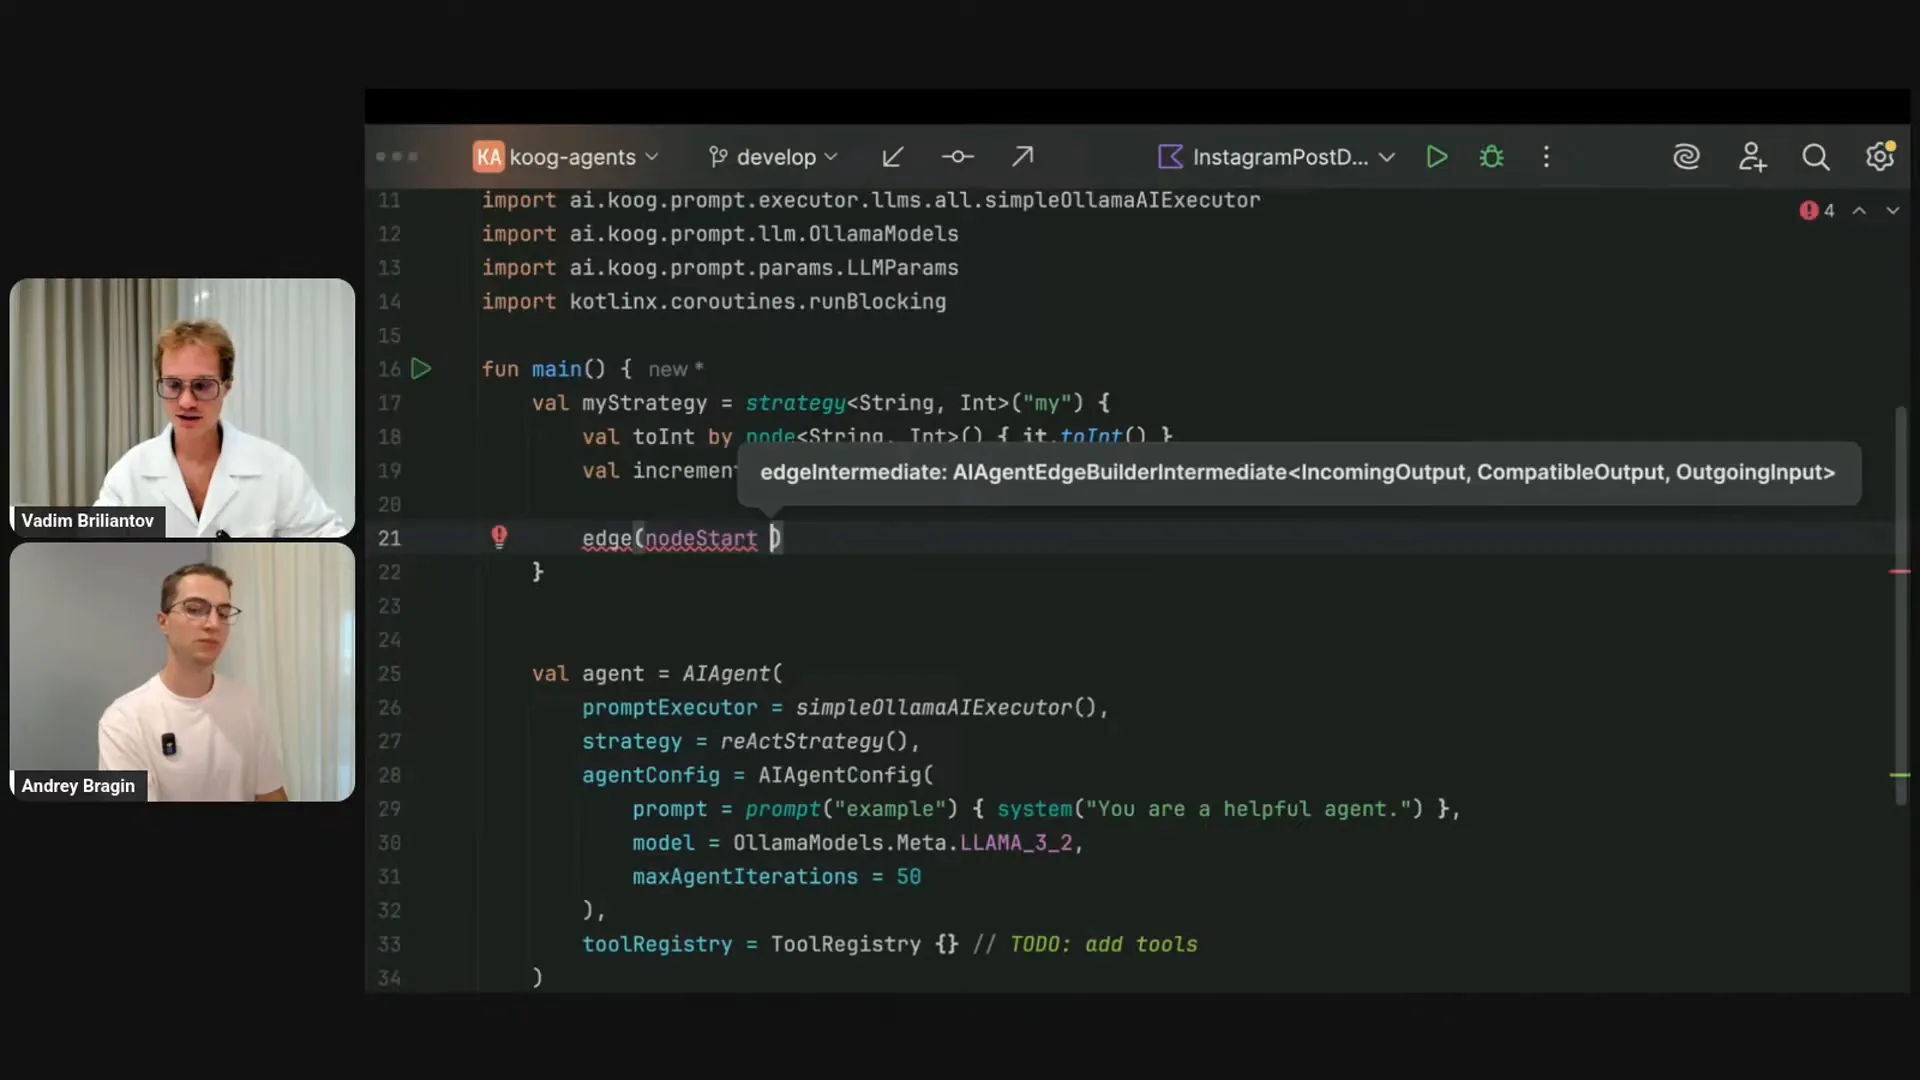 | I will briefly introduce the concept of strategies. While reviewing questions during Andrey's talk, I noticed a question about what a strategy is. Beyond the visuals and components I've mentioned, a strategy is straightforward. The basic agent setup includes an AI agent, a prompt executor, and a strategy, which is currently the simplest default one. We also have other defaults, like the React strategy, which incorporates reasoning steps after certain iterations. The default strategy simply performs basic loop iterations. I will demonstrate how to build a precise, custom strategy that remains simple and effective. First, I will create a strategy using the strategy DSL builder. For both the strategy and the nodes, I need to specify their types. While types can be automatically deduced from context, I will explicitly state that I am building a strategy to convert a string to an integer. I will name this strategy “my strategy.” Inside the strategy, I will create a few nodes. The first node will take a string and convert it to an integer using the You can provide different names for the nodes, which represent the steps in your agentic algorithm. However, with Kotlin, you can leverage the delegating operator to automatically use the variable name as the node name. The increment node takes an integer and returns the next integer. Now, I will connect the nodes by creating edges. The node start, which is always present in the strategy, will connect to the “toInt” node. From “toInt,” I will connect to the increment node, and finally, from the increment node, I will connect to the node finish. This strategy performs a simple operation: it takes a string, parses it, and produces the next integer. For instance, if you pass the string “100” to this agent, it will output “101.” You must provide the strategy name, “my strategy,” and everything is type-safe. If I change the type of the strategy, the nodes will become incompatible. For example, if the start node outputs an integer while “toInt” expects a string, the code will not compile. This illustrates the DSL capabilities of Kotlin, which are advantageous for agentic development. Now, let’s move on to a more complex example: building the out-of-the-box default strategy that you have seen in the previous visuals. This strategy includes three required nodes: “ask LLM,” which initiates the process; “call tool,” which executes any tool provided to the agent; and “send result,” which returns the tool’s result back to the LLM. I will create edges starting from the node start to “ask LLM,” as this is where the process begins. The LLM will then determine the next step. Let me copy this line. While I wait for my IDE to respond, I can explain the roles of the node start and node end. These are special nodes that serve as the input and output for our strategy. |
Slide 37 — 52:04 (watch)
 | Node start is a special node that emits an input to our strategy based on the argument supplied in the run. For example, if the strategy takes a string, node start will emit a string. If it takes an integer, it will emit an integer, and so on. Node finish operates in reverse; it does not emit a value but consumes the final value of the agentic execution. |
Slide 38 — 55:14 (watch)
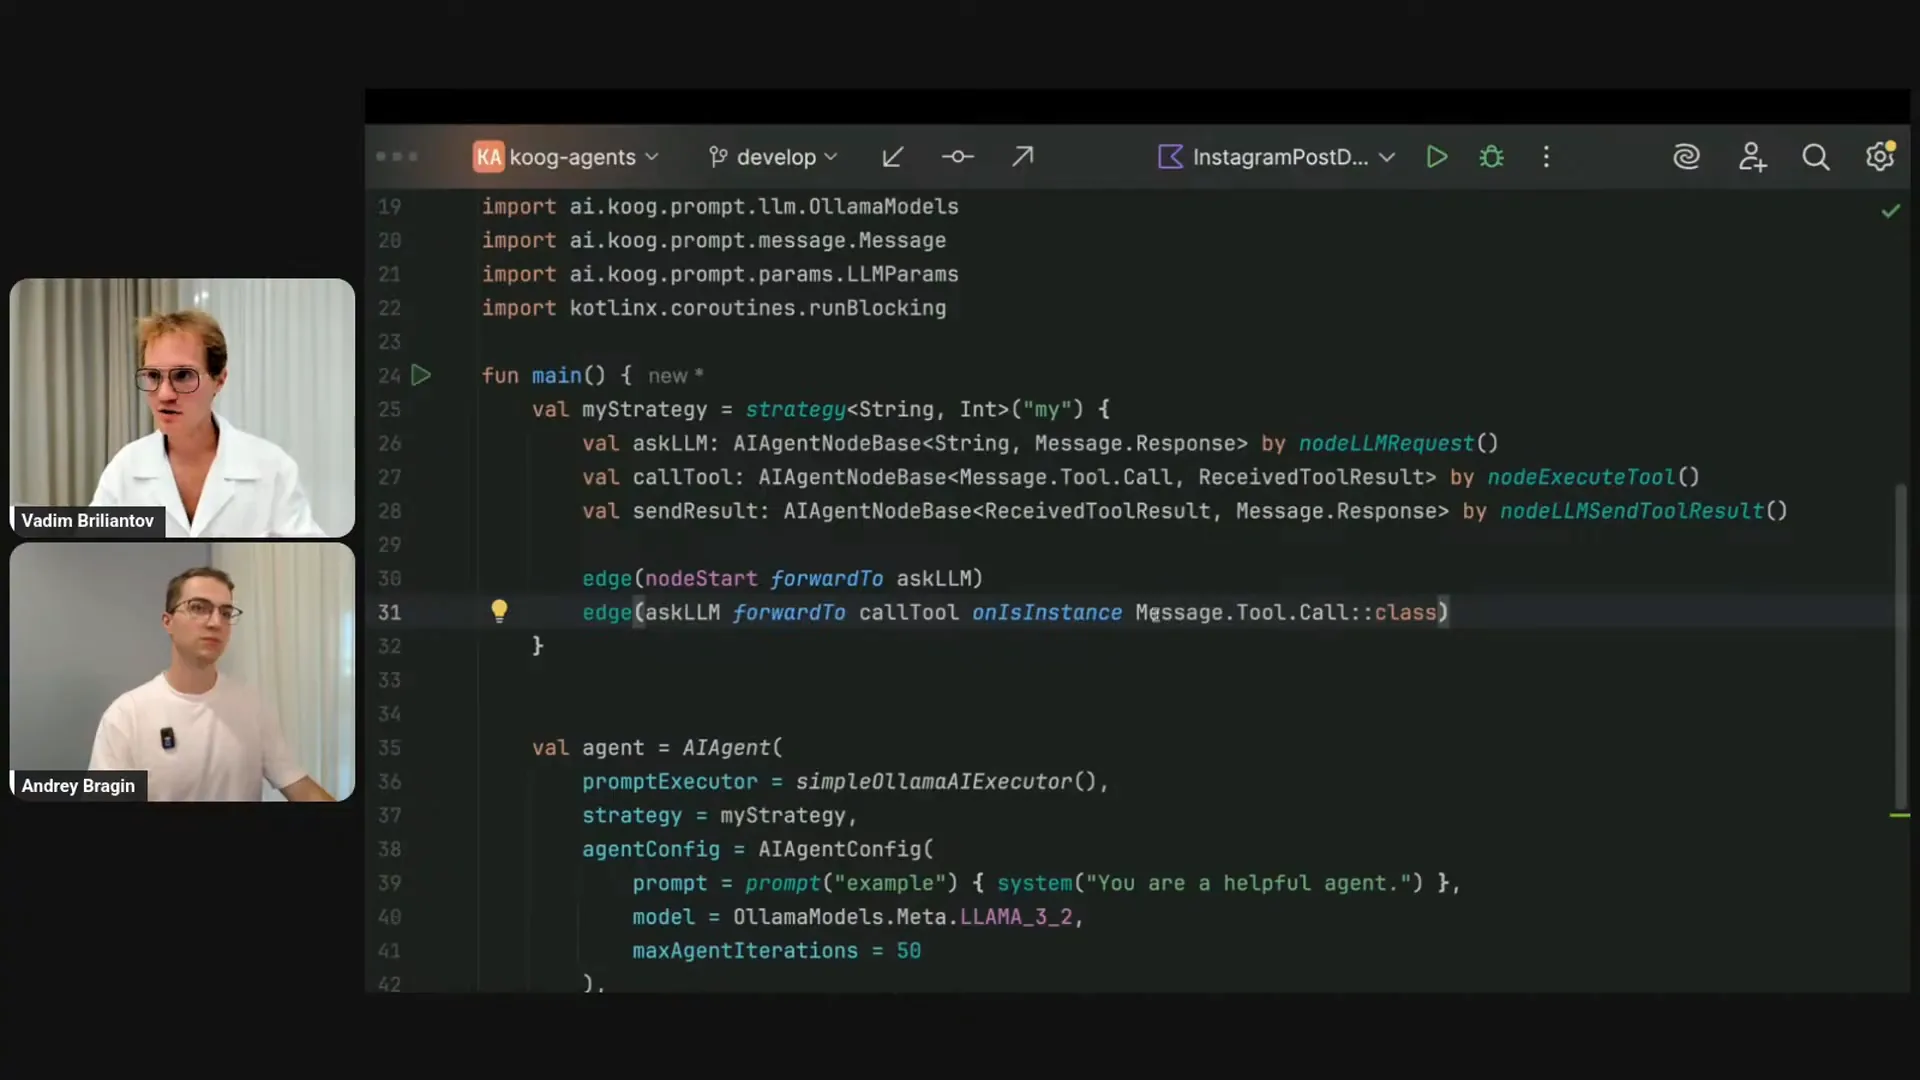 | The argument you provide to the run function is what will be emitted by the node start. The final result you specify for the node finish is what will be returned from the agent that runs. These nodes allow us to consume and return results and responses. Now, let me demonstrate this in my IDE by explicitly specifying types, which you usually don't have to do. We are planning to enhance tooling for this, but for educational purposes, I’ll show you the types of the nodes. The issue arises because the ASCII LLM produces a response of type message.response, while the call tool node expects a tool call, which is a type that inherits from message.response. If you look at the definition, you’ll see that it’s a sealed interface. The response from the LLM can be either a system message or a tool call, as shown in the presentation images. To connect this to the node, the IDE suggests a solution. In a typical scenario, you would need to write a condition. There is a DSL method called onCondition, and I’ll copy the full type name. If it’s a tool call, I will proceed to calling a tool. However, I just checked the condition without transforming the value. There is a DSL method for that, which I can write as transform it to message.toolCall. This is a lengthy line, but you usually don’t have to do this because there’s better syntactic sugar available for common use cases. You can use the DSL method called onIsInstance with the class. While this is convenient, it may not be ideal since there are many other types in your strategy depending on your application. The message.toolCall check is crucial. Fortunately, there’s even more syntactic sugar in the framework, allowing you to write something like onToolCall, where you can specify a lambda. For example, you might want to target specific tool calls by name. However, in this example, we are using a generic strategy, so it will evaluate to true for any tool call. After asking the LLM, you will proceed to calling the tool. If the ASCII LLM does not provide a tool call but instead gives an assistant message, you will finish at the node finish. There is a similar method called onAssistantMessage, which also evaluates to true for type checking. Initially, I implemented a string to integer strategy. The node finish has the output type of the strategy, which is integer, but I was providing the assistant message converted to a string. I will correct that. Kotlin helps prevent these types of mistakes. From asking the LLM, I either branch to calling the tool or finish the strategy. After calling the tool, I will forward the tool results back to the LLM, which are already compatible since it provides and receives the tool result. Finally, the sending result is a hanging node. If I run this code, it will throw an exception indicating there is no path from this node to finish. I need to copy this part as well. Let me… Why is my PC freezing again? Sorry, I have to reshare the screen one more time. |
Slide 39 — 58:20 (watch)
 | In the meantime, I can elaborate on the default strategy implemented by Varim. This strategy is essentially the default approach, with the only exception being that it includes some additional configuration parameters. In its simplest form, the default strategy is just that. |
Slide 40 — 1:01:26 (watch)
 | The graph includes a tool-calling loop. In the case of an assistant message, it terminates the graph and returns the final assistant message. Similar to asking the LLM, the Ask LLM function produces a message response, which is akin to sending a result, as both involve sending information to the LLM. From sending results, you can branch either to calling the tools or to the finish node. This is how the default out-of-the-box strategy operates. Now, let me illustrate how to implement a similar node. For this example, I’ll create a node that doesn’t add anything to the history but simply calls the LLM. Inside the node, it functions from an input type to an output type, but there is also a receiver type available. Within this context, various elements are accessible, including configuration, environment, LLM, strategy name, and agent ID. Among these, the LLM object is crucial, as it contains the tools linked to your LLM, the prompt with the message history, and other parameters. Every time you execute the node, the context, including the list of messages, gets updated. You primarily focus on the input and output, but you also have access to the entire context, allowing you to request the LLM without altering anything. To do this, you would need to acquire a write session, as the LLM is a shared object with mutable state. You can then request the LLM, which will return the message response. For instance, if I want to request the LLM with the current state, I would save the response in a variable. To update the prompt, I could copy the existing messages and use a DSL method to update it. The assistant message from the LLM will then be appended at the end, regardless of the type, treating it as an assistant message. Although this node may seem trivial, it demonstrates how strategies allow you to control interactions with LLMs. In future sessions, we will explore these concepts in greater depth. For now, I will stop sharing this part of the screen and move on to the final slide of my presentation. |
Slide 41 — 1:04:28 (watch)
 | We can go straight to the Q&A. |
Slide 42 — 1:04:56 (watch)
 | The first question I see is, and thank you, everyone, for your warm comments about how great Cook is. We are always happy to hear that. Thank you very much. |
Slide 43 — 1:05:30 (watch)
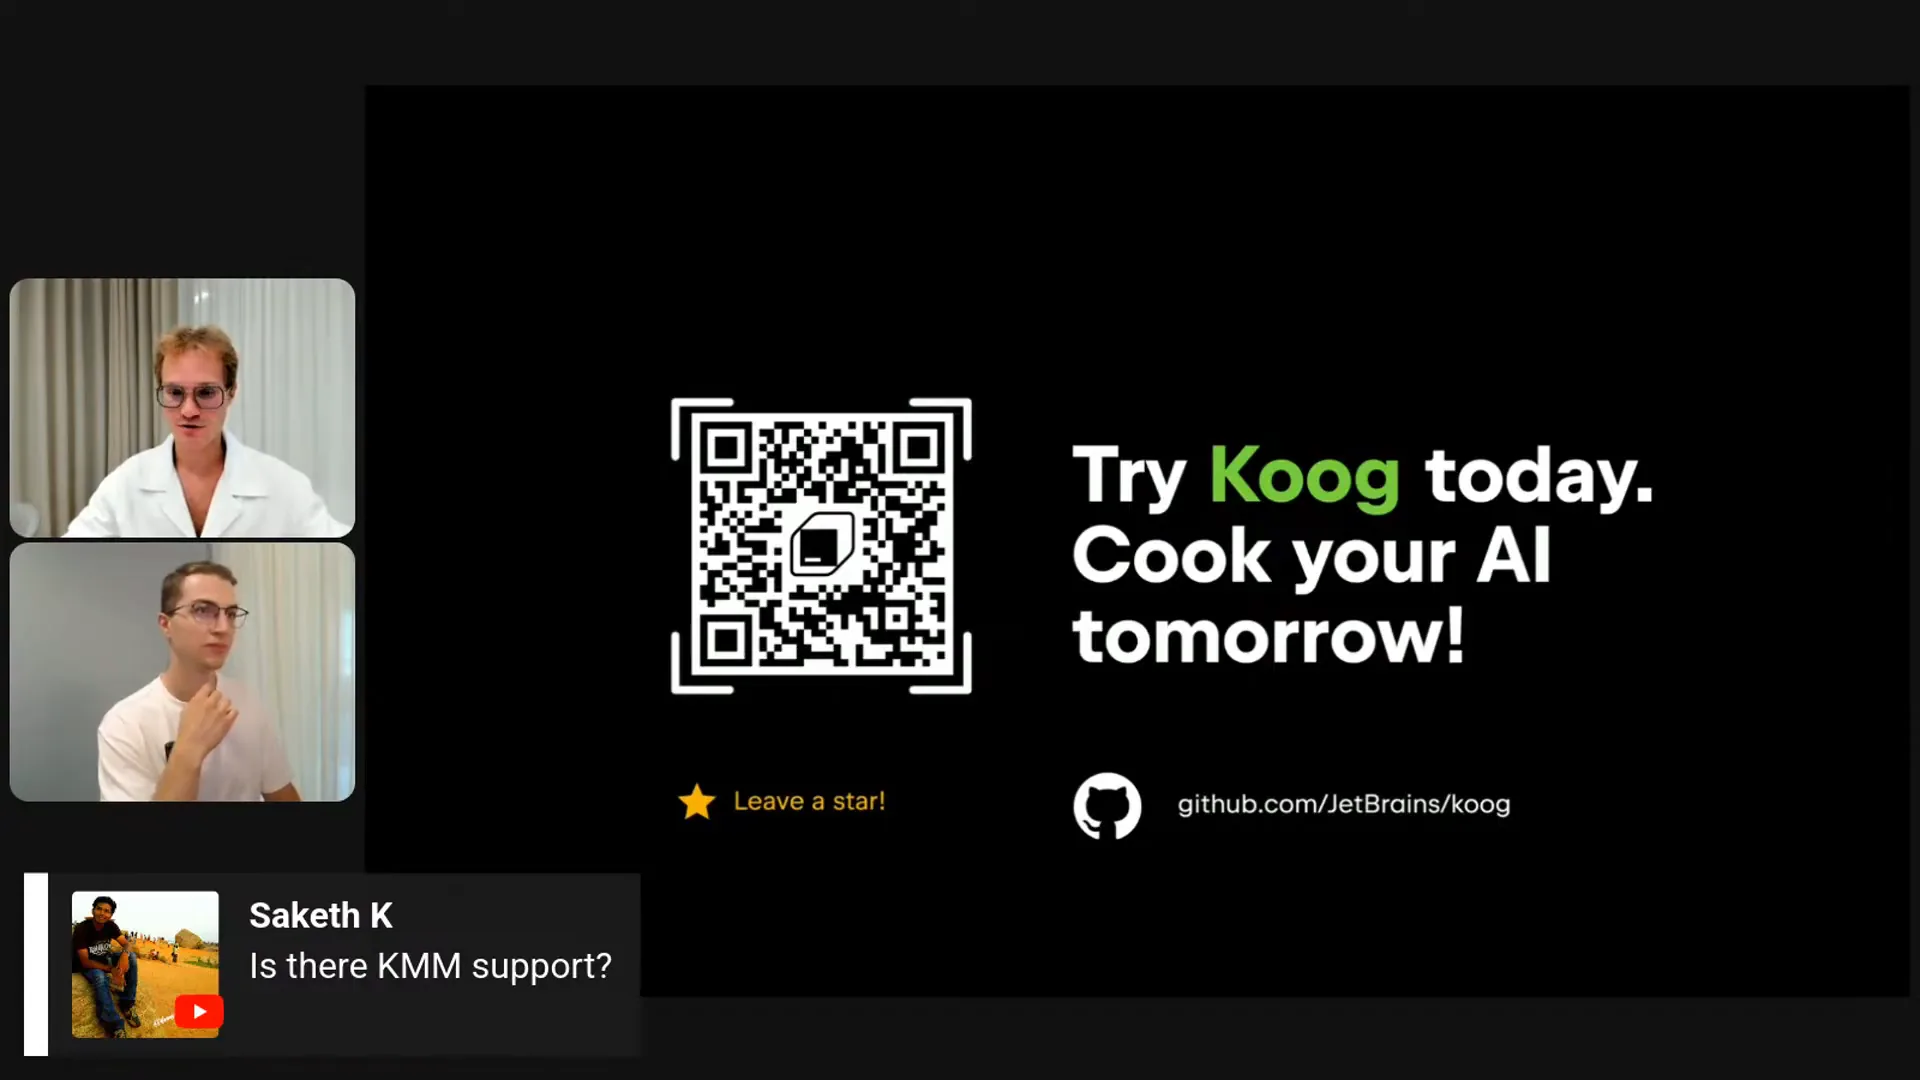 | The first question is whether there is KMP support. Yes, there is. Cook supports JVM, JS, and WebAssembly. In the upcoming release, expected in about one to one and a half weeks, we will also have iOS support. We are exploring additional targets as well. We already have a pull request adding iOS support, thanks to the fantastic community that contributes to the development of Cook. |
Slide 44 — 1:06:20 (watch)
 | Cook is free to use; there is no subscription plan. You can download it and use it without charge. If you scan this QR code, it will take you to the GitHub page, where Cook is open source. This means you can not only use Cook but also modify and incorporate it into your own proprietary code. Many users are already doing this, contributing to the project. We receive numerous contributions from both our internal team at JetBrains and external contributors from the community, which is fantastic. |
Slide 45 — 1:07:20 (watch)
 | Cook stores context over time, maintaining an increasing history. This allows for the preservation of context across user sessions. If an agent crashes, the feature called Persistency enables restoration from the same point. In upcoming sessions, we will discuss creating smarter and more fault-tolerant agents that implement this feature. For more information, please visit our documentation available on GitHub. I will skip questions that have already been addressed. |
Slide 46 — 1:08:58 (watch)
 | To use the platform for banking applications, you need to add the Cook dependency published to Maven Central. You have a couple of options: you can use the module dependency, which is common for many libraries, or the all-in-one dependency, which is simply "Cook-agents" followed by the version. Add this to your Gradle or Maven configuration, and you can use Cook like any other library, such as coroutines. The only specific setup required is a connection to the LLM. You will need a token for OpenAI, Anthropic, Gemini, or DeepSeq, or you can self-host a model like Llama on your backend or local machine. Additionally, we have a dedicated examples module in our repository with many standalone examples. You can take any example, insert your API key, and run it. We aim to provide a wide range of examples to help you familiarize yourself with the various capabilities of Cook. |
Slide 47 — 1:12:04 (watch)
 | Moving on to the next question about examples. One question is how to integrate an agent into an Android app and transform the agent's response into an appealing UI, such as displaying the answer in a card format. We have a demo Android application example in our repository, which is a standalone project that you can open in Android Studio or IntelliJ IDEA. This example demonstrates how to integrate KUK into both existing and new Android applications. However, transforming the answer into a visually appealing UI is somewhat outside the scope of KUK. With KUK, you can retrieve the response content as text and use structured output to obtain results that can be parsed into classes, rather than just strings. With this structured output, you can create your own custom UI or utilize a library like Juni to help design it. The demo Android application was created using Juni, which excels at rendering composed UIs. Additionally, if a KUK agent or any AI agent needs to call a critical tool—such as in a banking app where user confirmation is required—you have several options. You can incorporate this logic into the event handler, as shown previously, by handling events and printing the output. Alternatively, since tool calls are suspend functions, you can send a message to a coroutine channel and wait for user confirmation. You can also include UI elements as part of a tool call. Another interesting idea is to personalize UI using AI agents. You can describe UI components as JSON, and LLMs are effective at generating these JSON structures. By providing context about the user and their workflow, the LLM can create various types of windows, buttons, and messages, allowing for a highly personalized UI for each user. We would be excited if someone implemented this idea and submitted a pull request to add it to our examples. |
Slide 48 — 1:14:20 (watch)
 | The next point primarily involves Andrei. Do we have a link to the code you showed us? I will upload the web search agent to the examples module so that everyone can access it, run it, and experiment with it. It isn't available yet, but I plan to do this today or in the next few days. Stay tuned. Thank you. |
Slide 49 — 1:14:54 (watch)
 | I want to address the next question because it seems interesting. Andrei, do you have any idea what is meant by "handoffs" here? I actually don't know, and I wanted to ask you. Unfortunately, I don't have an answer either. If someone could provide more context in the comments, we would be happy to address this question. |
Slide 50 — 1:16:10 (watch)
 | We can output to Markdown using a helper class, and there are a few options available. One option is structured output, which currently supports only JSON format. This feature is part of a strategy within the agent, allowing you to force the agent to output in a specific format. Additionally, we have a streaming option specifically for Markdown output. During our work on agents at JetBrains, we found that Markdown is effective for streaming uniform types of information. You can ask the LLM to stream output, which you can then parse and use to call tools. There is a streaming Markdown DSL available for this purpose, so please check our documentation. We will also cover this topic soon in our livestream series. |
Slide 51 — 1:18:46 (watch)
 | Thank you, Andrey, for mentioning that. We invite you to join our official Slack channel in Kotlin, where we provide support. You can also open an issue on GitHub or start a discussion. This question is interesting: can you adjust the tools available to the agent during iterations? For example, if the agent calls tool A, can we then provide tool B afterward? Currently, due to how LLMs work out of the box, this isn't available. However, by building a custom strategy, you can implement this logic. When I demonstrated how to change the LLM object or the current representation in the agent state from within a node, you can include this logic there. The tools parameter is transformable from a write session, allowing you to assign it to a new set of tools after an event occurs. Additionally, Andrey might want to comment on the subgraph with task, which can also change the tools. While this is slightly different from the original question, it's a powerful component of our framework that we will cover in the next livestream. It allows you to run a dedicated subgraph with a specific set of tools, limiting the tools to only those needed for a particular task. You can get the output and pass it to the next subgraph, chaining components to create a comprehensive strategy for your agent. If your workflow involves multi-step processing, you should definitely check out the subgraph with task, as it provides sensible presets out of the box. Thank you for your understanding, and I apologize for not being able to answer all your questions. Thank you to everyone helping in the chat. If you have any further questions, please join our Slack channel to ask directly, or suggest a hands-on discussion. Stay tuned for our next livestreams. Thank you, everyone. |