75 slides extracted.
Slide 1 — 0:22 (watch)
 | Welcome, everyone. Thank you for joining the workshop. It's great to see such a full house today. Quick show of hands: who here loves Claude Code? You're in the right place! It's lovely to meet you all. |
Slide 2 — 0:46 (watch)
 | My name is Arno, and I am an architect on the Applied AI team. Today, I will explain how we Claude Code at Anthropic. We will conduct a workshop where you can code along and earn some credits. A QR code will be available shortly, so please be sure to grab that. There will also be people around to assist you with any technical difficulties you may encounter. Is there anyone in this room who hasn't used Claude Code before? Great! There’s plenty more to explore, and I'm glad you're here. Let's get started. Let me get my clicker. Ah, yes. Excellent. |
Slide 3 — 1:46 (watch)
 | Please grab the QR code to set yourselves up. There will also be a repository that you can clone, which contains three phases for us to work through. There’s an interesting verification setup that you can follow along with, and it’s quite detailed, so you may want to explore it further later. What we’re covering today is based on the version of the talk that Tariq gave in San Francisco about a week and a half ago. Who here follows Tariq on Twitter? Fantastic. |
Slide 4 — 2:42 (watch)
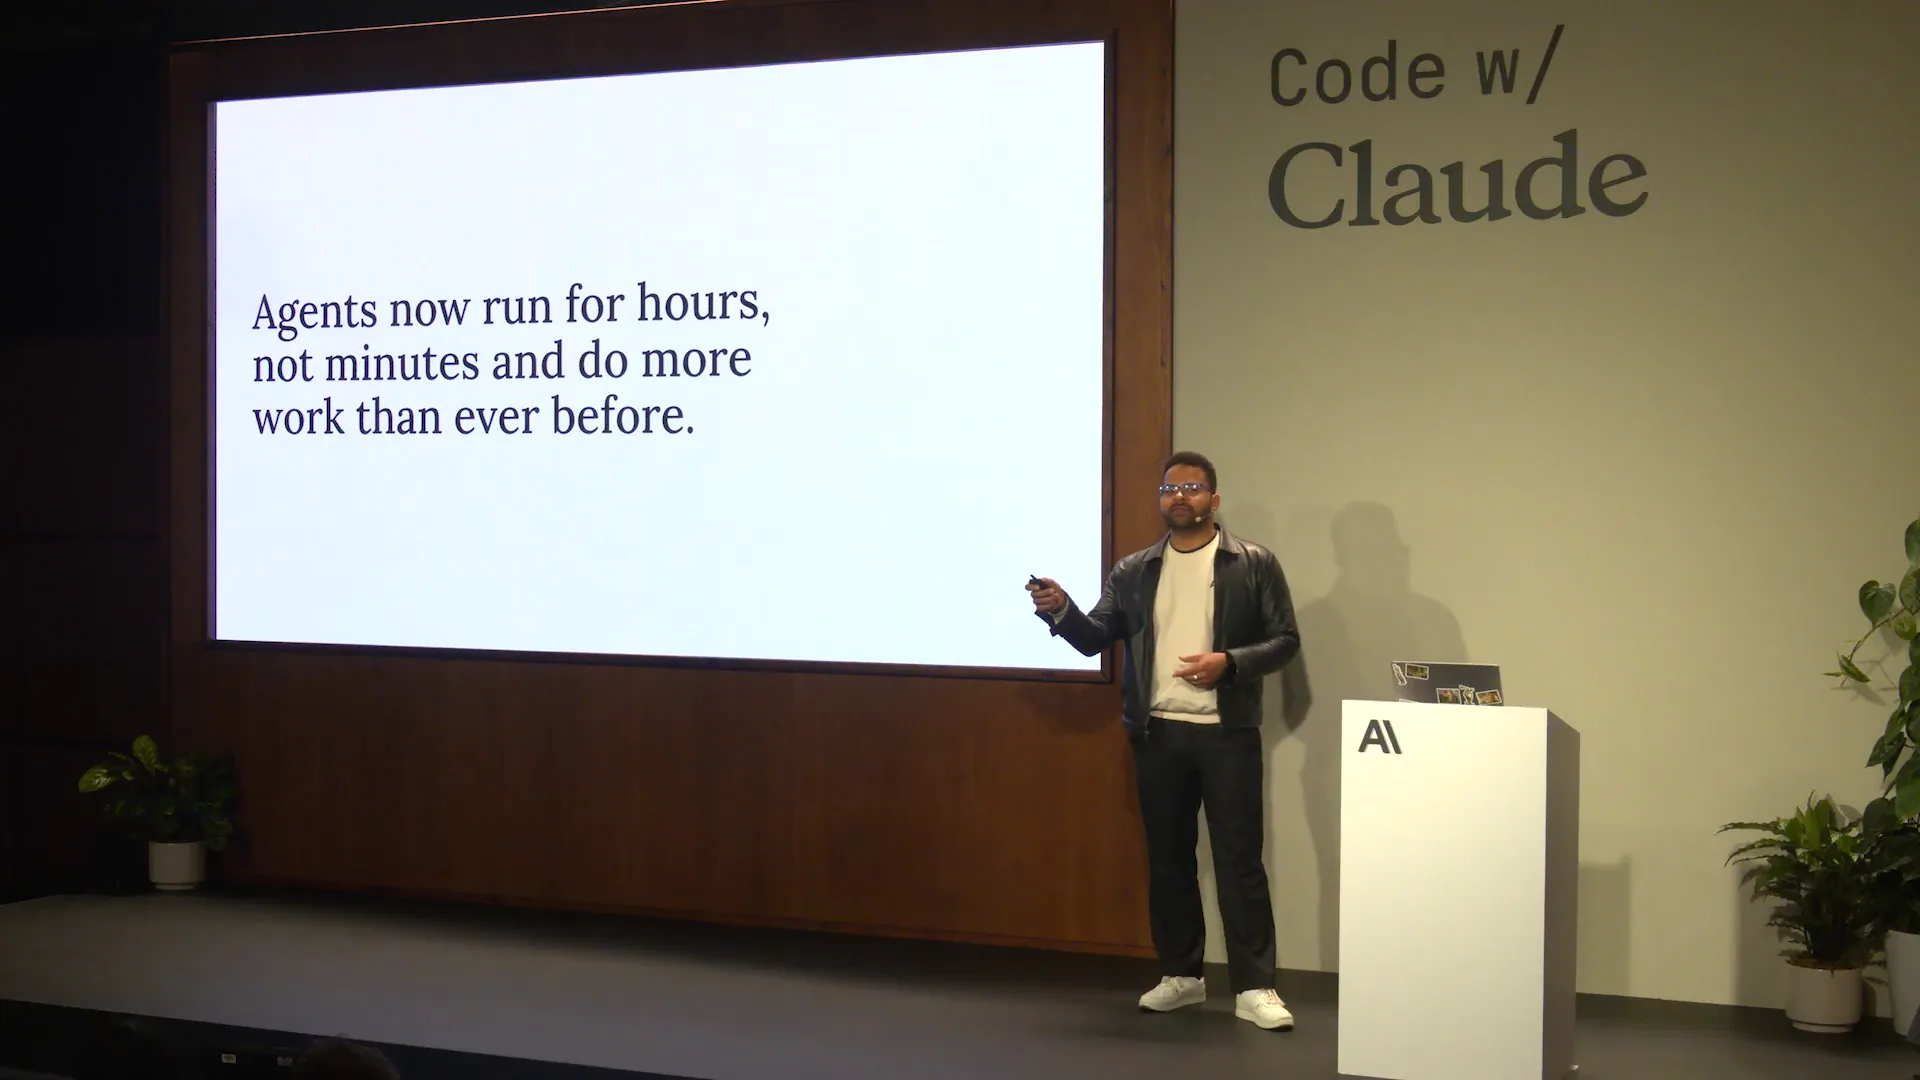 | He published a blog post titled "The Unreasonable Effectiveness of HTML Files," advocating for a shift from markdown files to HTML. We will demonstrate some of that today, and there's a repository available for you to explore throughout the week. Currently, agents are becoming increasingly capable, which is a result of advancements in model capabilities. As models improve, agents can operate for longer periods and handle more complex tasks. However, this necessitates a change in our working habits. Today, we’ll discuss how to adapt your workflow with cloud code to maximize its potential. Allowing your agent to run for extended periods can lead to excessive token usage if it makes mistakes, so it’s crucial to mitigate that risk early on. The idea is to incorporate more verification typically performed by humans into an HTML file, as it provides a richer and more user-friendly way to interact with the content your agent will generate. We’ll explore how this approach works. |
Slide 5 — 3:44 (watch)
 | There are many resources available regarding agents that are worth exploring. Our webpage features numerous engineering blogs, as well as standard blogs, all of which contain valuable information. Topics include harnesses and long-running agents, which are important to understand. Today, we will focus on three levels of discussion: one that is more basic, one that is more advanced, and one that is quite interesting and will be more in-depth. |
Slide 6 — 4:10 (watch)
 | The first point is that as models become more capable, you should resist the urge to constrain them. Who here has heard of the "bitter lesson" by Richard Sutton? Great. Fantastic. |
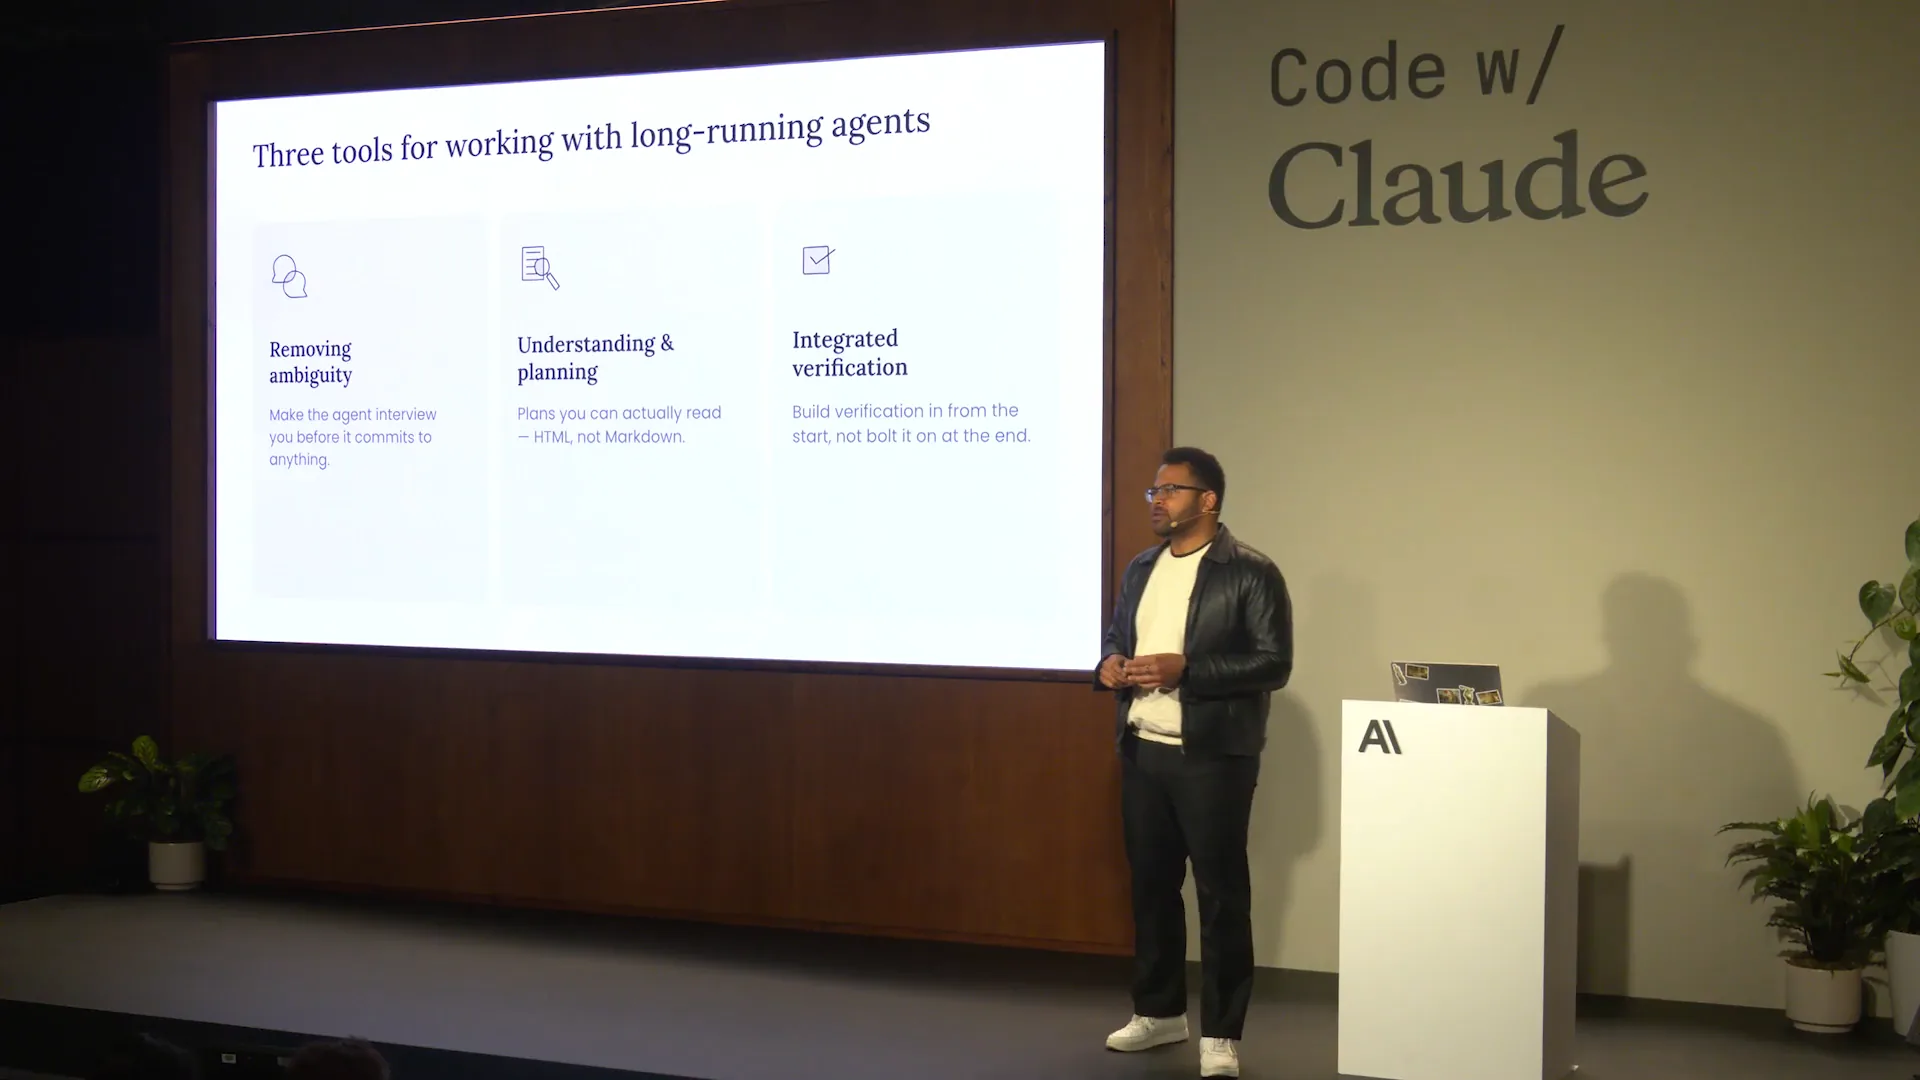
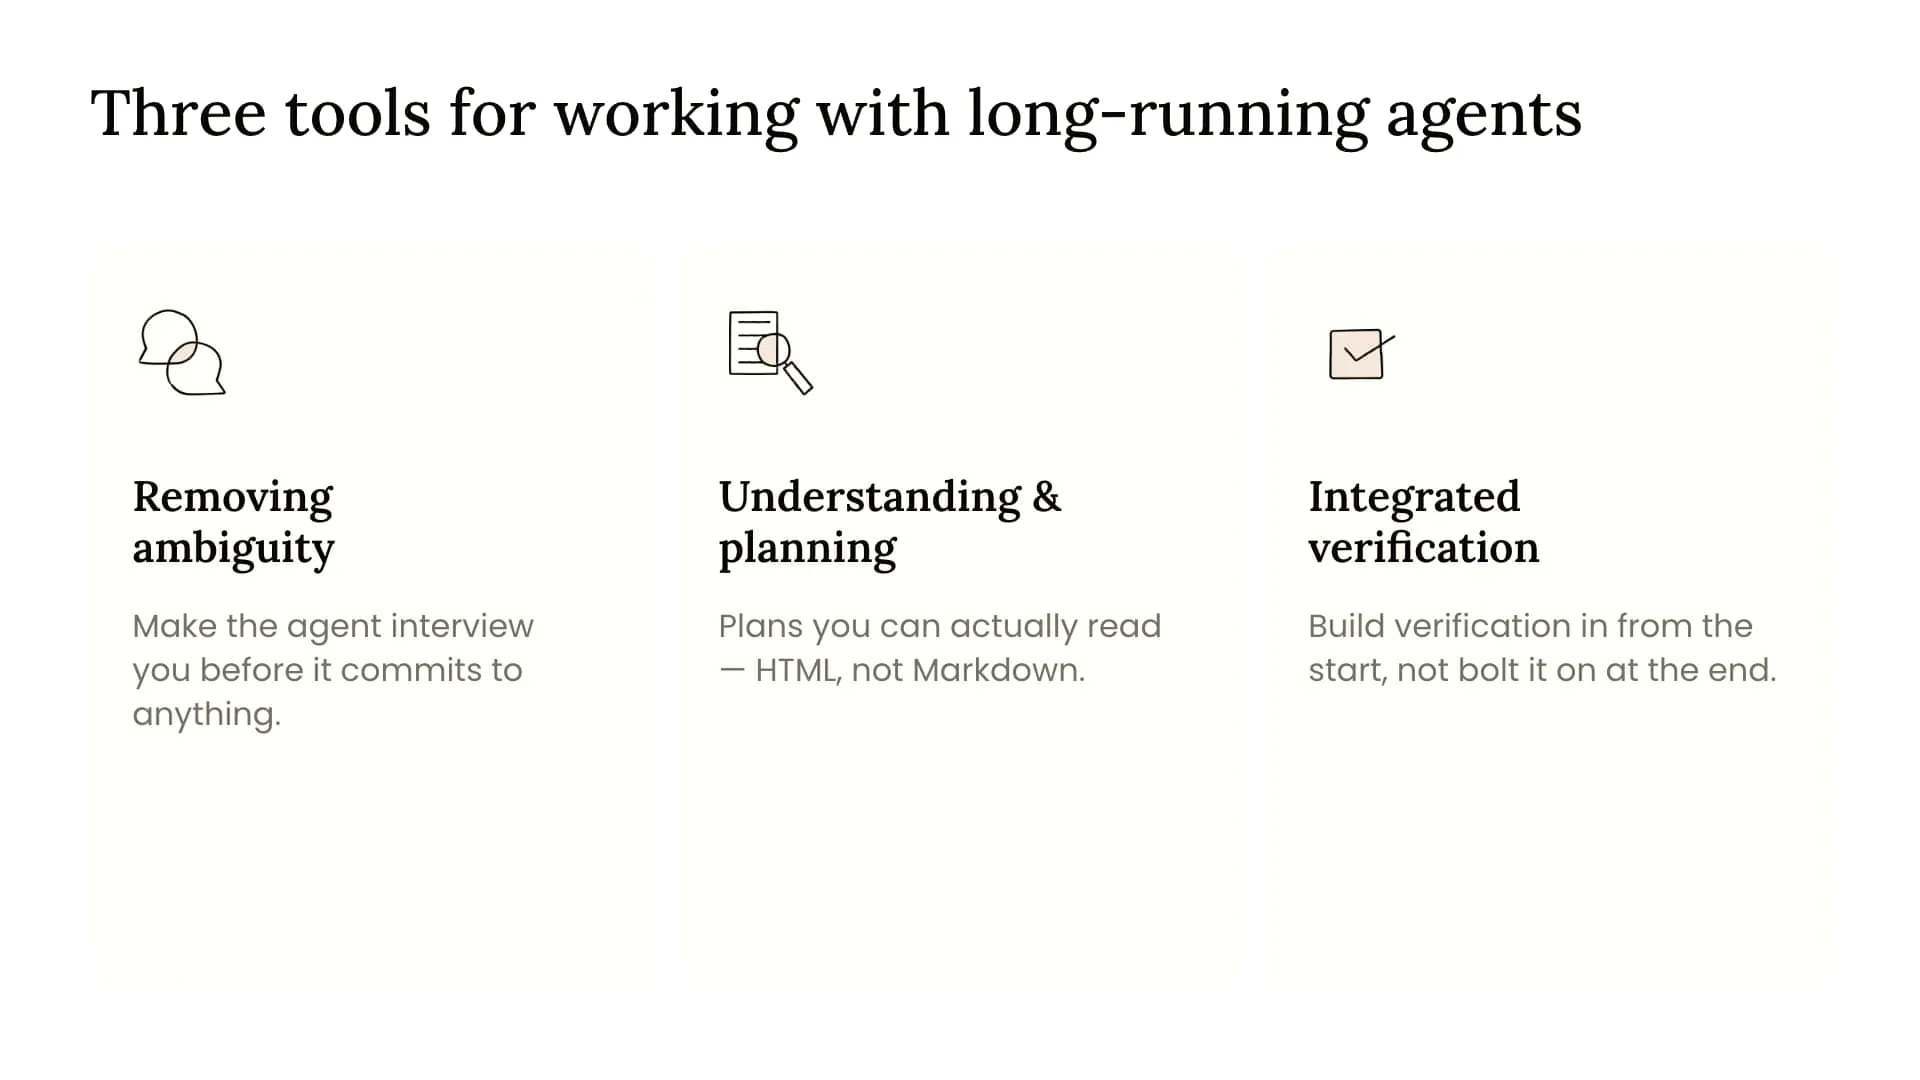
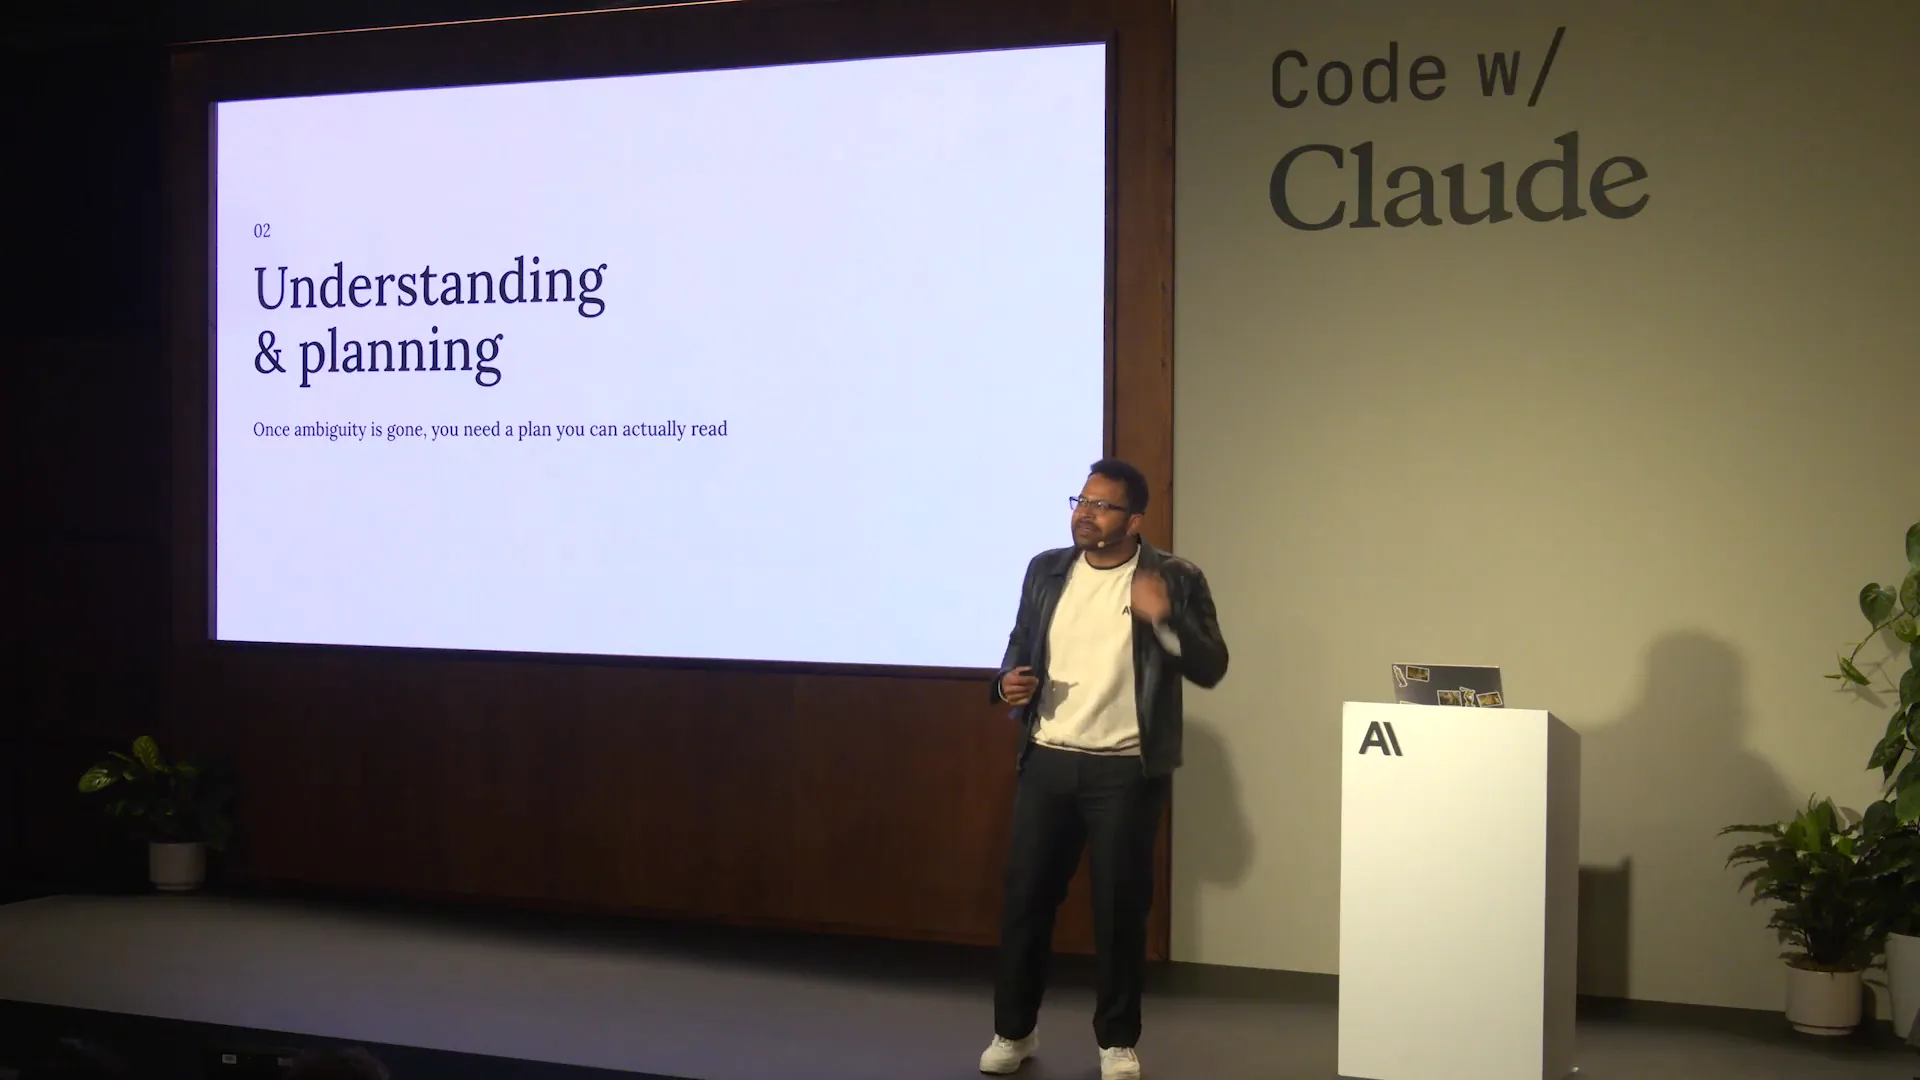
Slide 7 — 5:20 (watch)
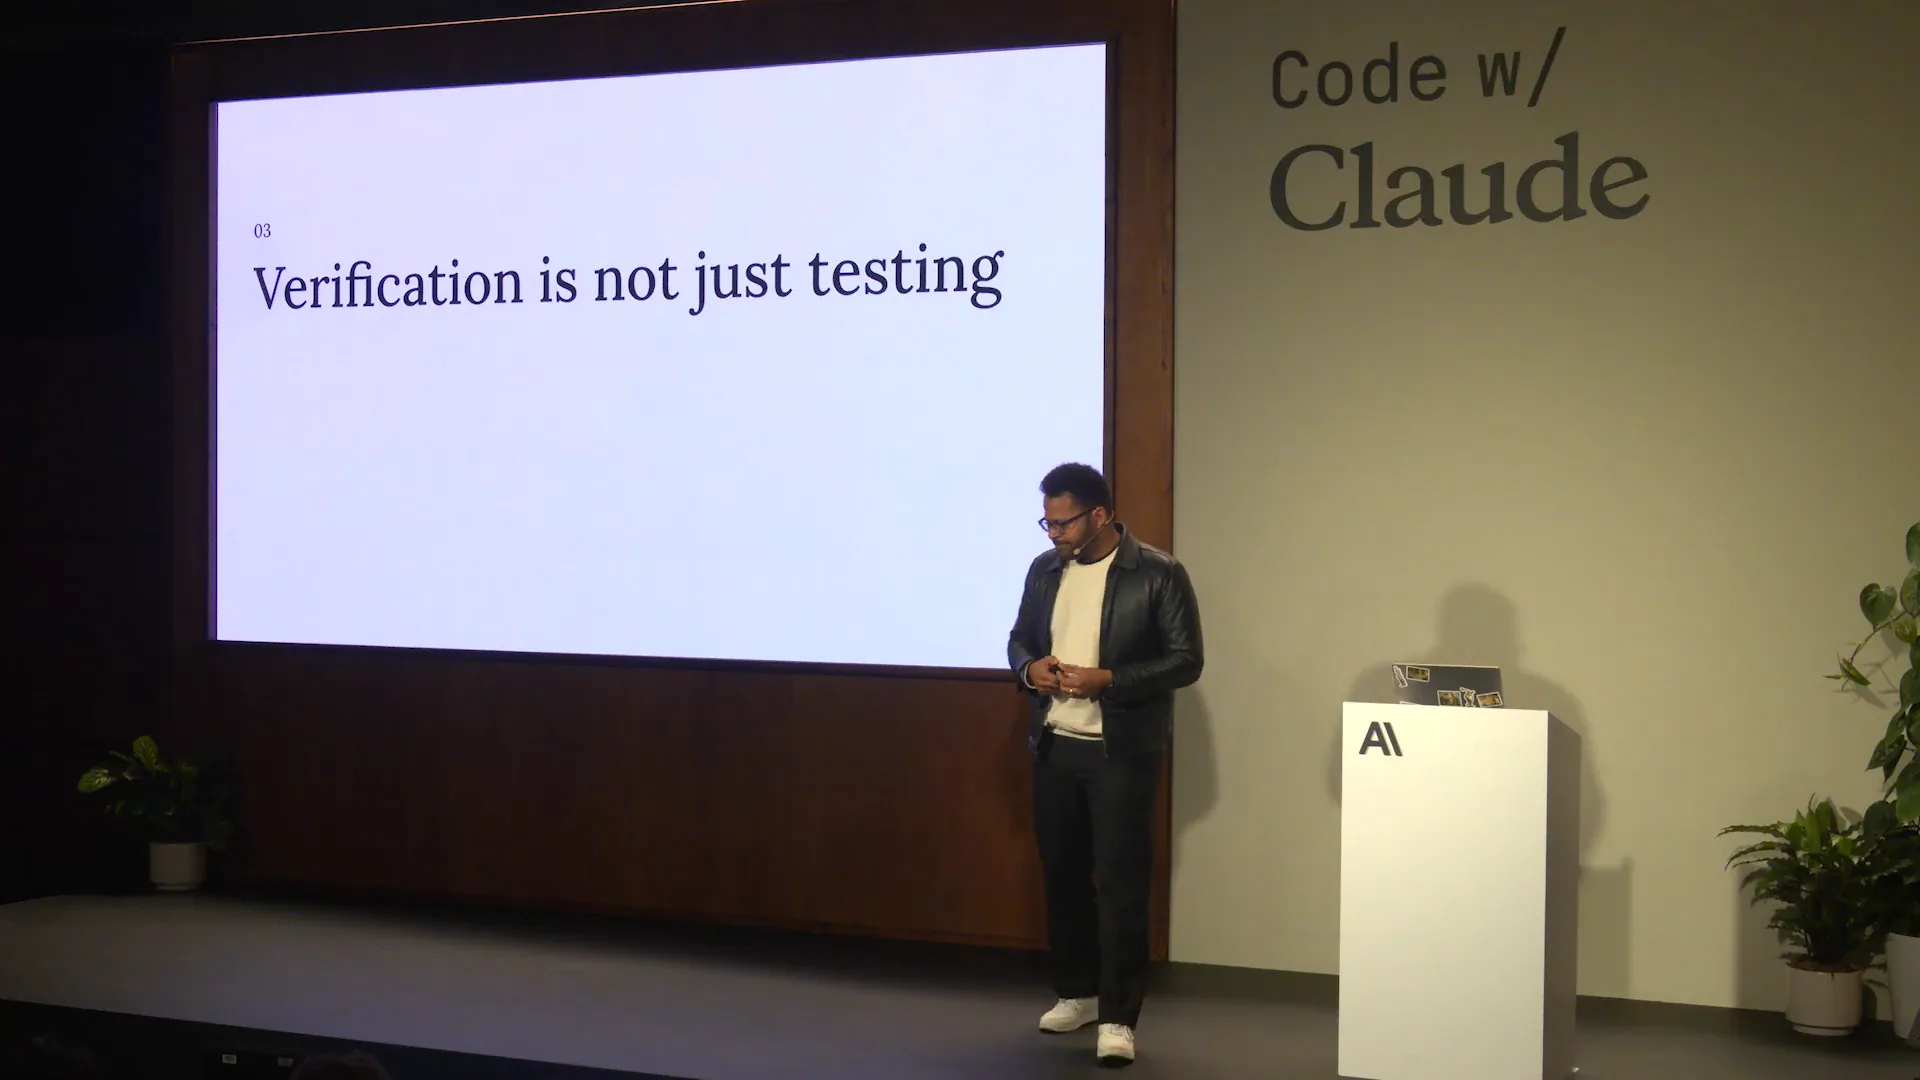
 | For those who haven't raised their hands, Richard Sutton is the father of reinforcement learning, and if you're reading a book on the subject, it's likely authored by him. His main idea is that while you can spend time trying to hard-code and constrain a system with your human capabilities, ultimately, providing more data and compute resources yields greater capability than any constraints you could impose. The models are becoming increasingly capable, and you should recognize that they are likely better at extracting requirements from you than you are at defining them. Just as users often struggle to articulate their needs, you may know what you want when you see it, but Claude is probably more adept at drawing out your requirements than you are at specifying them. This leads us to consider how to remove ambiguity and allow Claude to prompt and interview you effectively. We used to document everything in Markdown files, and while we still do, a colleague once described Markdown as the lingua franca of the AI-native software development life cycle, which is quite poetic. However, this format can feel constrained and lengthy, making it difficult to read. We can condense more information into HTML files, which is our focus today. Additionally, we will discuss how to integrate verification into the process—not testing, but verification—so that the agent can perform it alongside a human or eventually headlessly. This is the direction we are heading, with agents taking on more of these tasks natively. |
Slide 8 — 7:04 (watch)
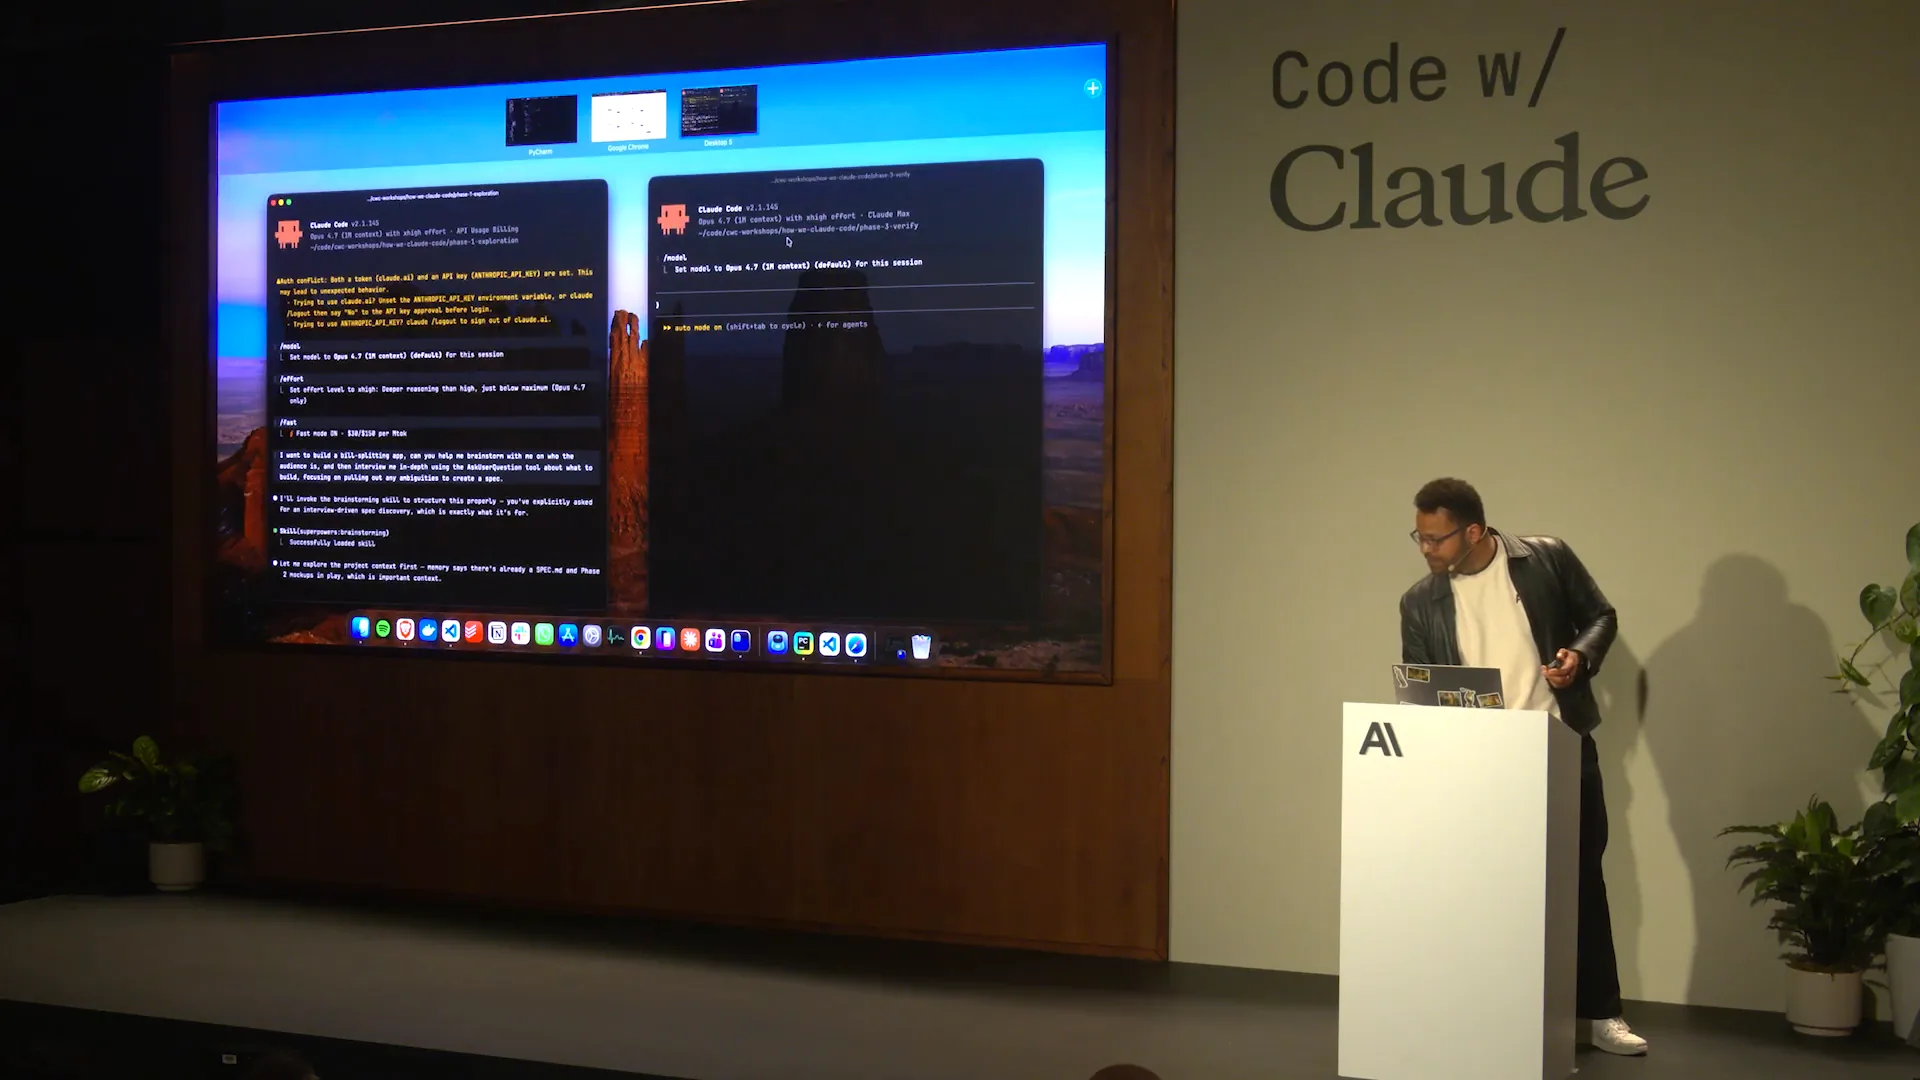
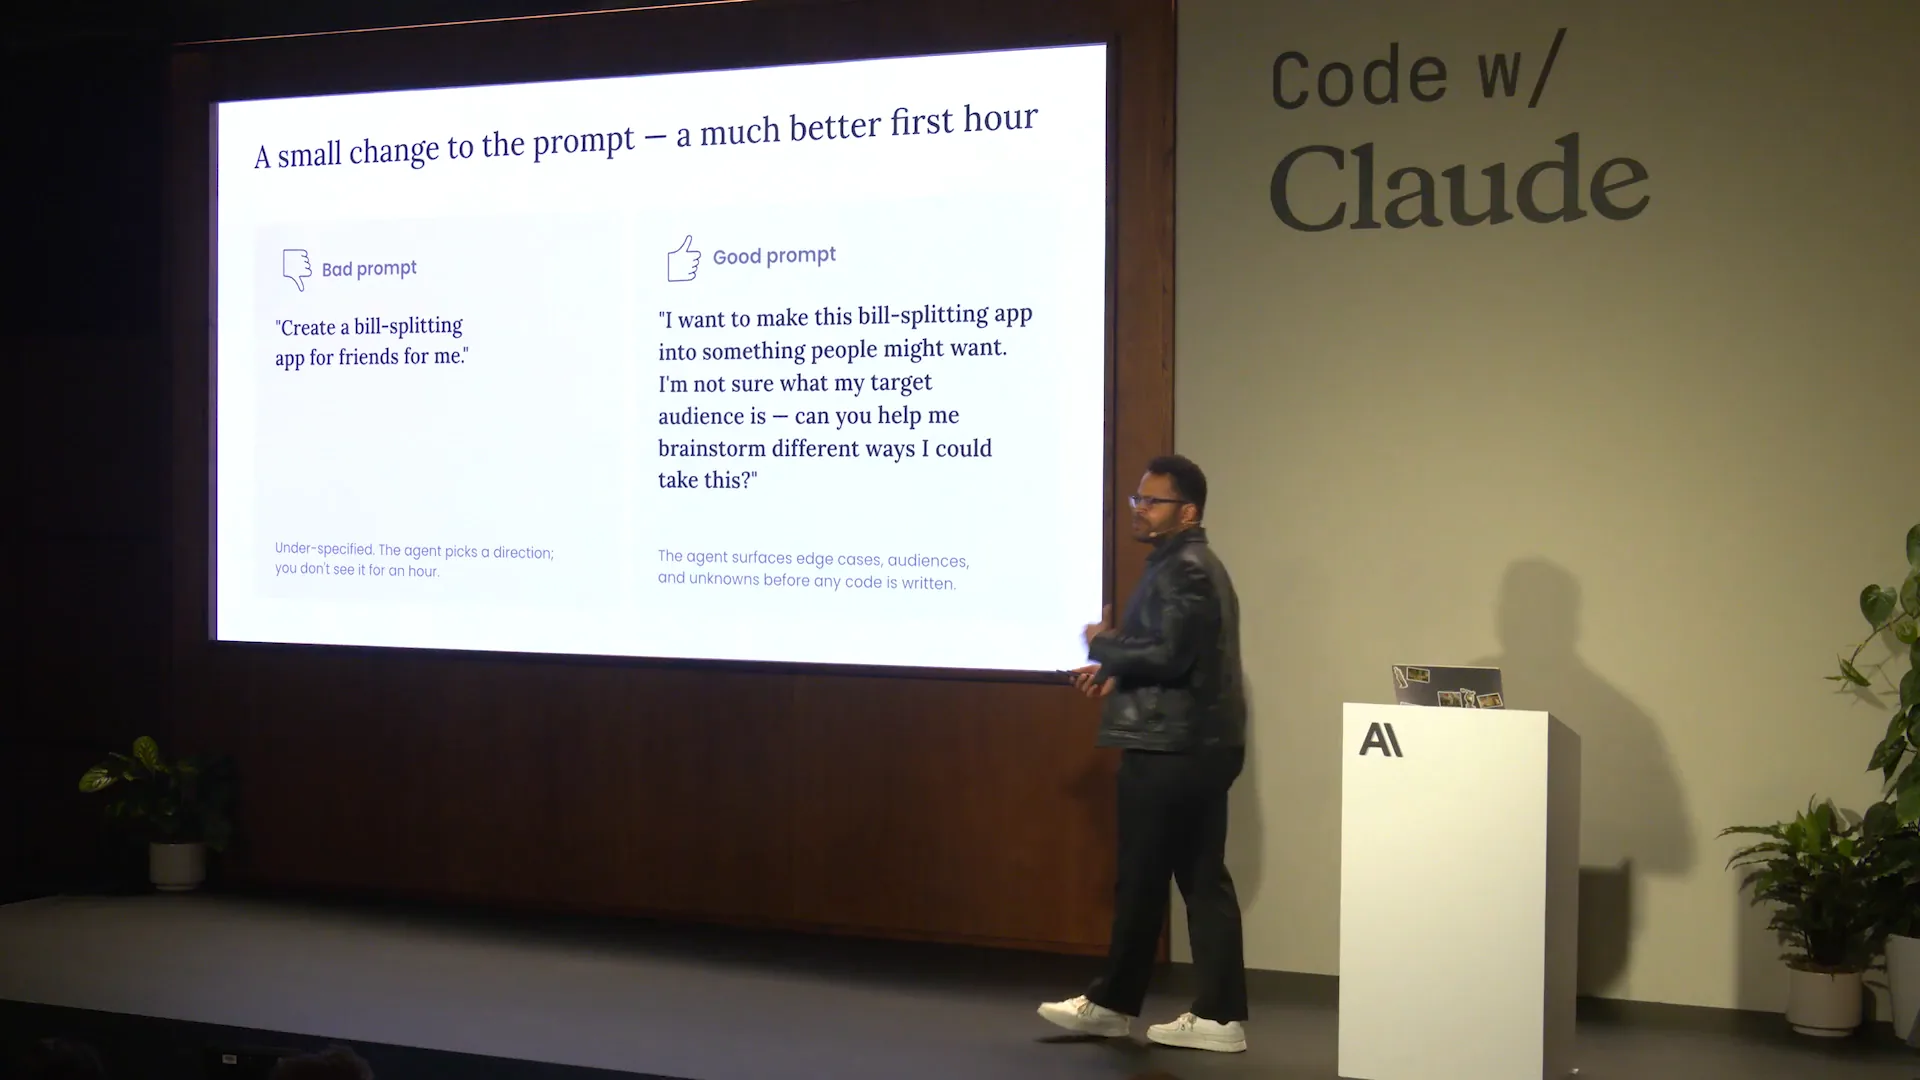 | How can you set up the artifacts you produce to be natively testable and verifiable? Let's go through an example. Has everyone had a chance to grab the QR code and set themselves up? Great. There will eventually be a link to the repository as well. For this example, let's say we want to create a bill-splitting app. It's simple: you go out with friends and want to find out who owes what. We can let Claude guide us through this process. I will demonstrate how to approach this and how to improve your prompting. Good prompting involves asking Claude to extract specific details from you. For instance, provide the relevant domains without overly specifying the outcome. This approach encourages Claude to focus on the areas of interest rather than just asking for a vague improvement, like saying, “make it better.” Many users of Claude Code simply type “make it better,” which is not effective prompting. Instead, focus on the audience or suggest an open-ended way to respond to the question. This will prompt Claude to engage in an iterative interview process with you. |
Slide 9 — 7:56 (watch)
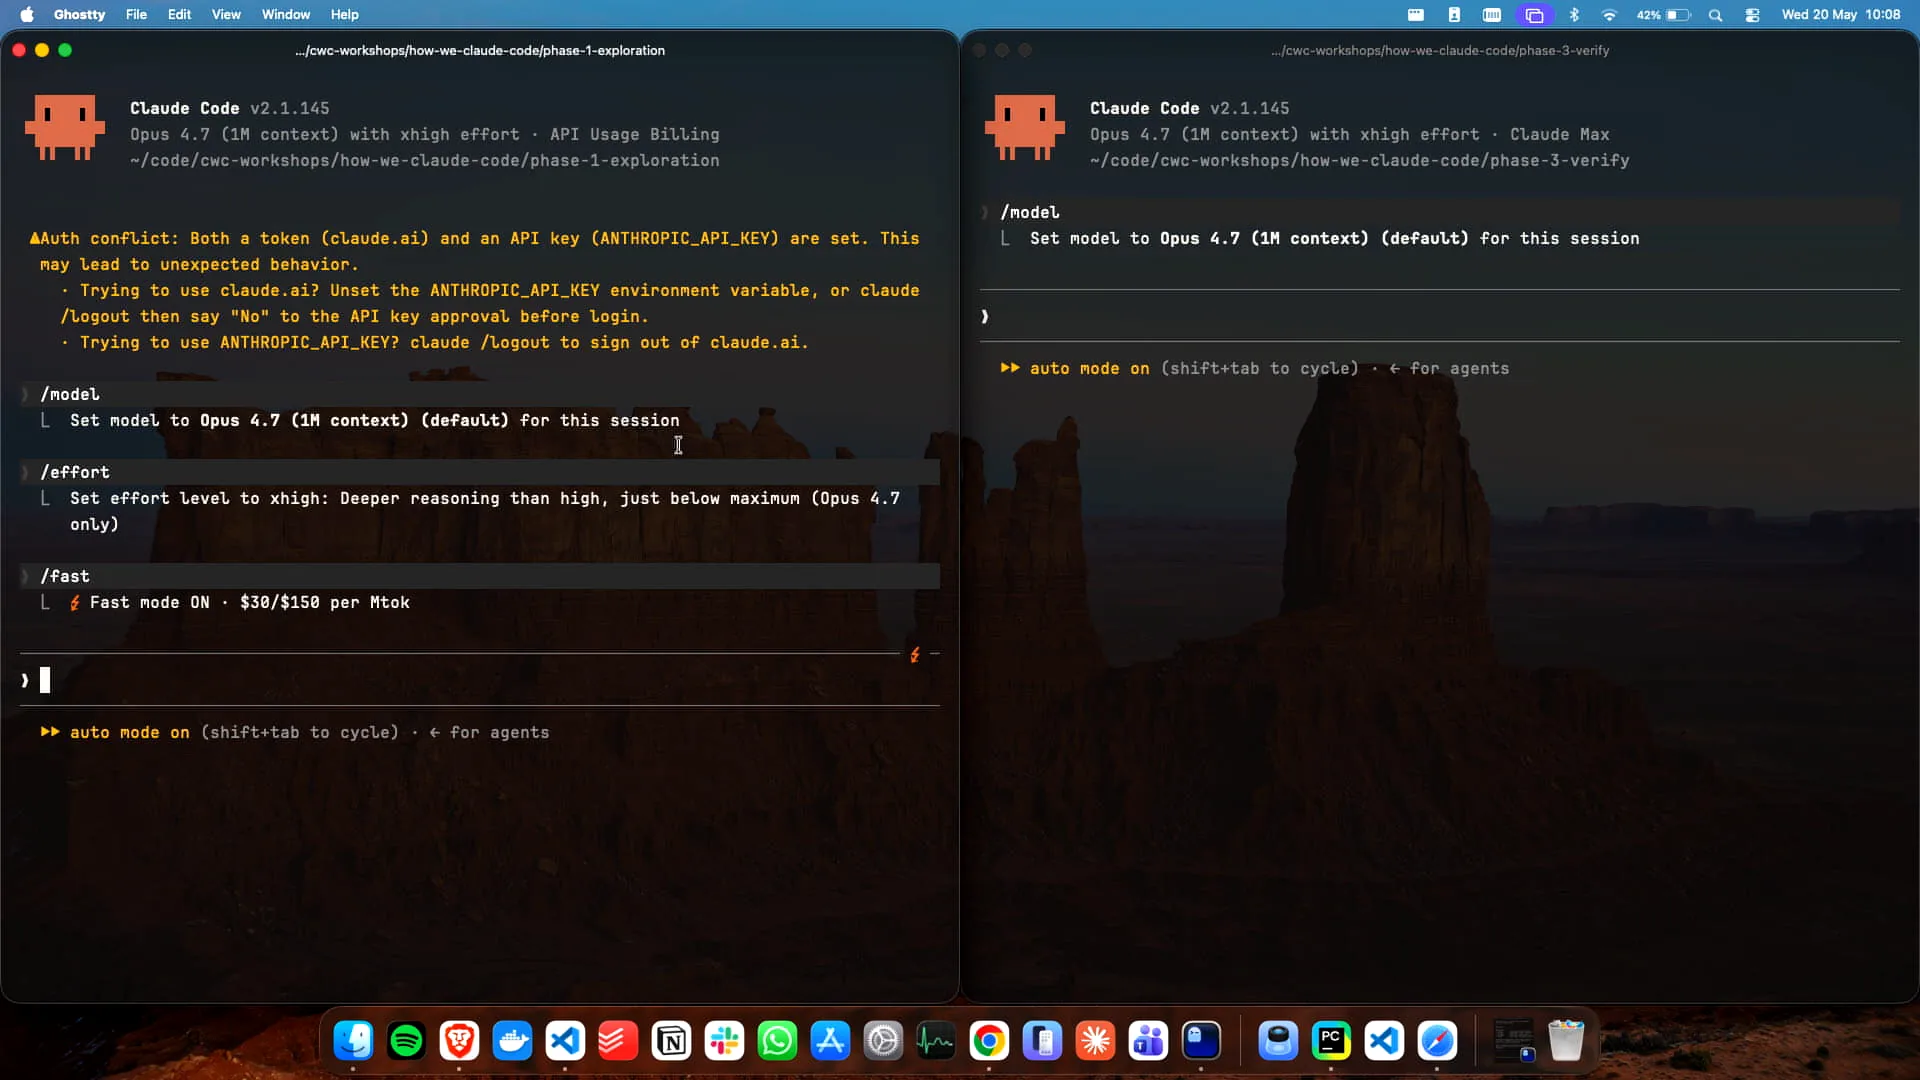 | I have two instances of Claude open here. How many of you have used fast mode? Not many, it seems. That's why I set it up. Now, how many of you use auto mode? I'm glad to see that most of you do. You really should be using auto mode. |
Slide 10 — 8:18 (watch)
 | If you're not using auto mode, I strongly recommend that you start using it. It simplifies the process significantly. |
Slide 11 — 8:42 (watch)
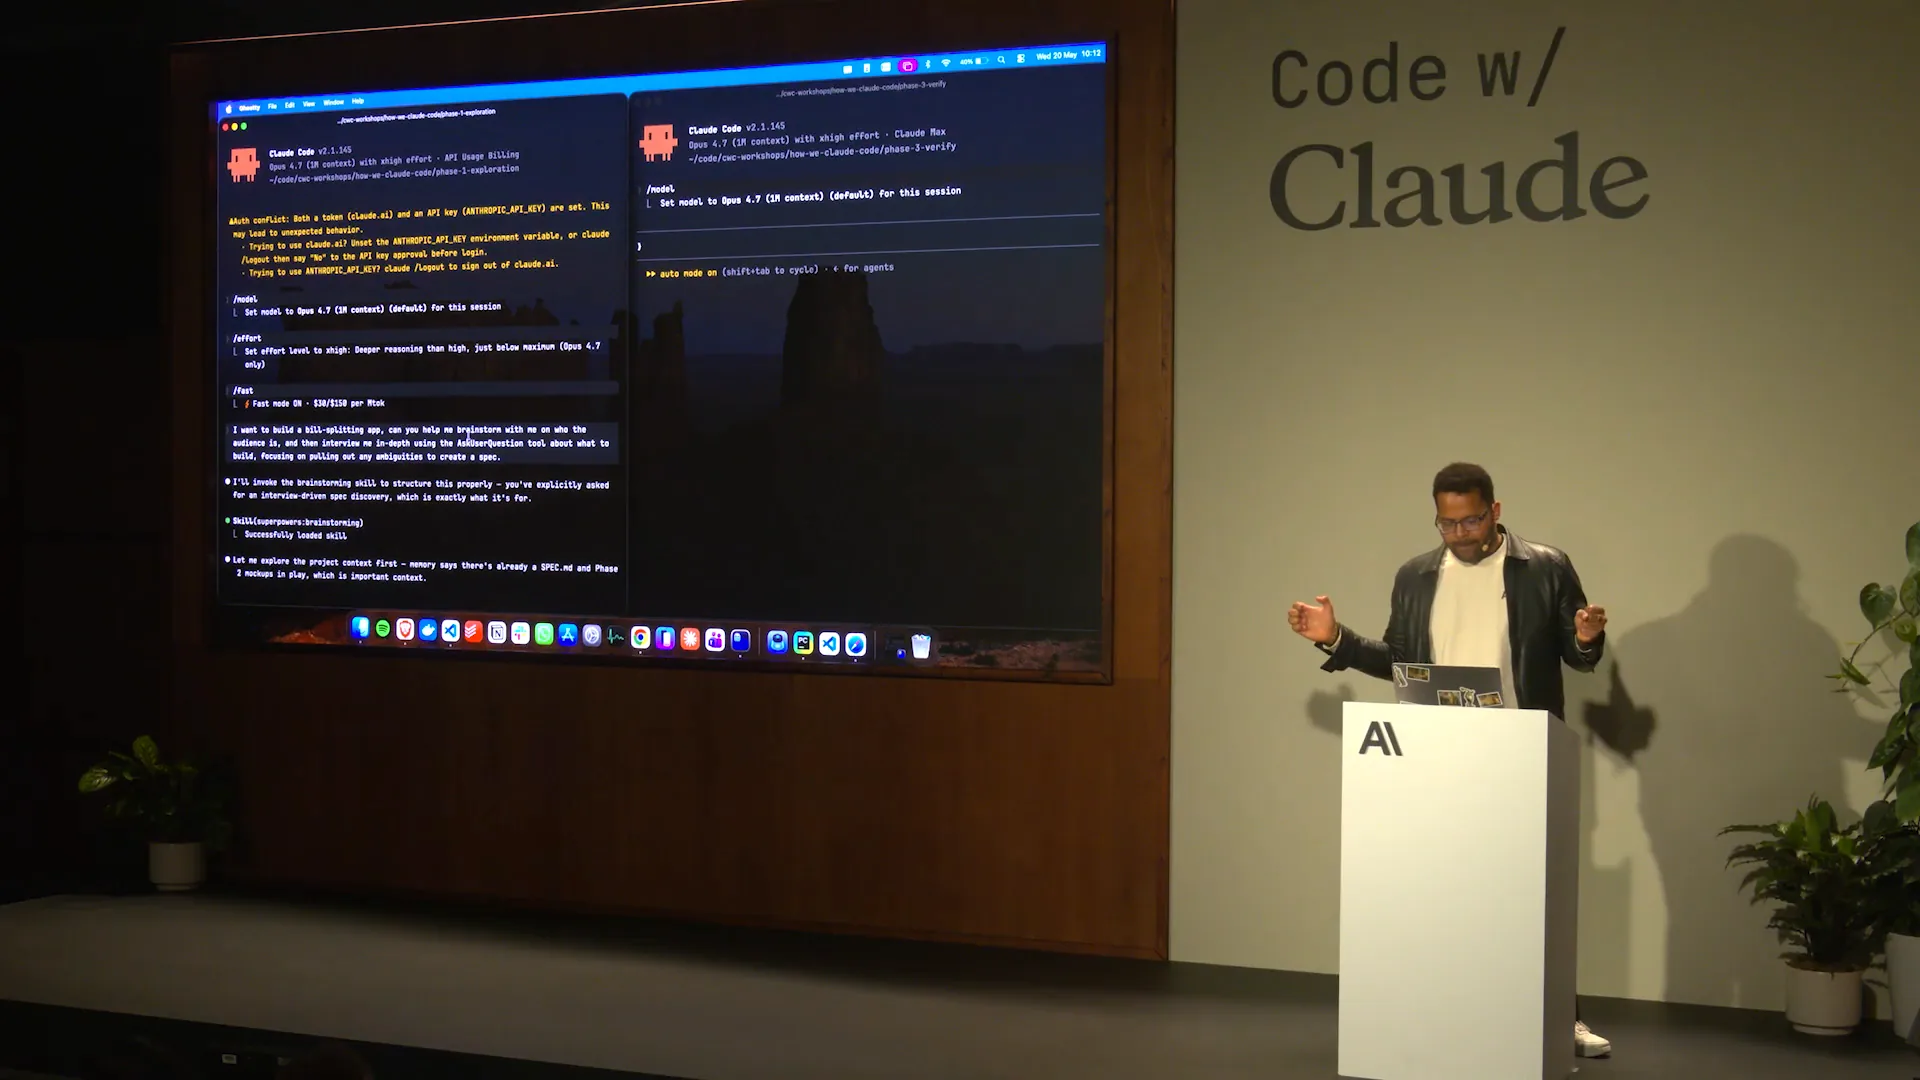
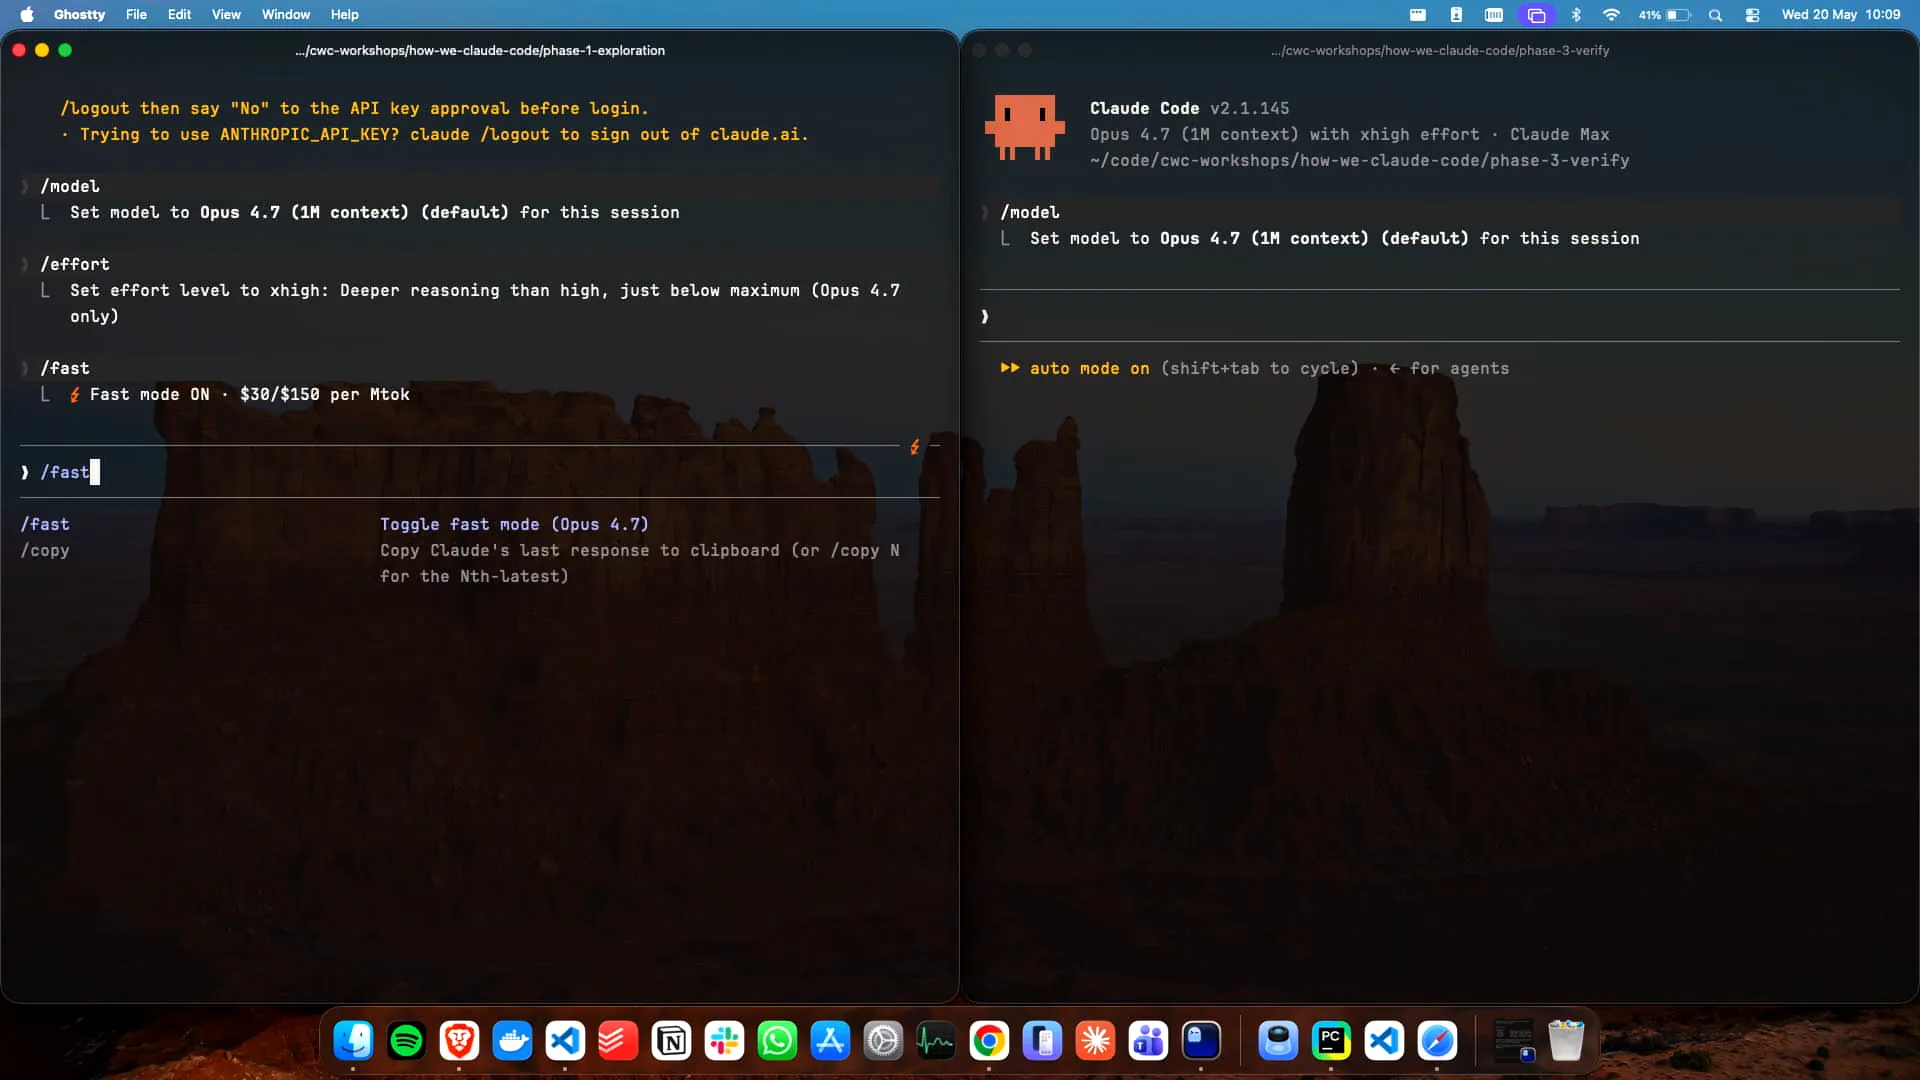 | Use auto mode; it's highly recommended. Who here is setting their effort parameter? Our recommendation is high, but you can also set max effort. Personally, I kept it at high for this. To clarify, we have the command `/effort` for the effort parameter, `/fast` for fast mode, which I have enabled, and then we have auto mode, which we access by using Shift + Tab. Auto mode is the best option. I will copy and paste my prompt into the build splitting app, and Claude will guide us through this. You can tab through the options like this. In my case, I want to specify "friends" as the audience, and there is no secondary audience. |
Slide 12 — 9:46 (watch)
 | The key aspect of the prompt is to encourage Claude to utilize the "ask user question" tool, which I demonstrated earlier. Once I submit those answers, it will generate the specification. By explicitly referencing the "ask user question" tool in my prompt, I trigger this workflow. The quality of the outcomes depends on how well the prompt is specified. This process will generate a specification that we can then use to explore various methods of building the app. |
Slide 13 — 9:58 (watch)
 | It will take a moment, so let's return to my slides. Could I please go back to the slides? |
Slide 14 — 10:14 (watch)
 | Great. Let's say we have a plan that generates a plan. We've answered some questions, and it's improving at extracting, turn by turn, what I actually want without requiring me to verbalize everything upfront. Now, I want to check if it aligns with my expectations. |
Slide 15 — 10:36 (watch)
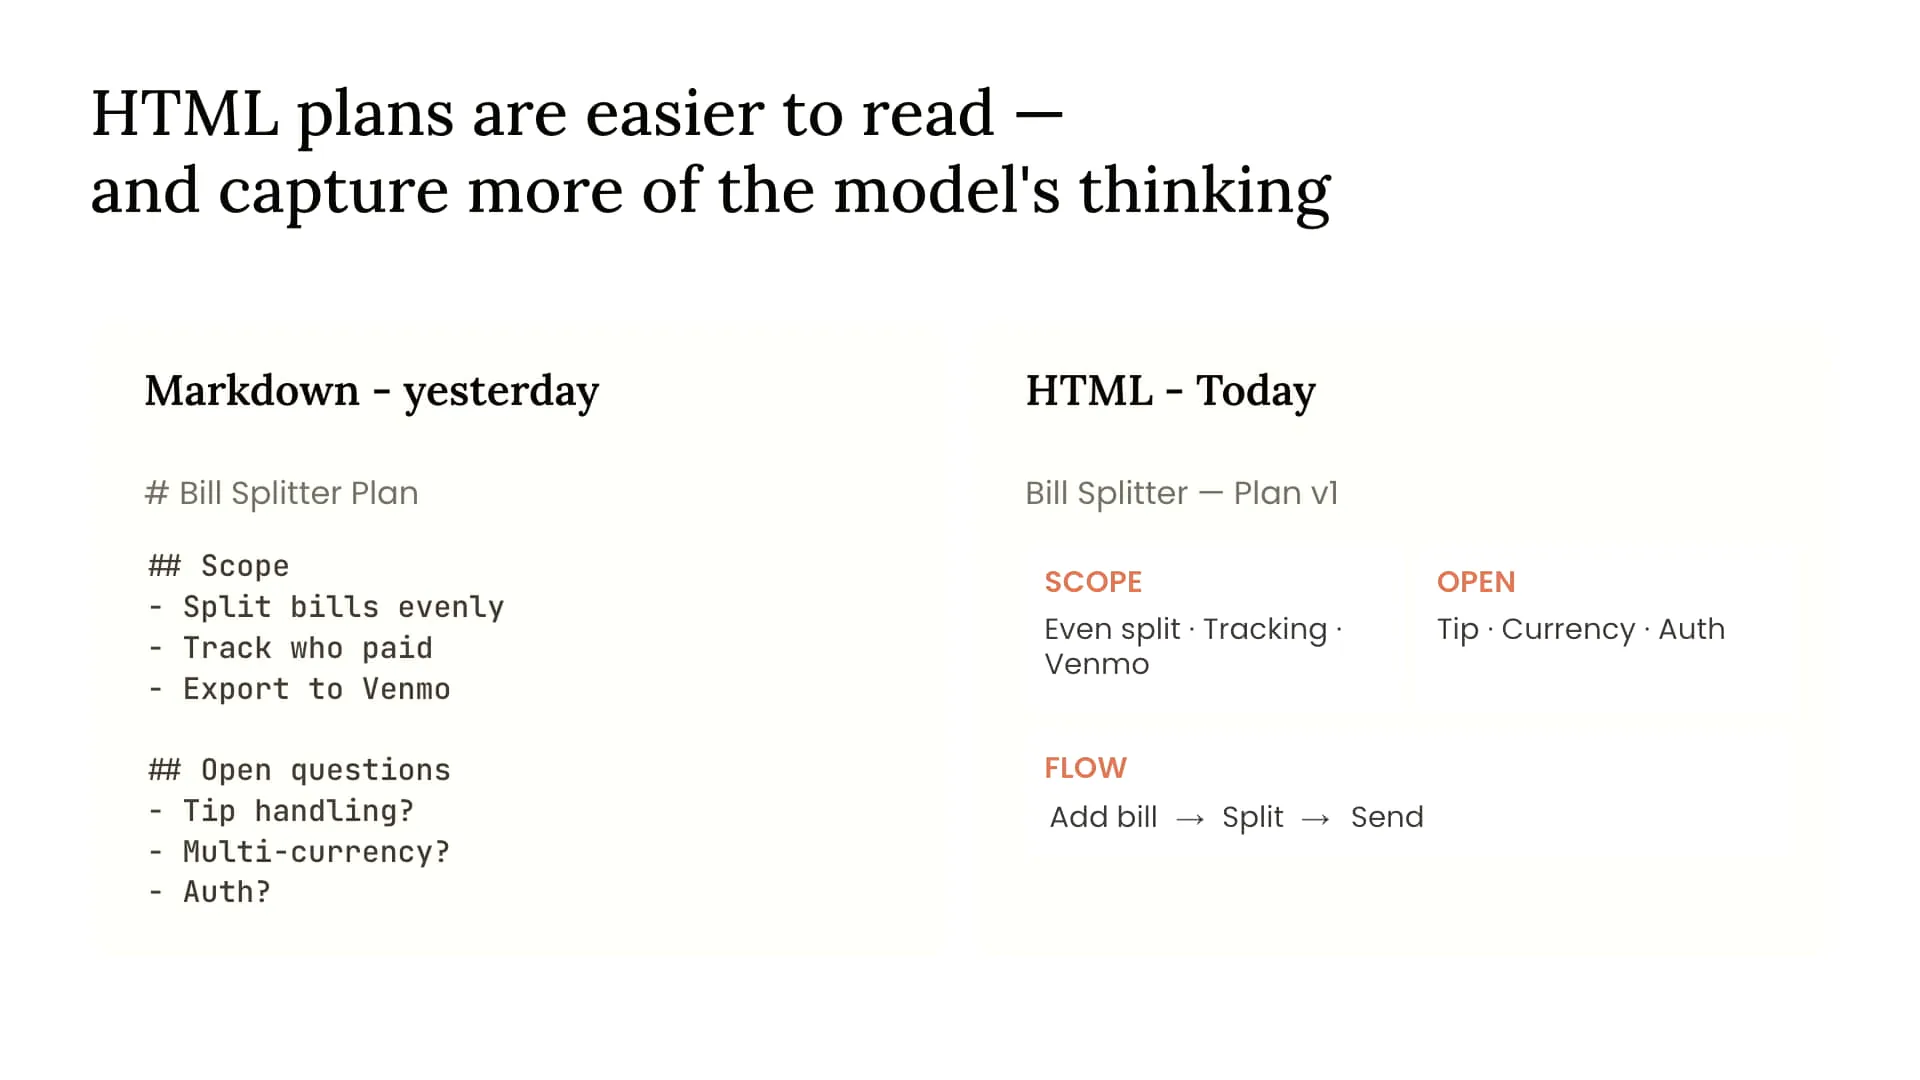 | An HTML file is more information-dense and ergonomic, making it easier to understand the final appearance of the content. You can even include a screenshot alongside it. Additionally, you can use Playwright MCP for enhanced interaction, which offers a richer experience compared to a lengthy Markdown file. |
Slide 16 — 10:48 (watch)
 | If the Markdown files exceed 200 lines, it's unlikely that you or your colleagues will read them. |
Slide 17 — 10:56 (watch)
 | Before we began, I had Claude with Opus 4.7 generate a few examples of what this could look like with my build splitting app. |
Slide 18 — 11:02 (watch)
 | Now, let's examine those examples. |
Slide 19 — 11:04 (watch)
 | We have them here. |
Slide 20 — 11:10 (watch)
 | The prompt I used is available in the repository you will have access to. |
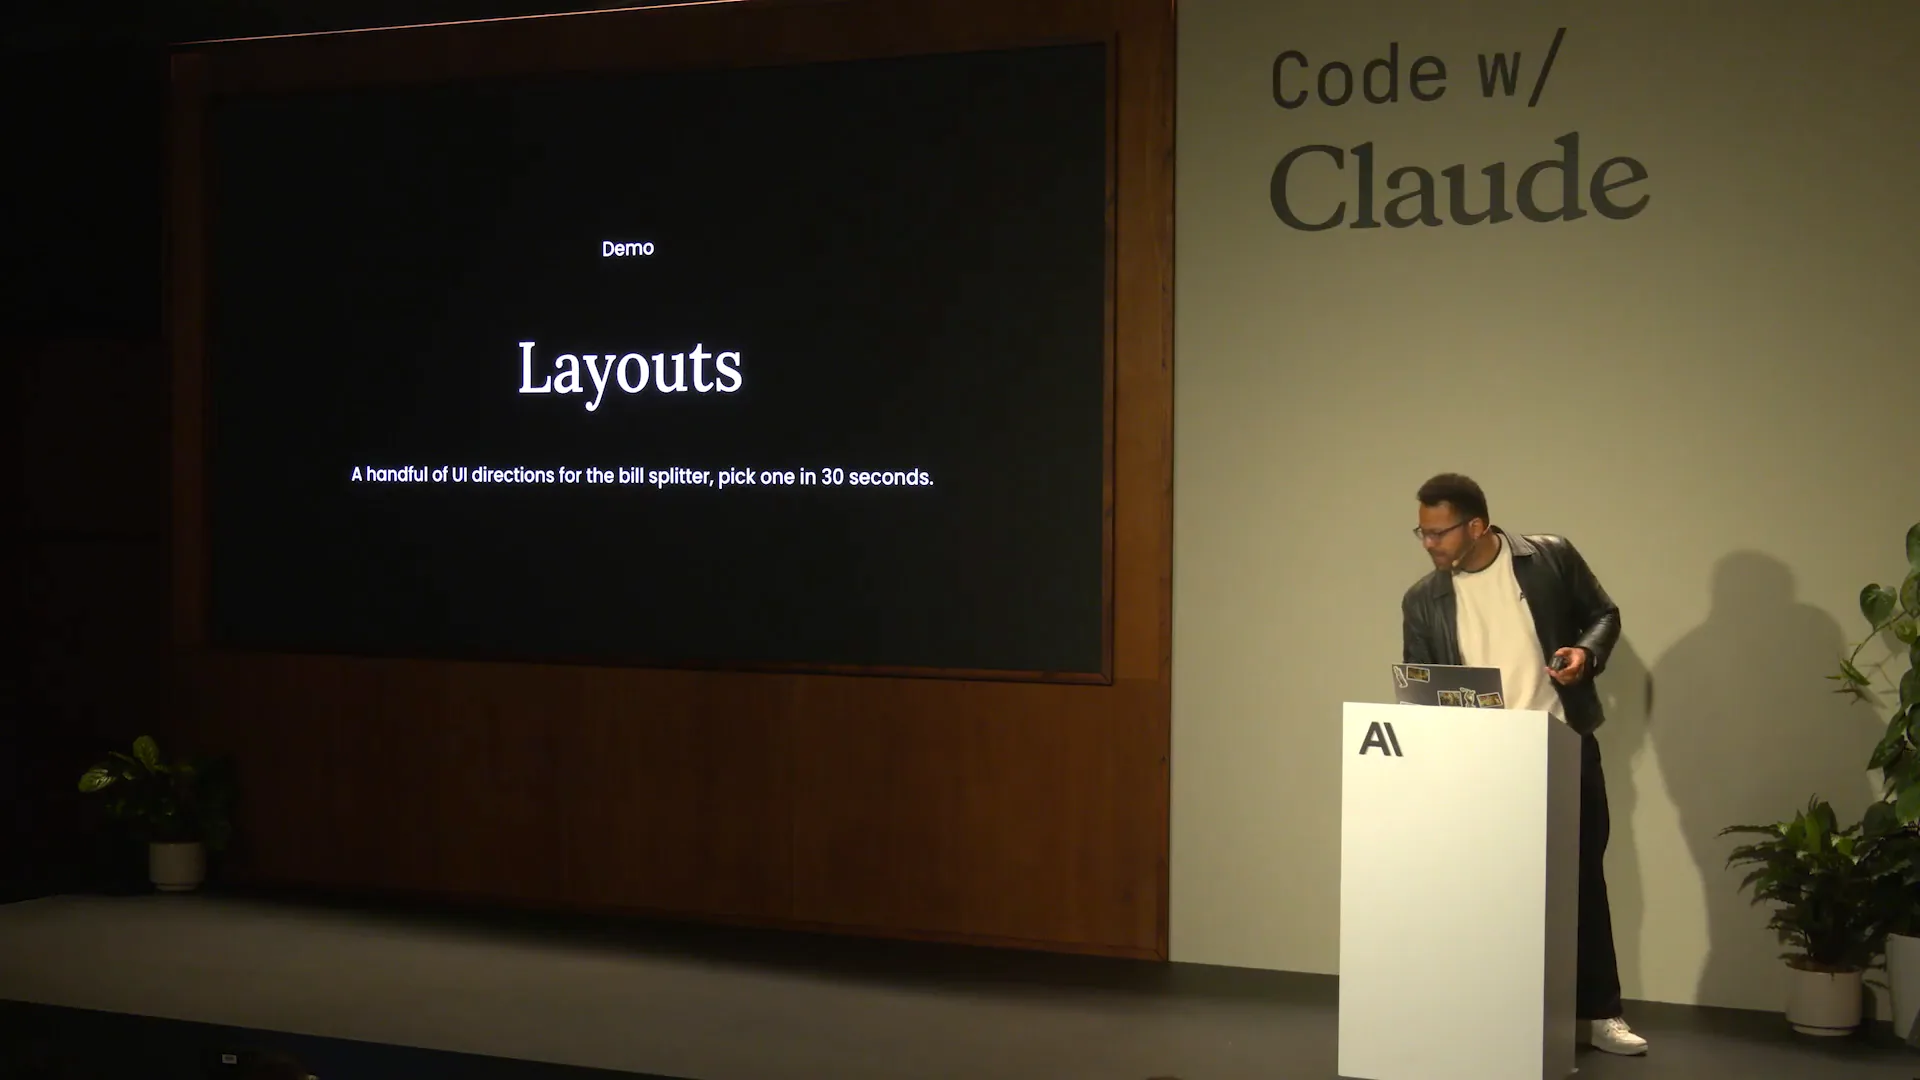
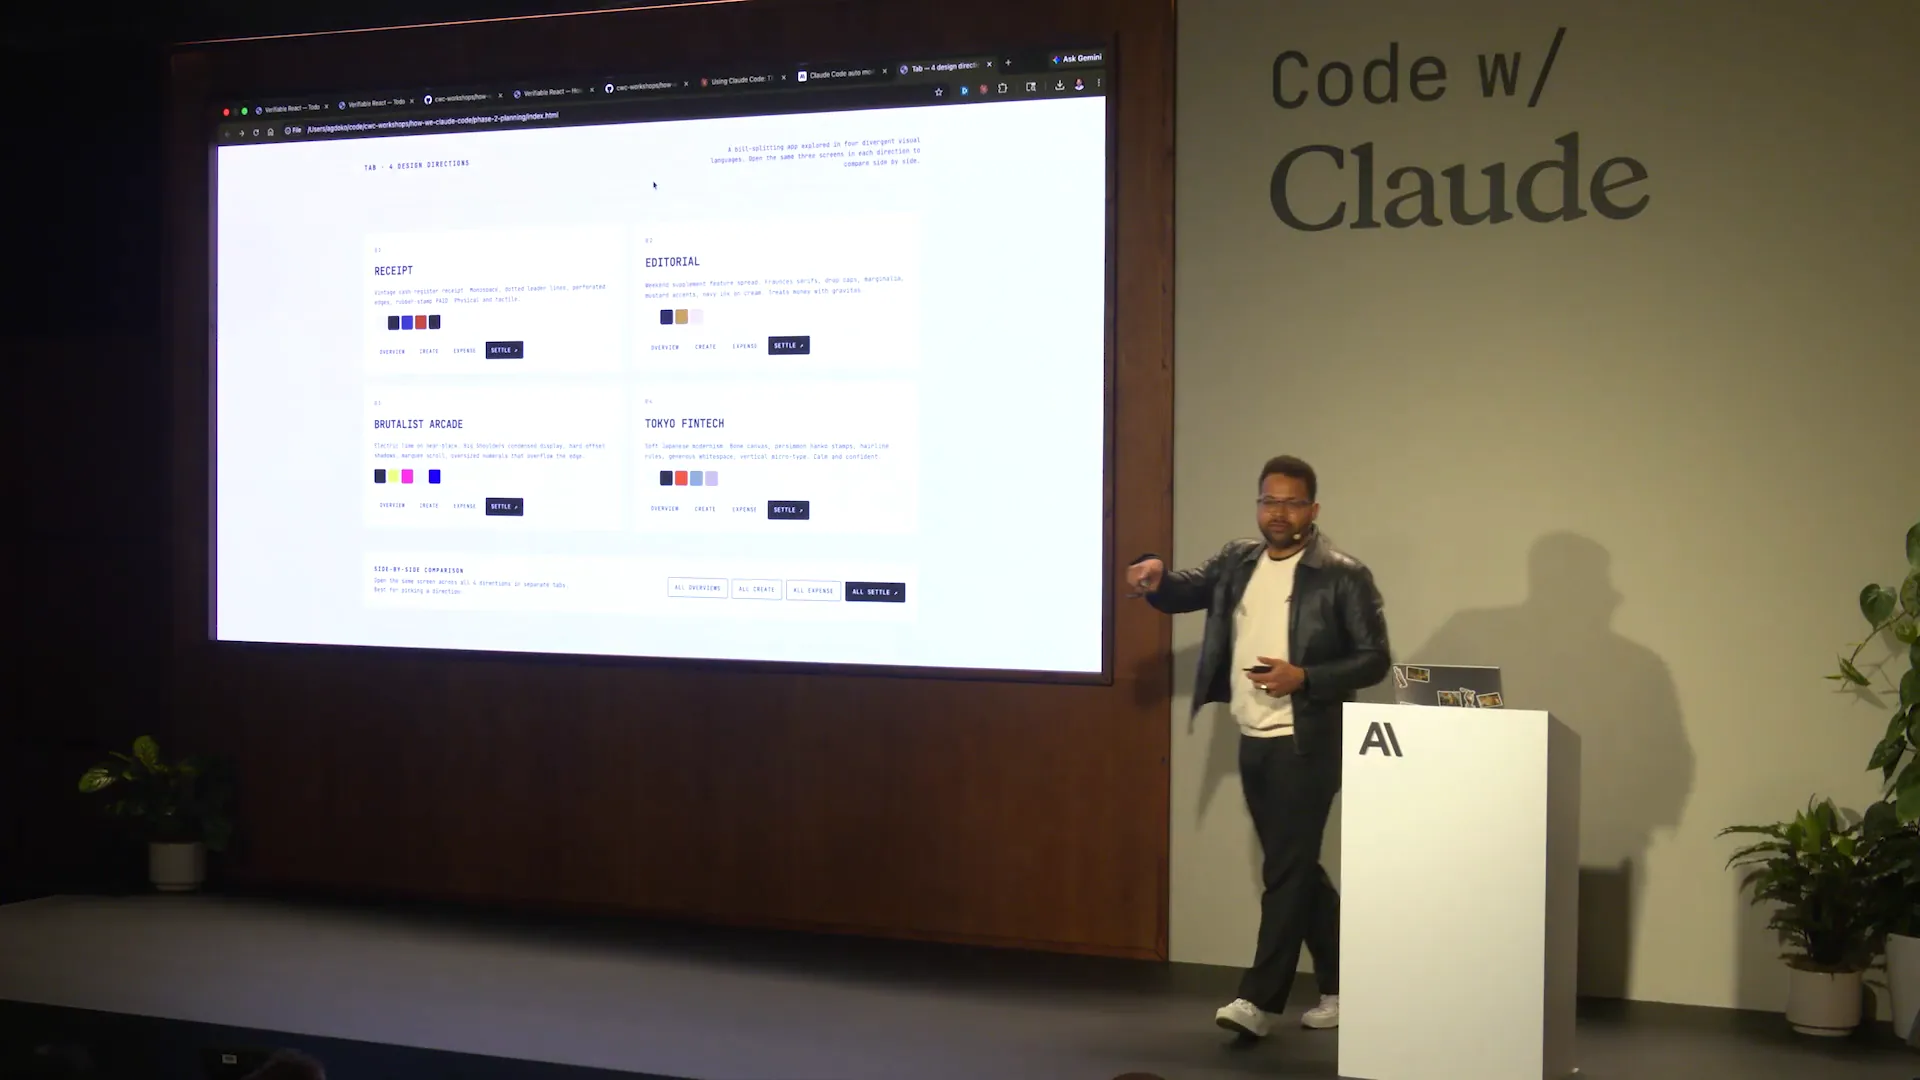
Slide 21 — 11:20 (watch)
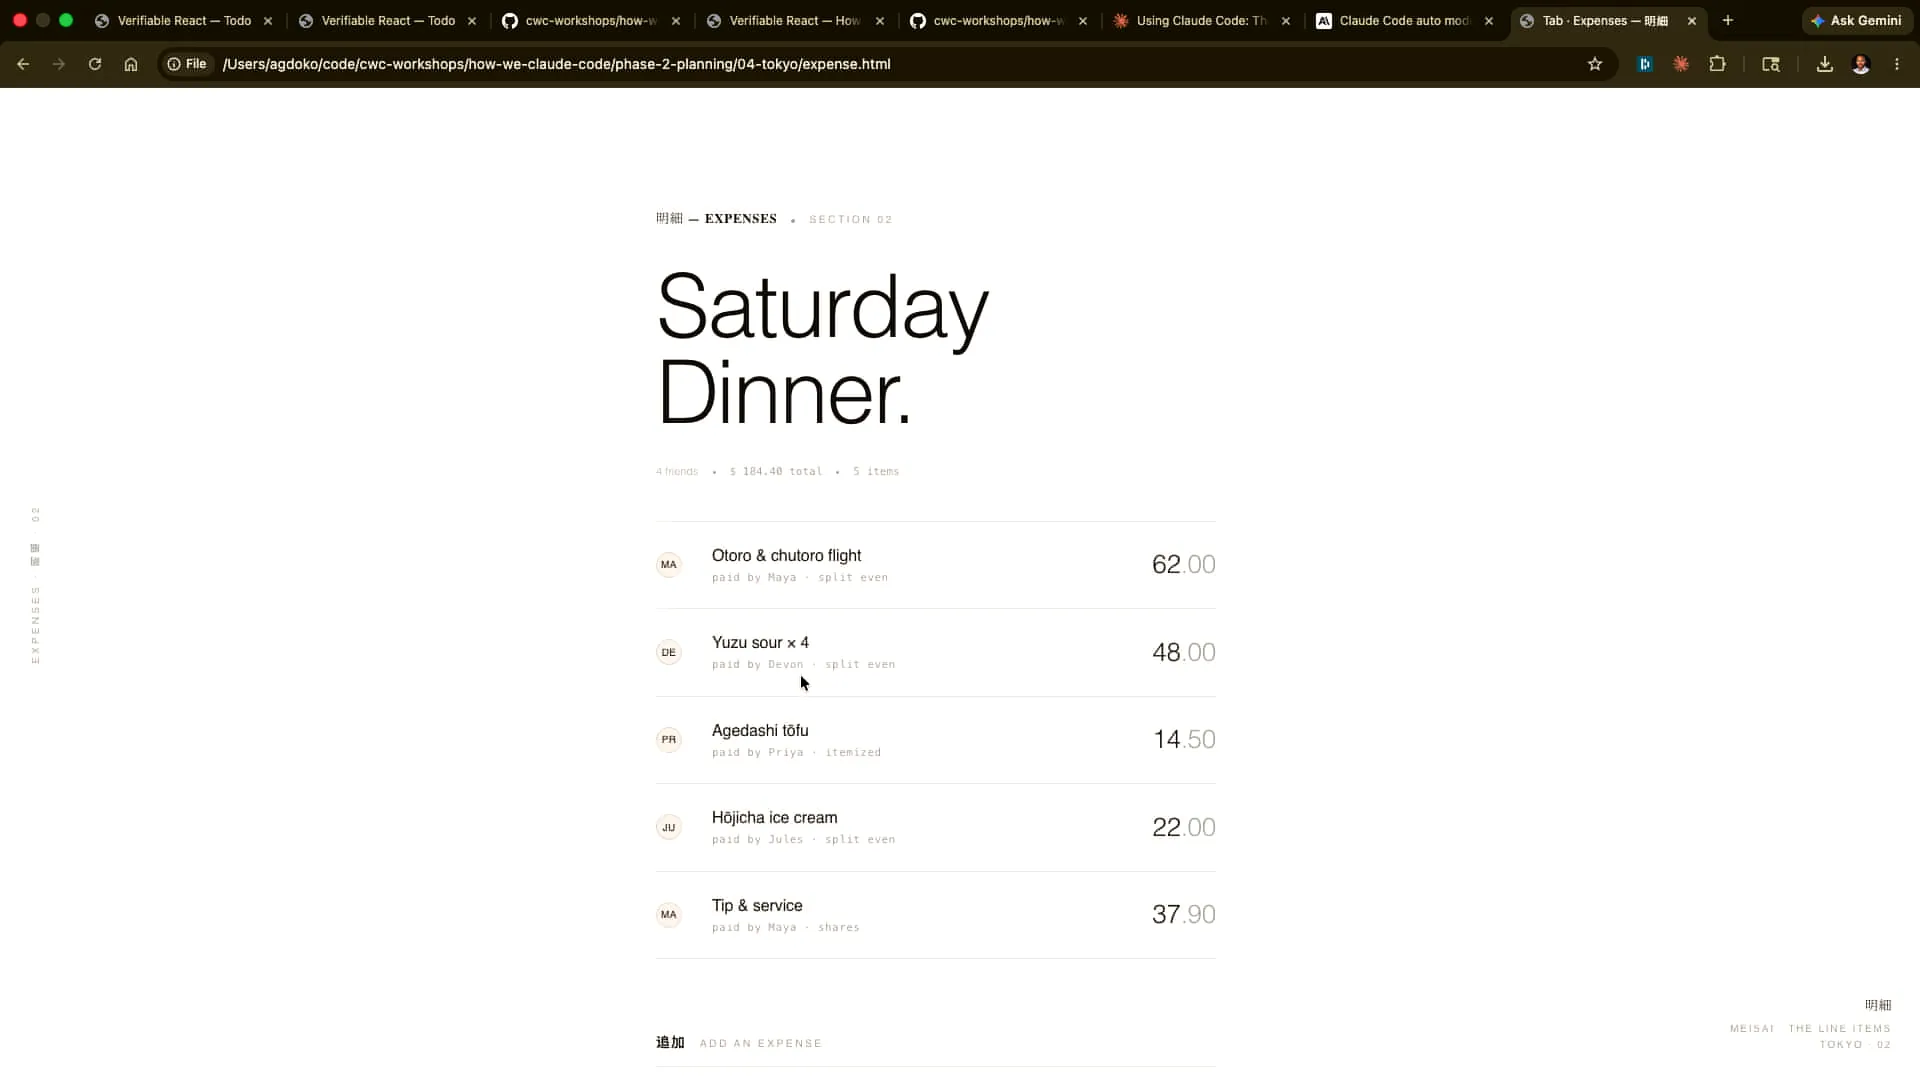
 | I asked Claude to provide four different design directions and generate them as HTML for comparison. The results included a Brutalist style, a Tokyo-inspired design, and a FinTech theme. Let's click through each one. |
Slide 22 — 11:28 (watch)
 | This is what this design would look like. This one might look like this. |
Slide 23 — 11:36 (watch)
 | This has a completely different aesthetic. I can click around. |
Slide 24 — 12:00 (watch)
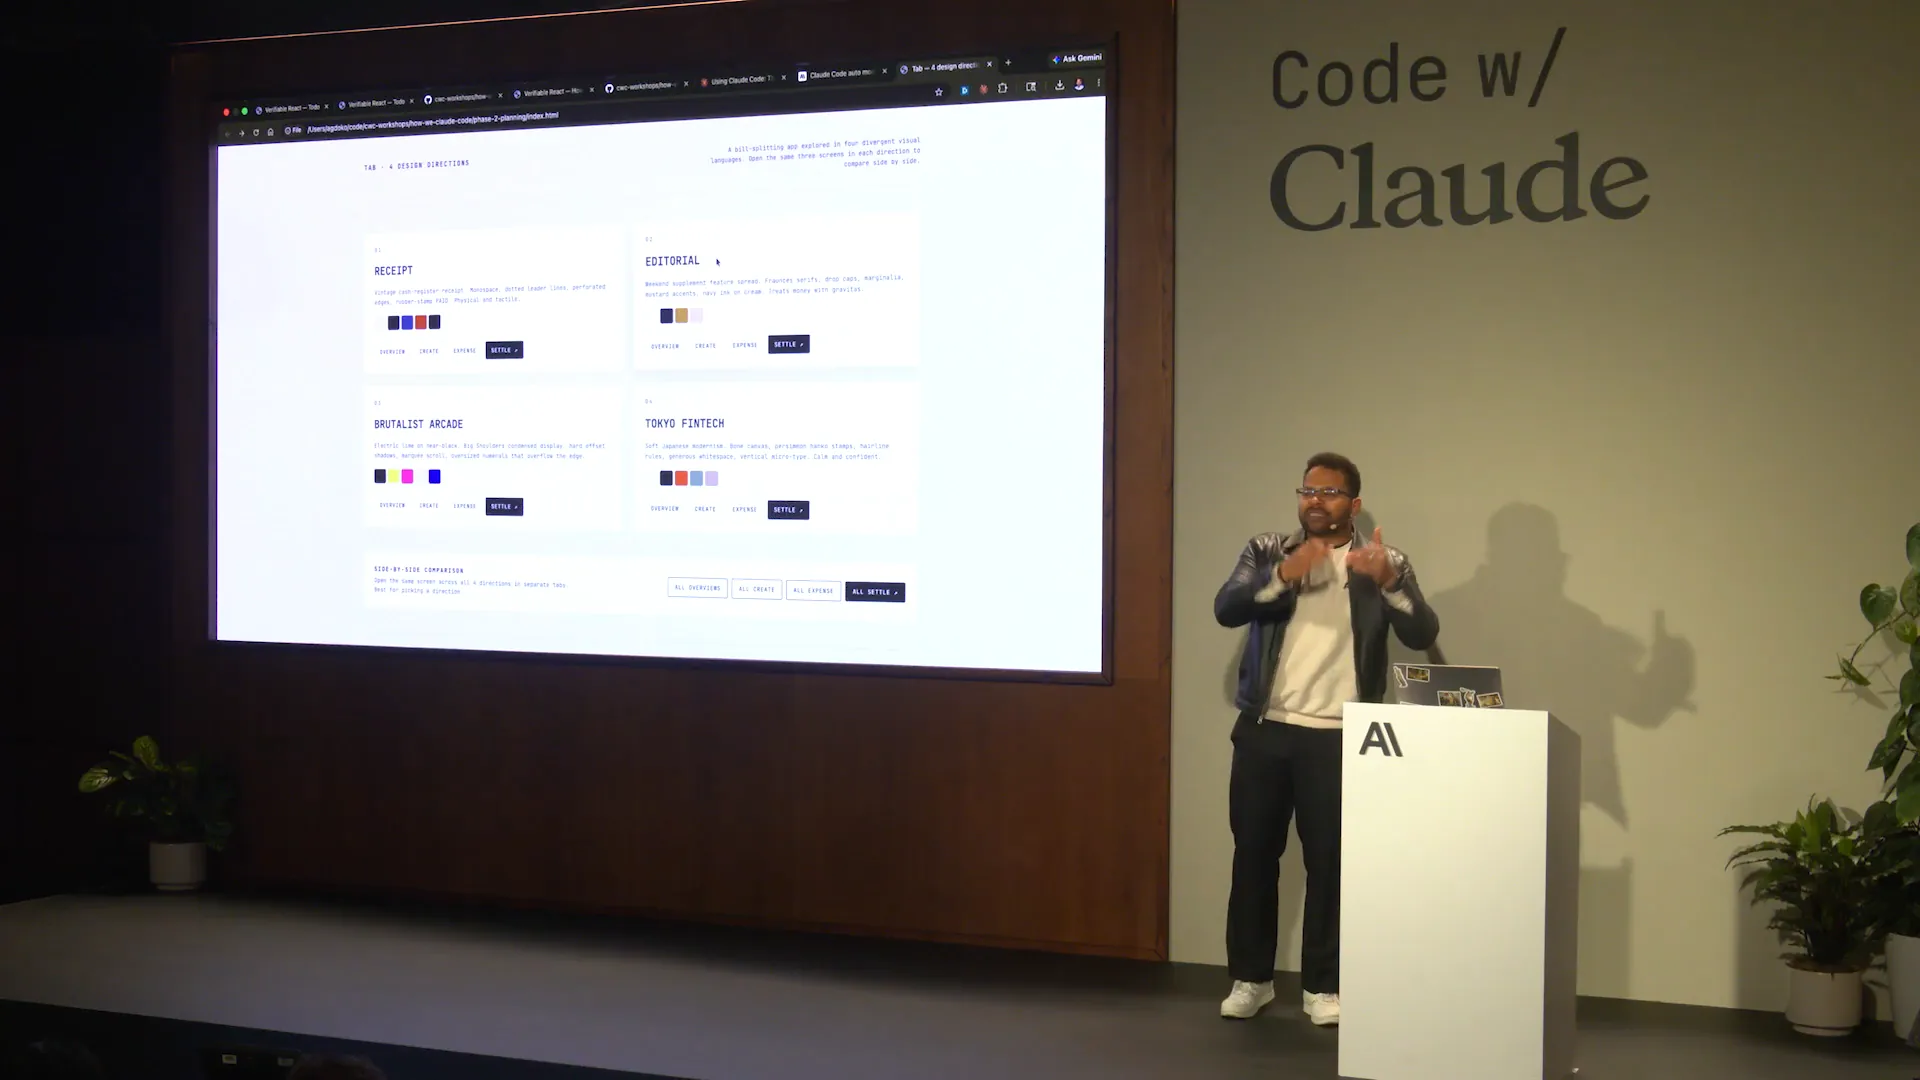 | This approach is much better for providing feedback to Claude than trying to infer from a Markdown file what the final product will look like. I can take screenshots and feed them back into Claude. How many of you regularly take screenshots to communicate with Claude? That's excellent. You should be doing that, especially in front-end development, where it's difficult to articulate issues like slight misalignments. You'll often find yourself reaching the limits of what you can express verbally. It's actually easier for Opus 4.7, which has a significantly improved vision model, to identify and proactively address these problems. Tariq has many more examples in his repository, which you can also find online. |
Slide 25 — 12:52 (watch)
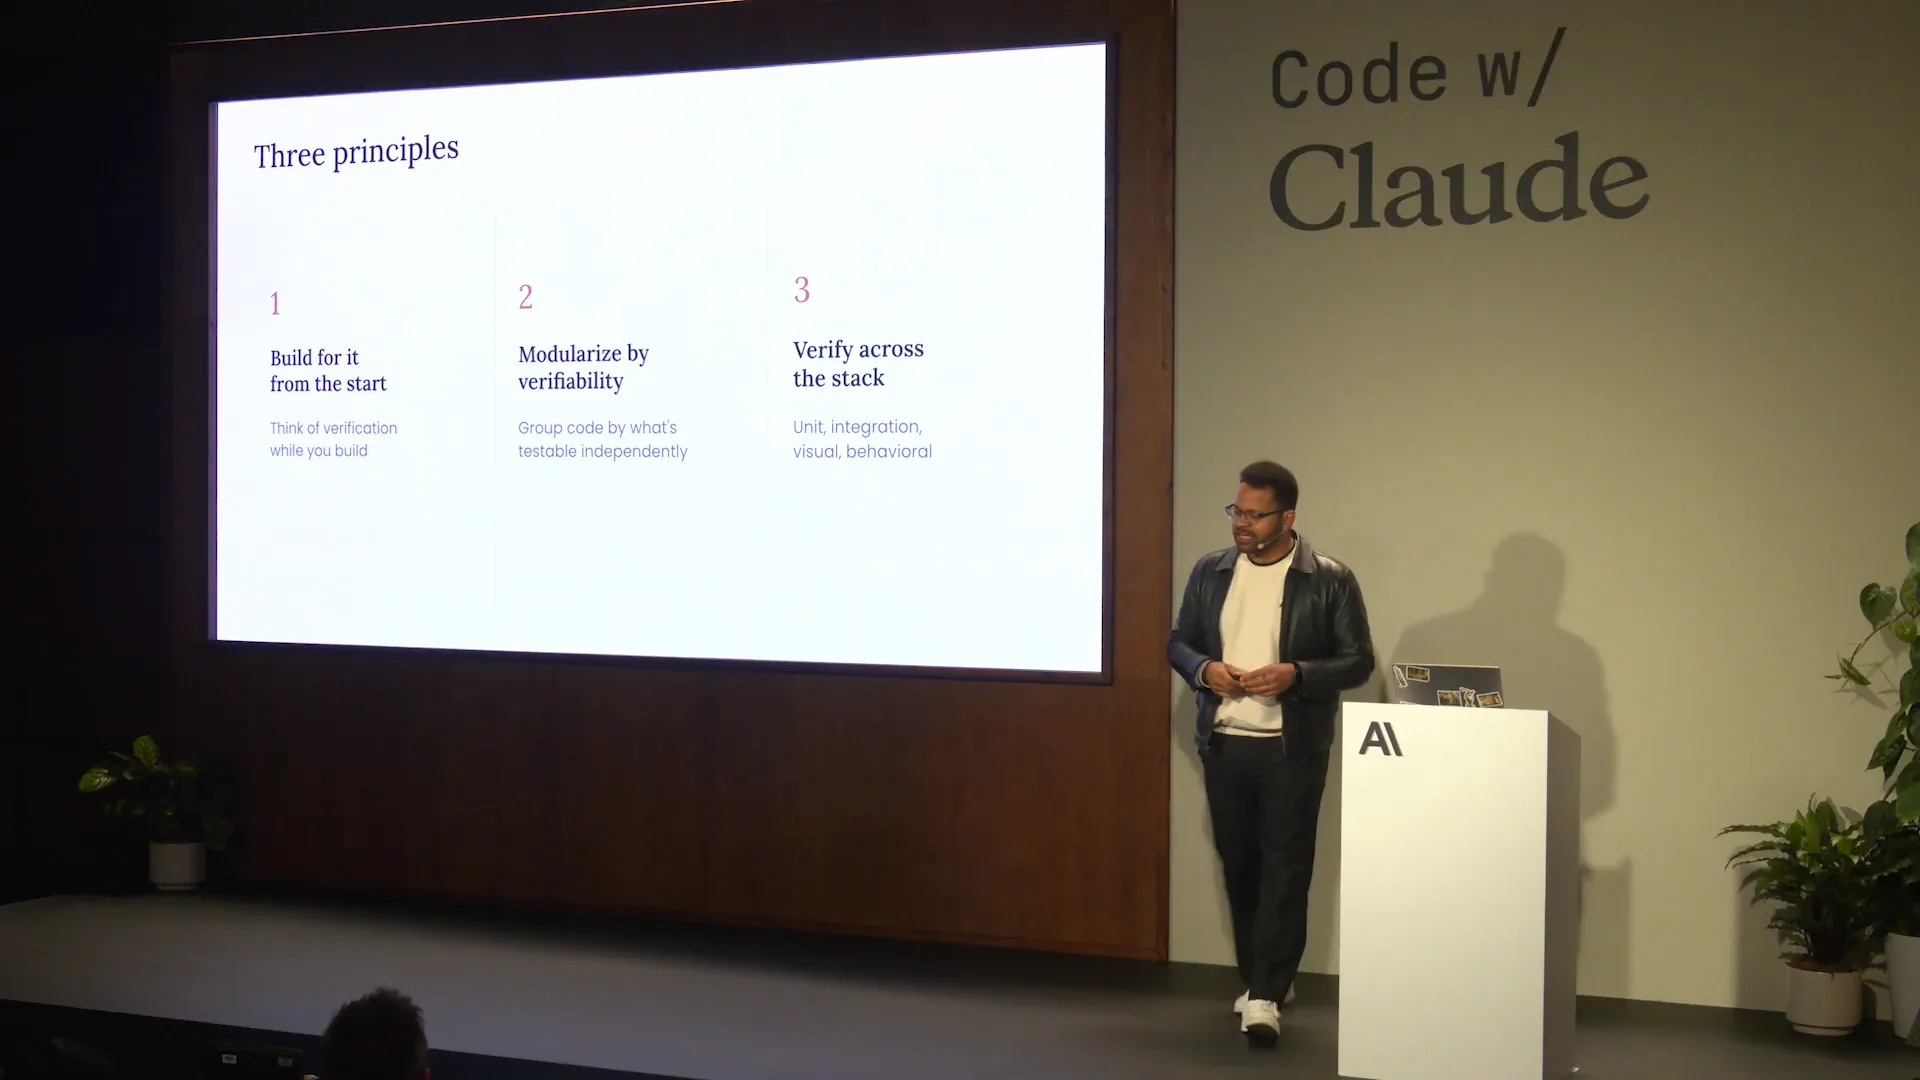
 | So far, we've discussed how Claude can interactively extract information from you as an interviewer. The longer you let an agent run, the more crucial it is for the specifications to be comprehensive. It becomes less likely that you will identify everything upfront, making it better to iterate with Claude. A more efficient and ergonomic format for this process is the HTML file. The key aspect to focus on is how to verify what Claude has accomplished and how to make it agent-native, which we will cover using the repository. |
Slide 26 — 13:24 (watch)
 | We will have one slide where you can see the actual URL to engage with. You want to make it part of the artifact, and that is what we will cover today. |
Slide 27 — 14:14 (watch)
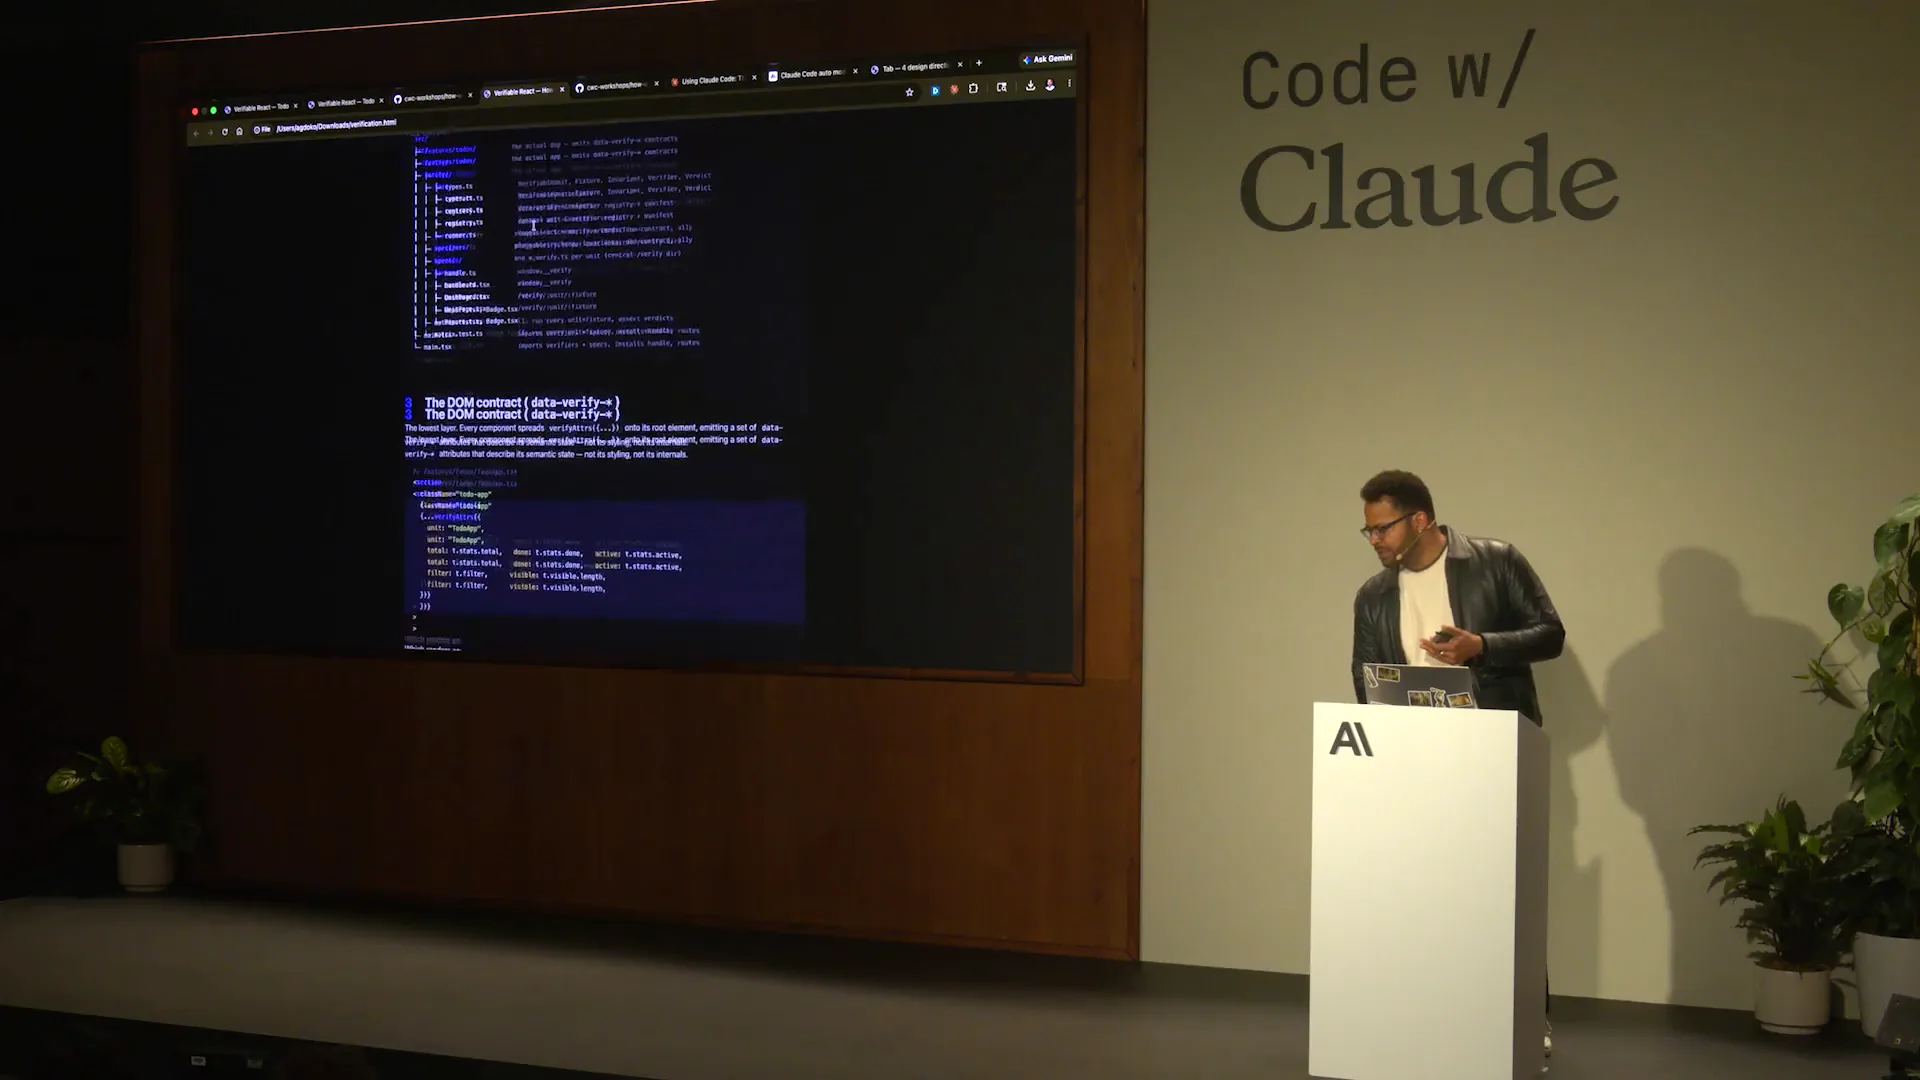
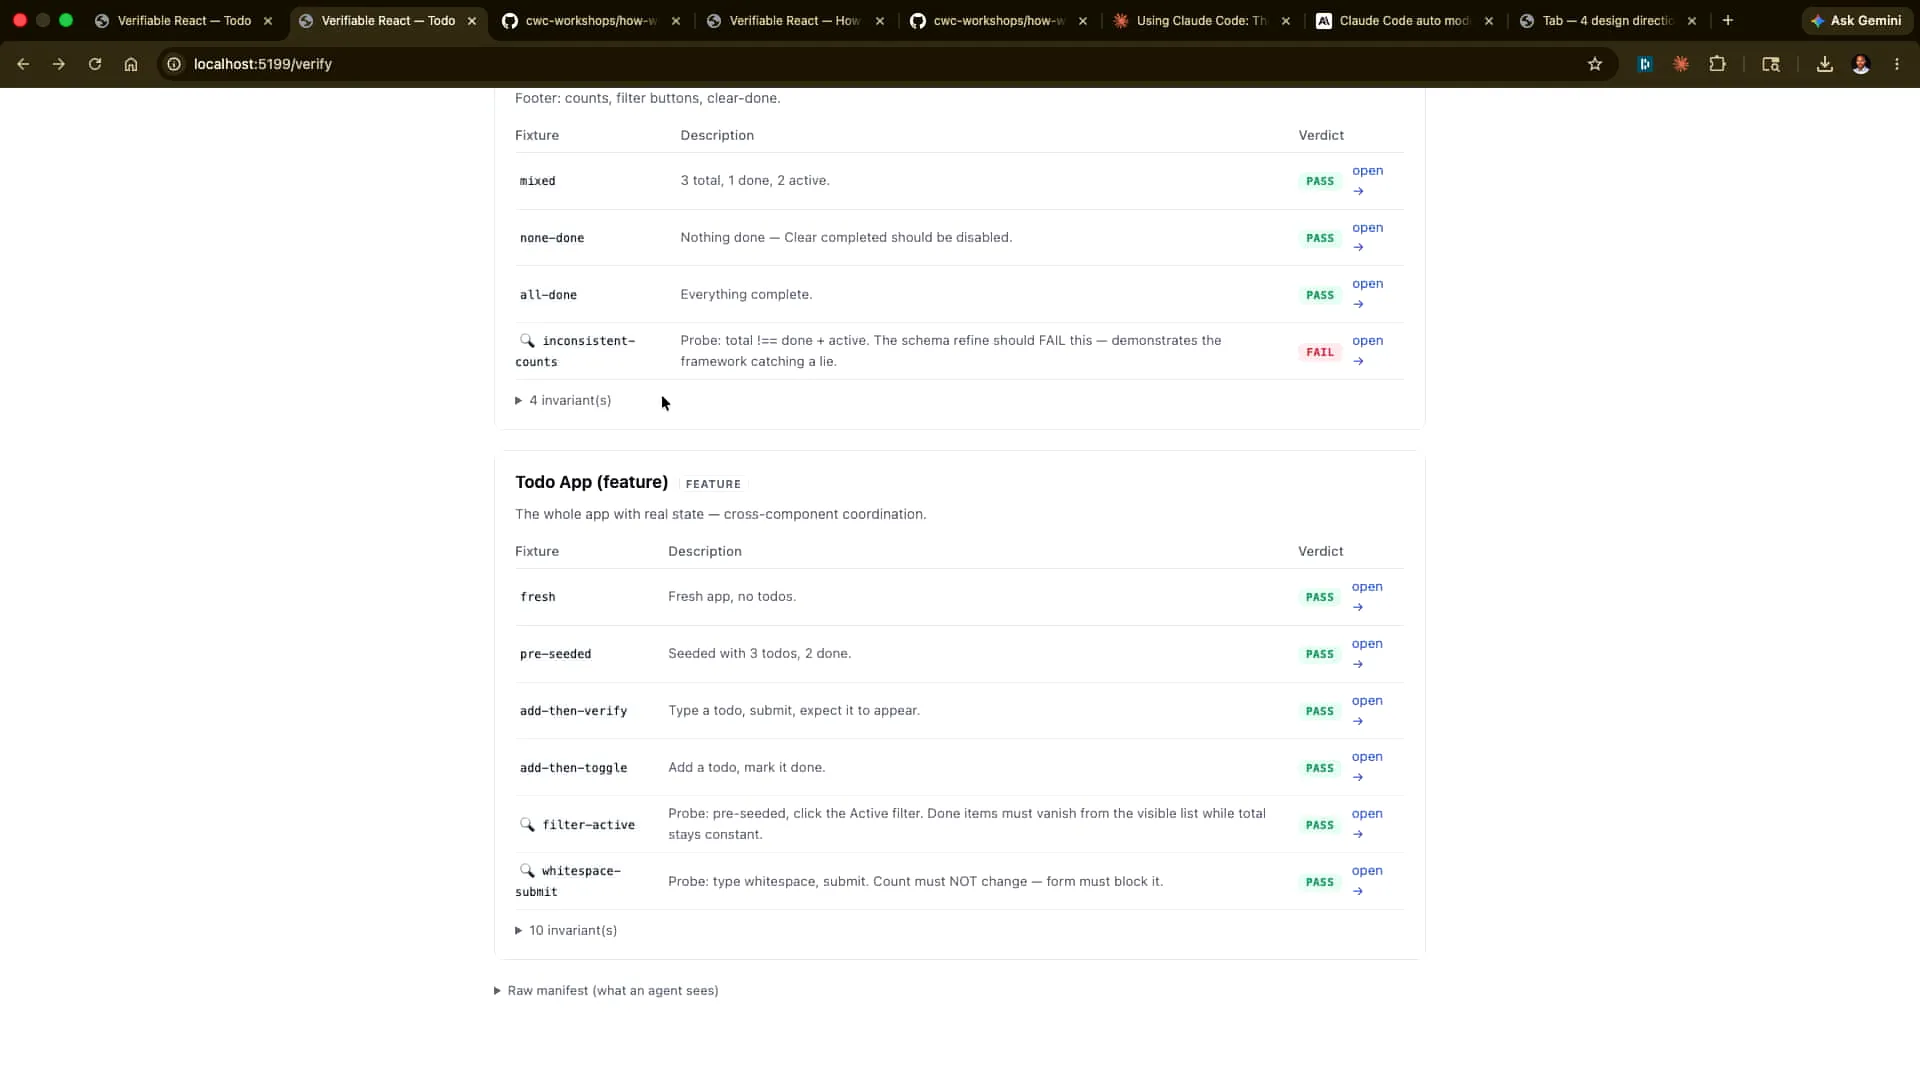
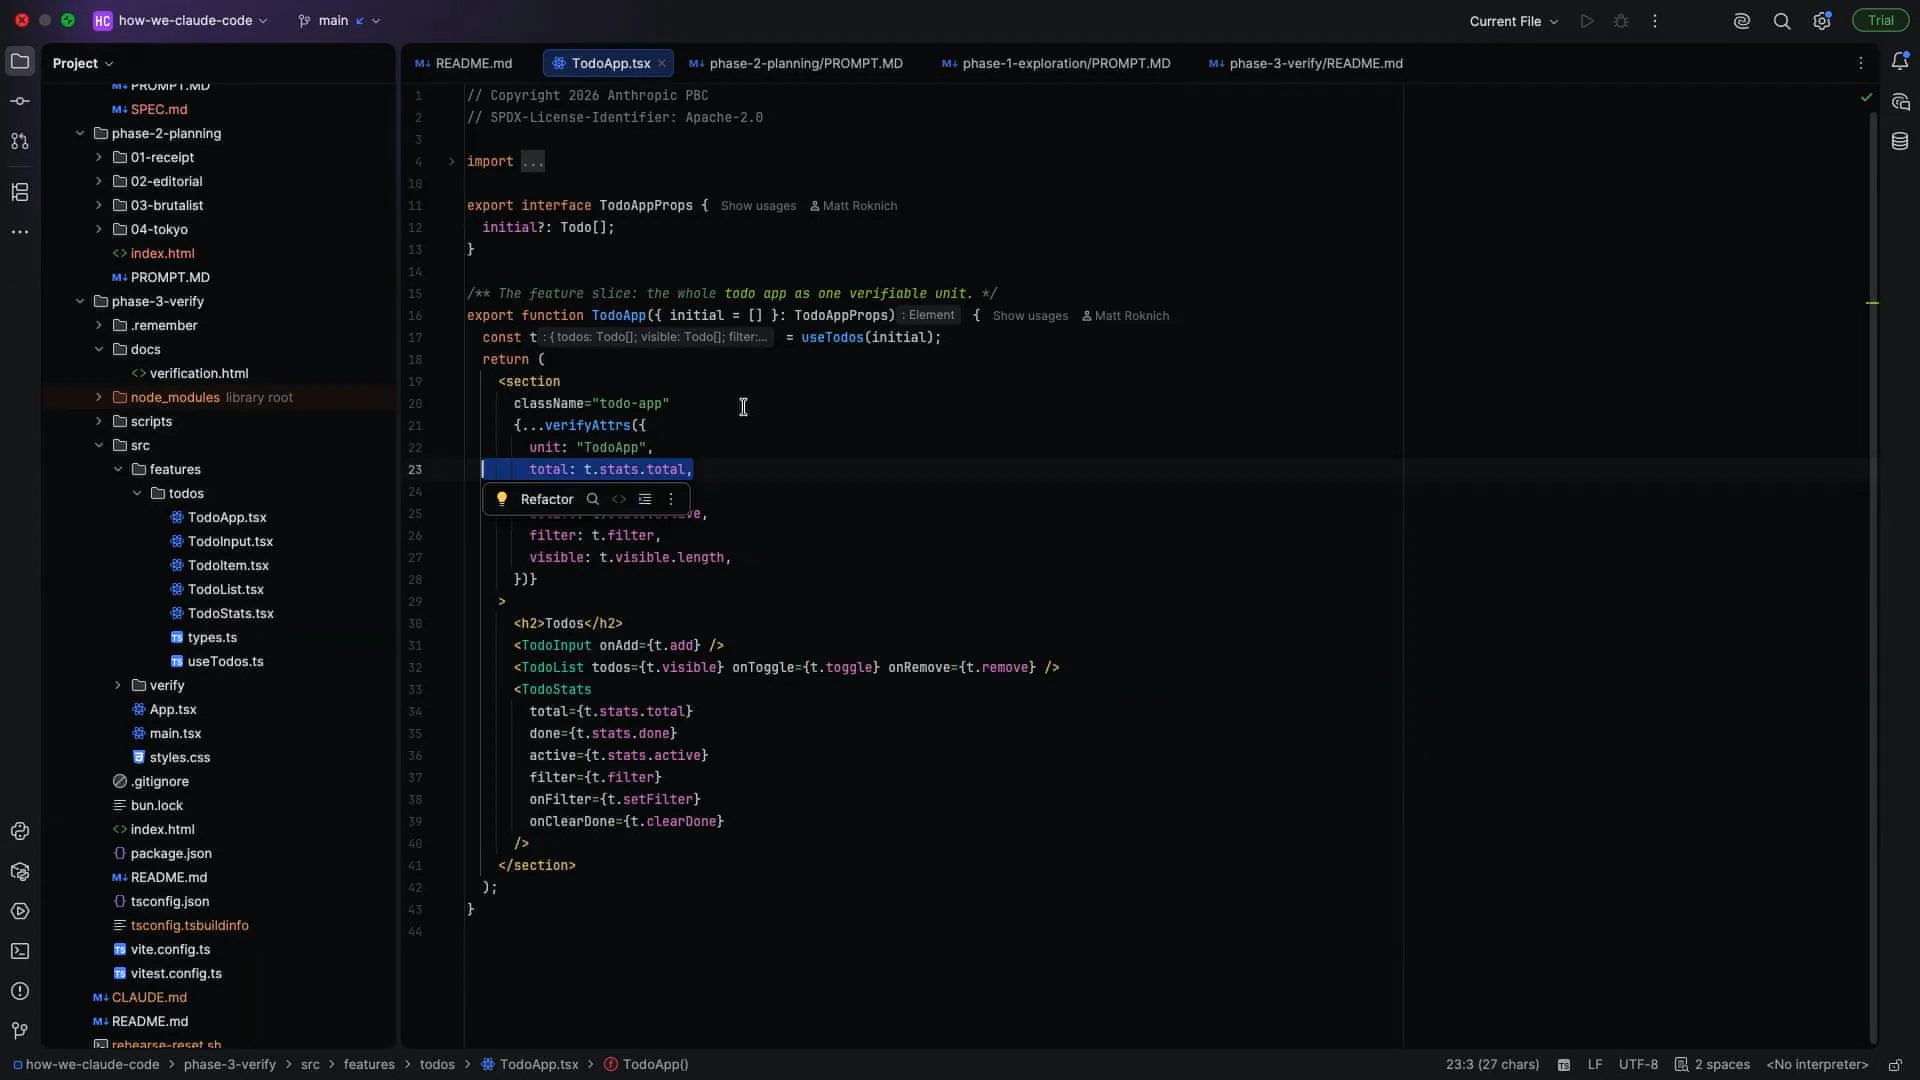
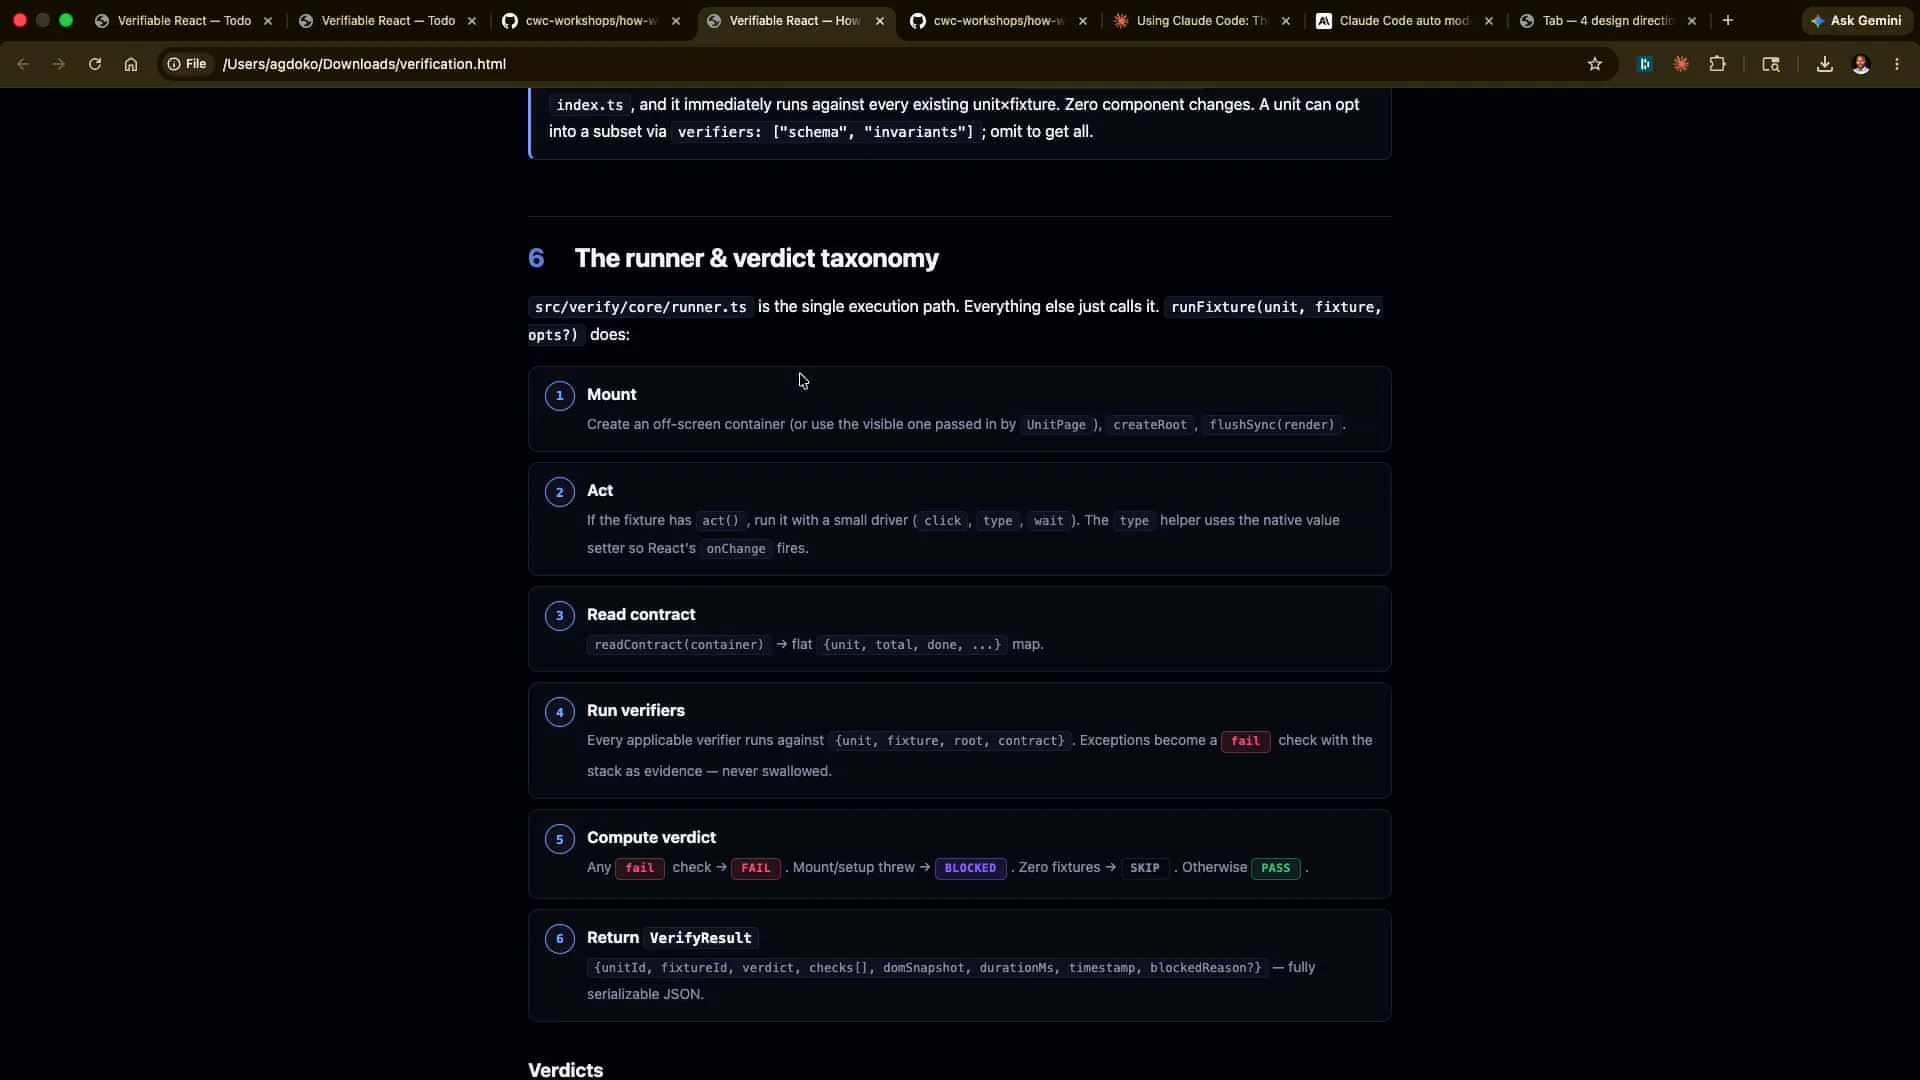
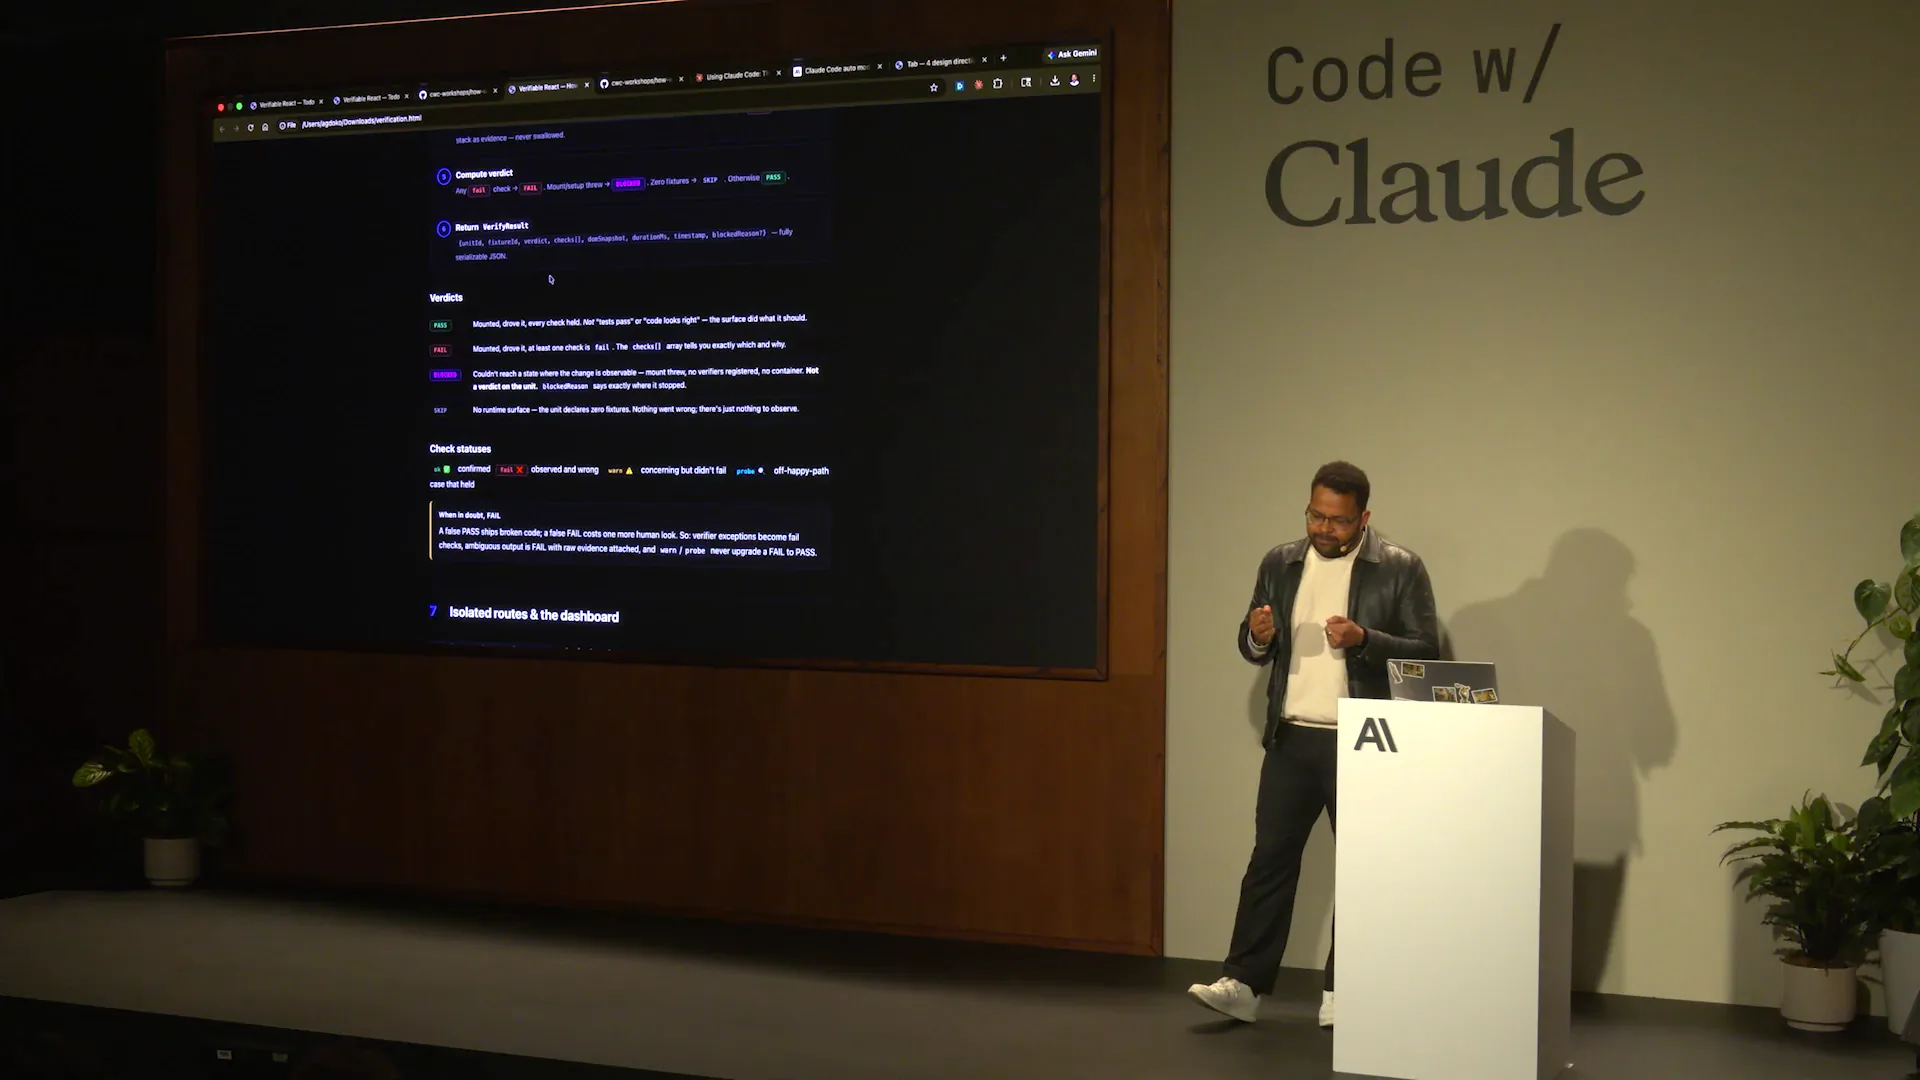
 | Today, we will use Storybook fixtures, a testing library for data emissions and attributes, along with Playwright MCP for a React app. The components you will see have been remixed to facilitate Claude's ability as an agent to extract data contracts from the DOM, run verifications, and record those verifications. This process is how Tarek's Claude code team operates. The demo he built will generate verification steps that are recorded and then stored on S3 or shared with colleagues. This approach minimizes the number of touchpoints required, allowing for easier replication, especially from the rebuild. Sensible modularization is key to achieving this, and it will become clearer when we examine the actual implementation. |
Slide 28 — 14:48 (watch)
 | I encourage you to visit that link, where you will find a repository. |
Slide 29 — 14:52 (watch)
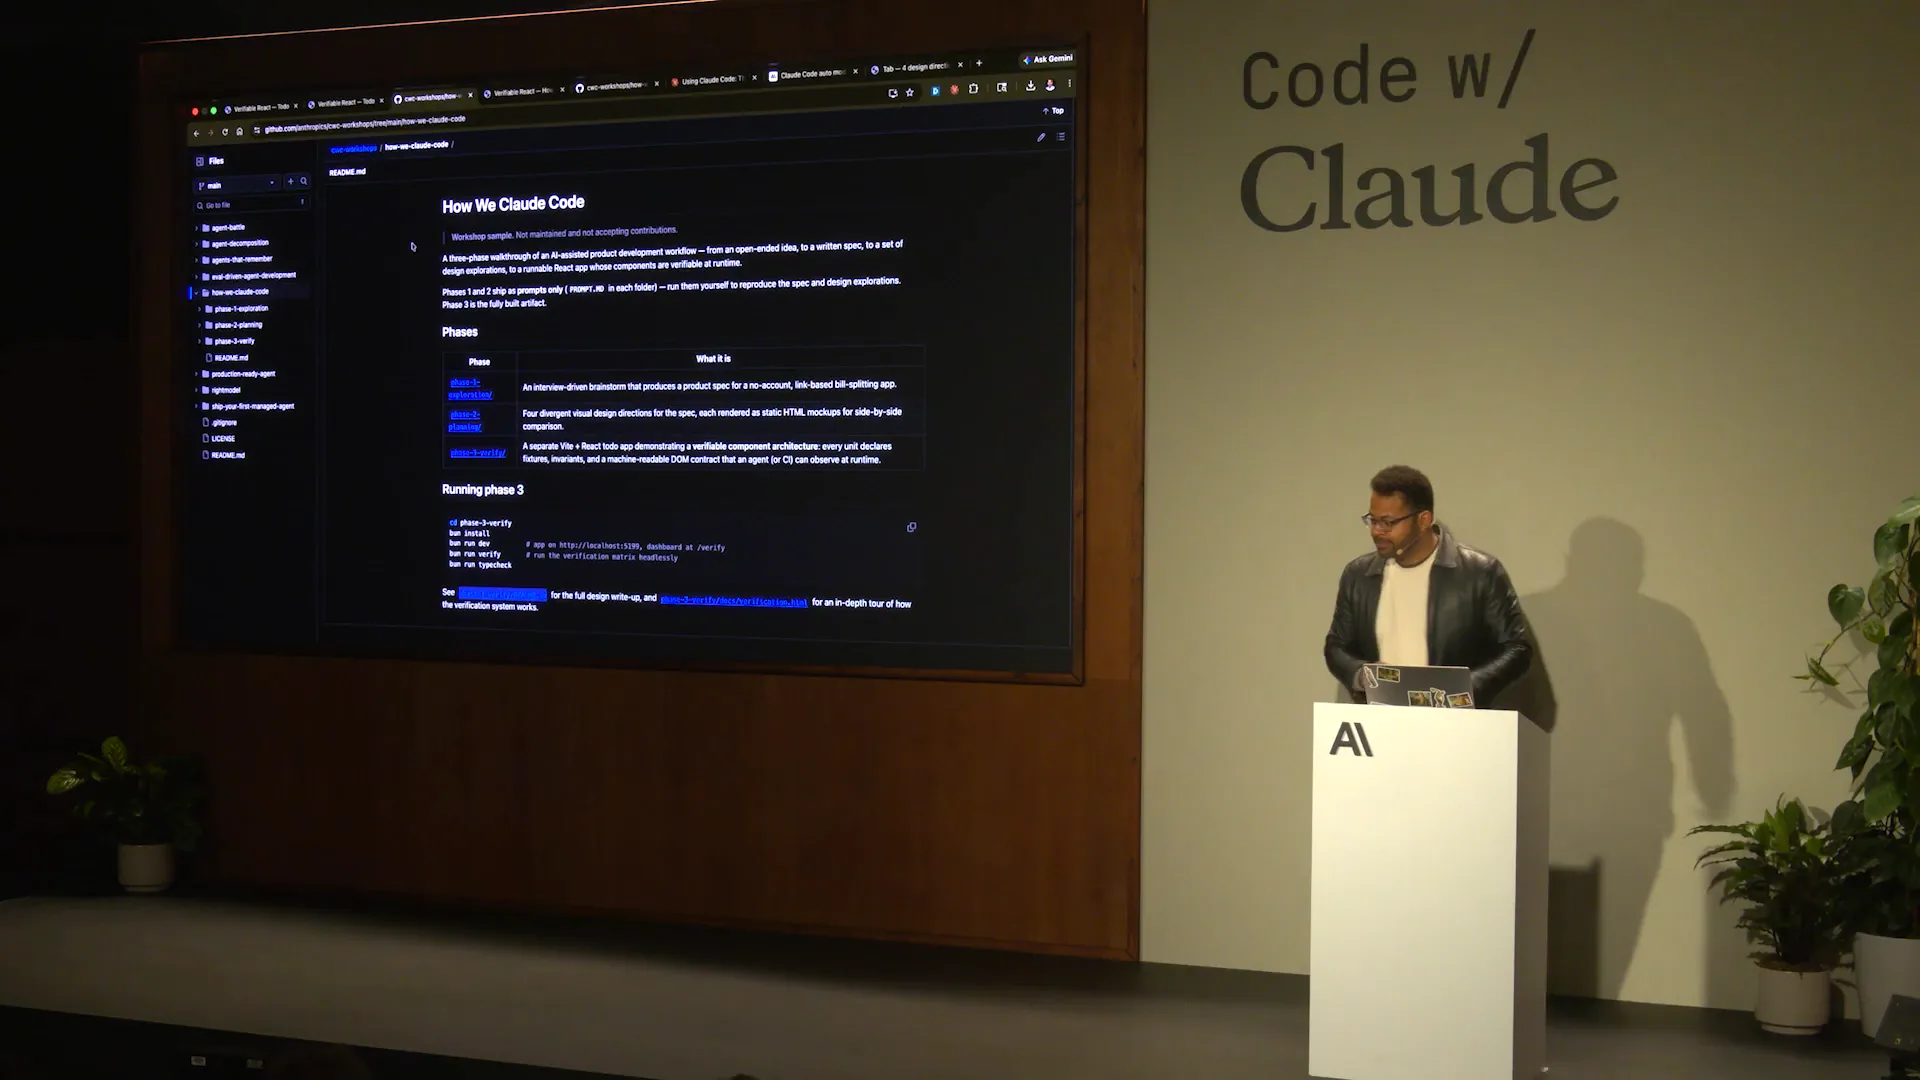 | This is the repository for CWC Workshops, specifically for today's session titled "How We Claude Code." |
Slide 30 — 15:28 (watch)
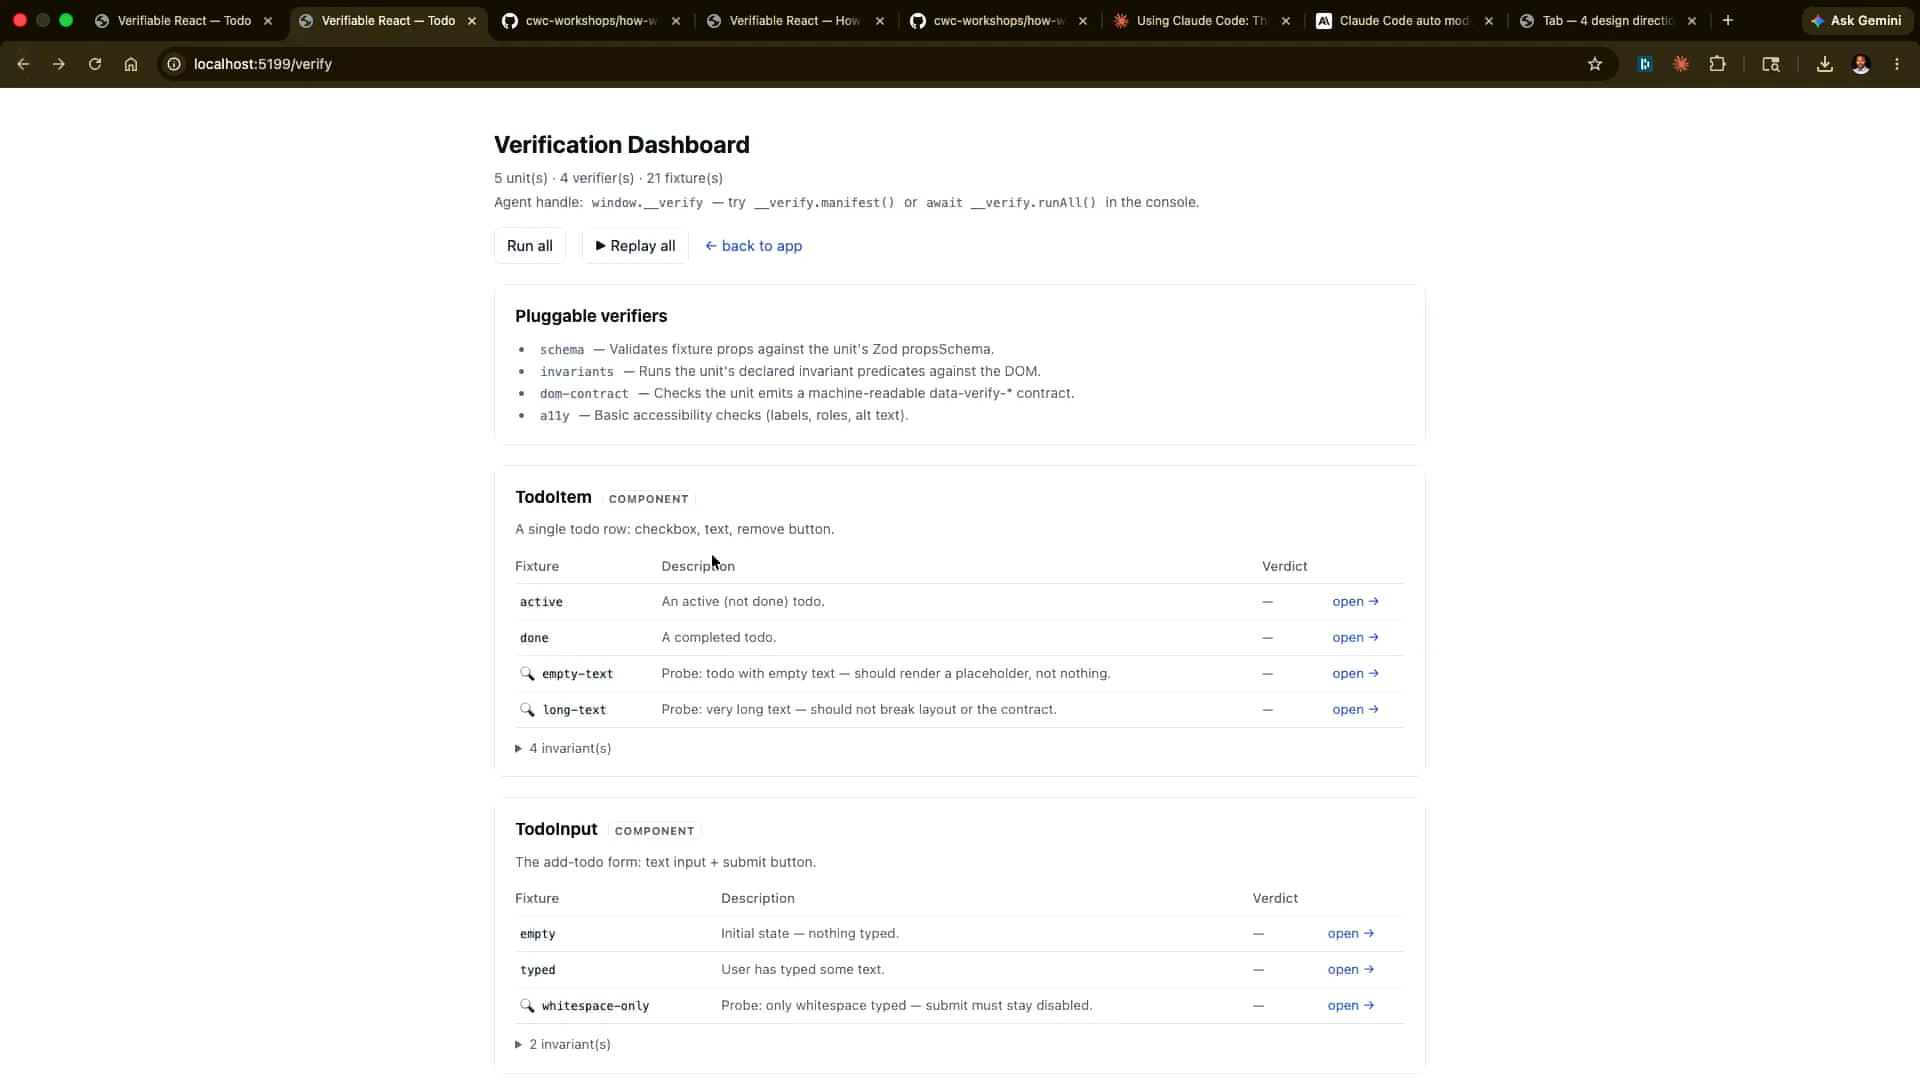
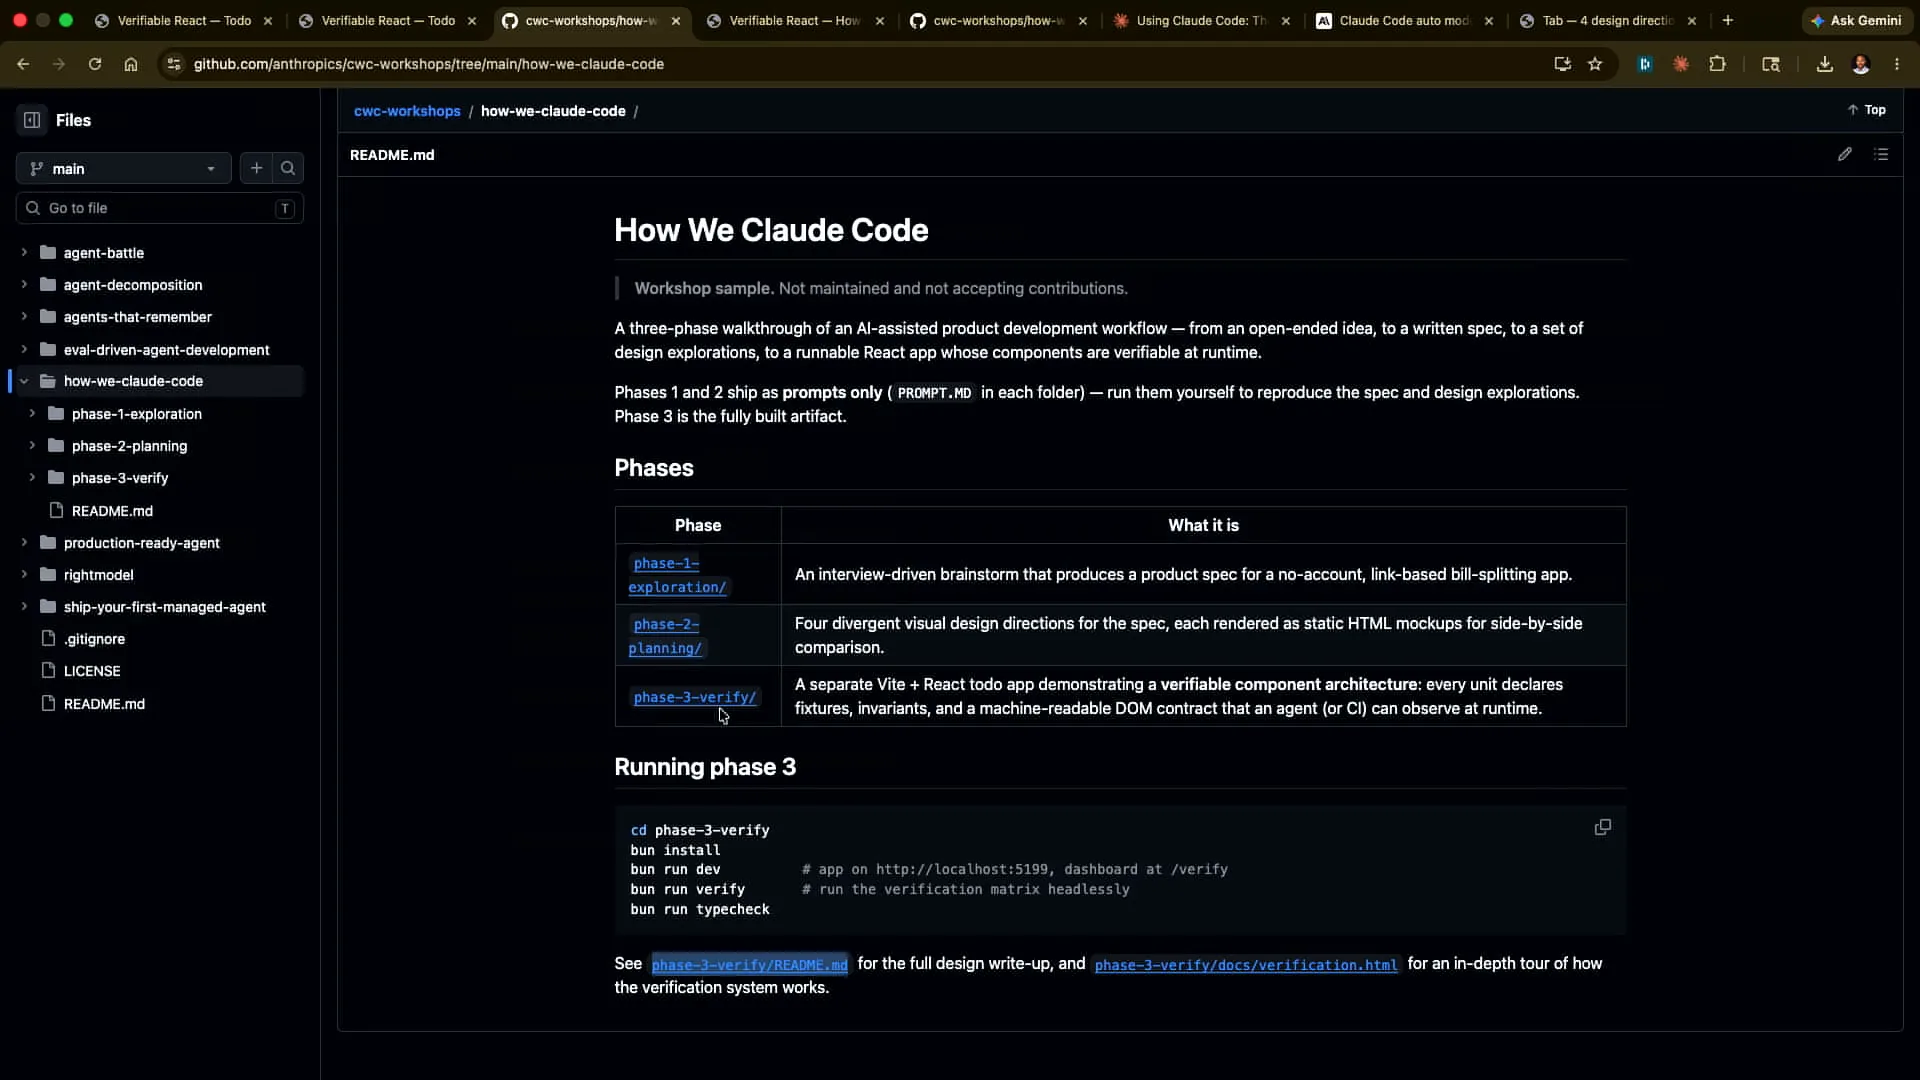 | Phase one covers a simple prompt where I ask, "Hey, I'm writing a bill-splitting app. Interrogate me on the requirements so I don't miss any in my upfront description to Claude." The second part involves generating four different HTML design directions for me to provide feedback on or choose from. Third, we have a verification framework in a different context, specifically for a small to-do app written in React. We will demonstrate how we integrated verification throughout the development process. This is detailed in the README for phase three, as well as in the verification section, so you can refer to that for an in-depth look at the setup. |
Slide 31 — 16:02 (watch)
 | It's all provided in the repository, which is quite impressive. |
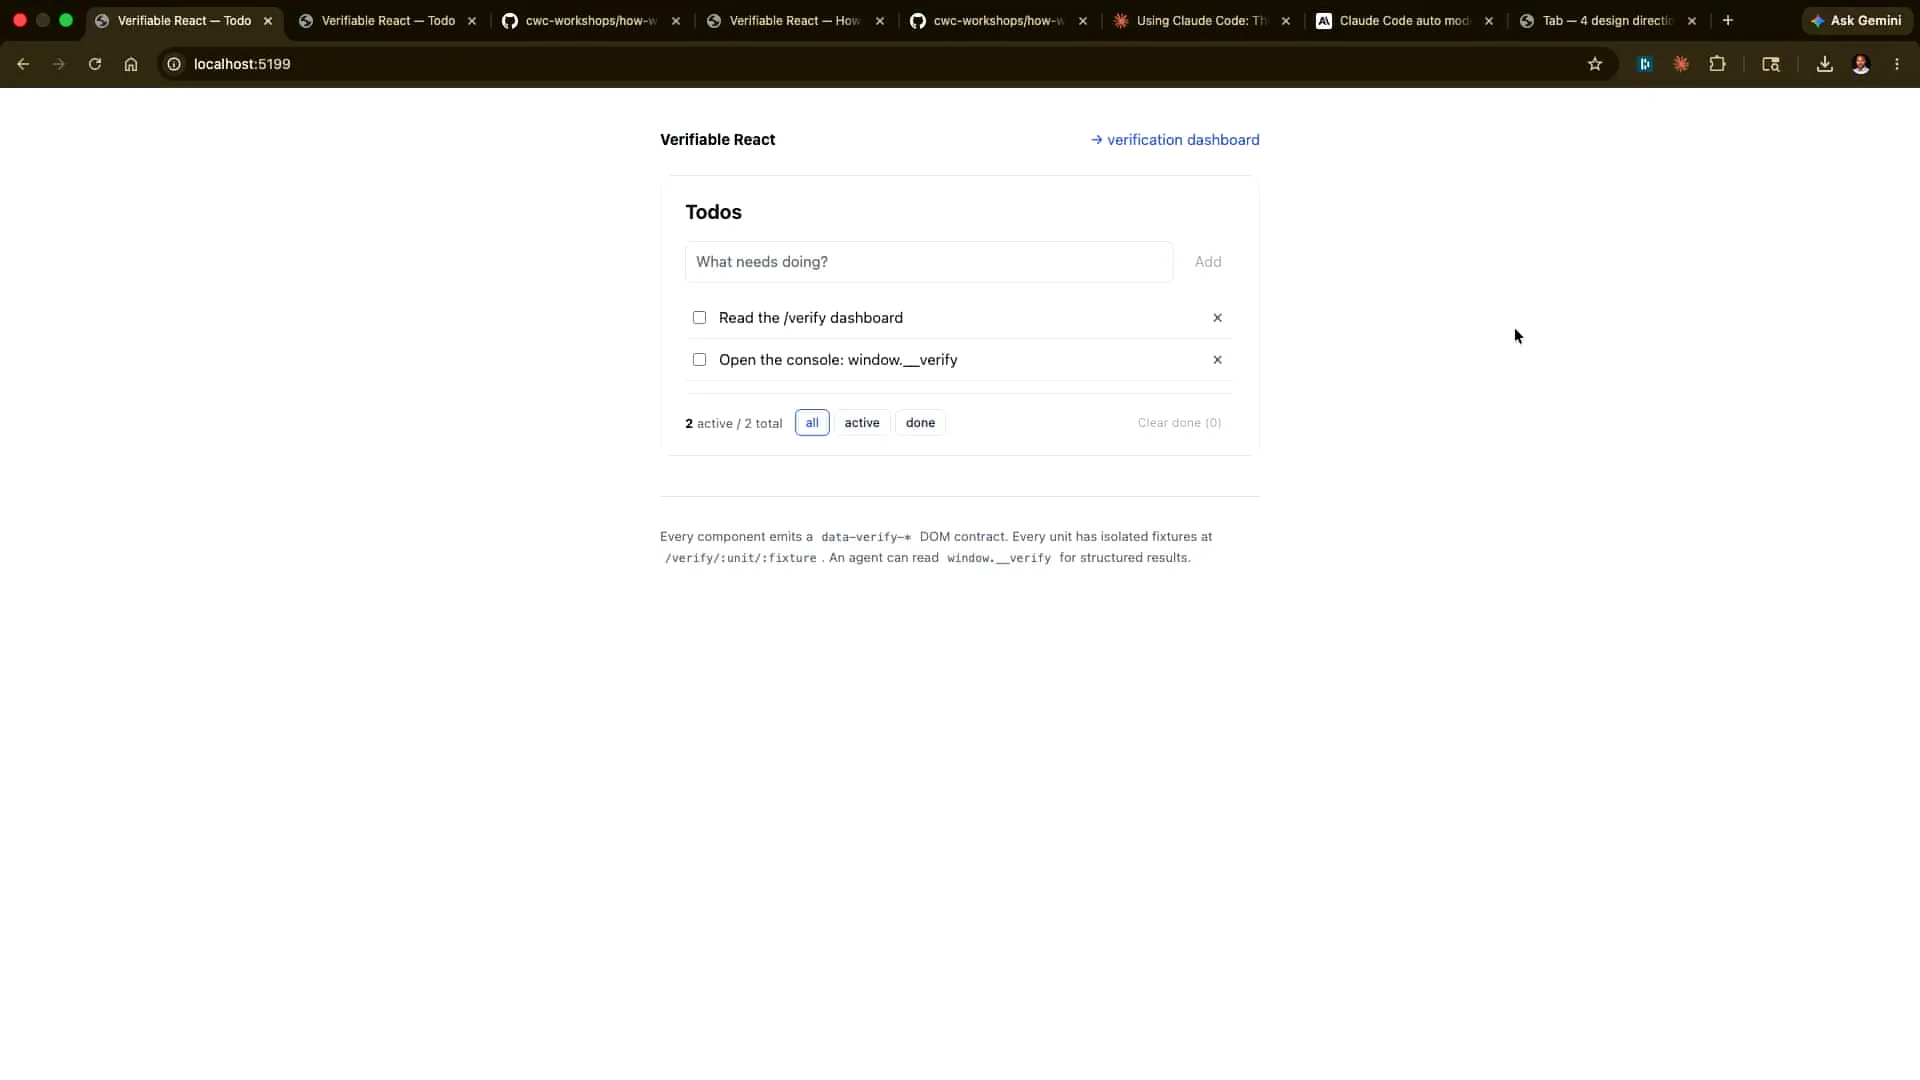
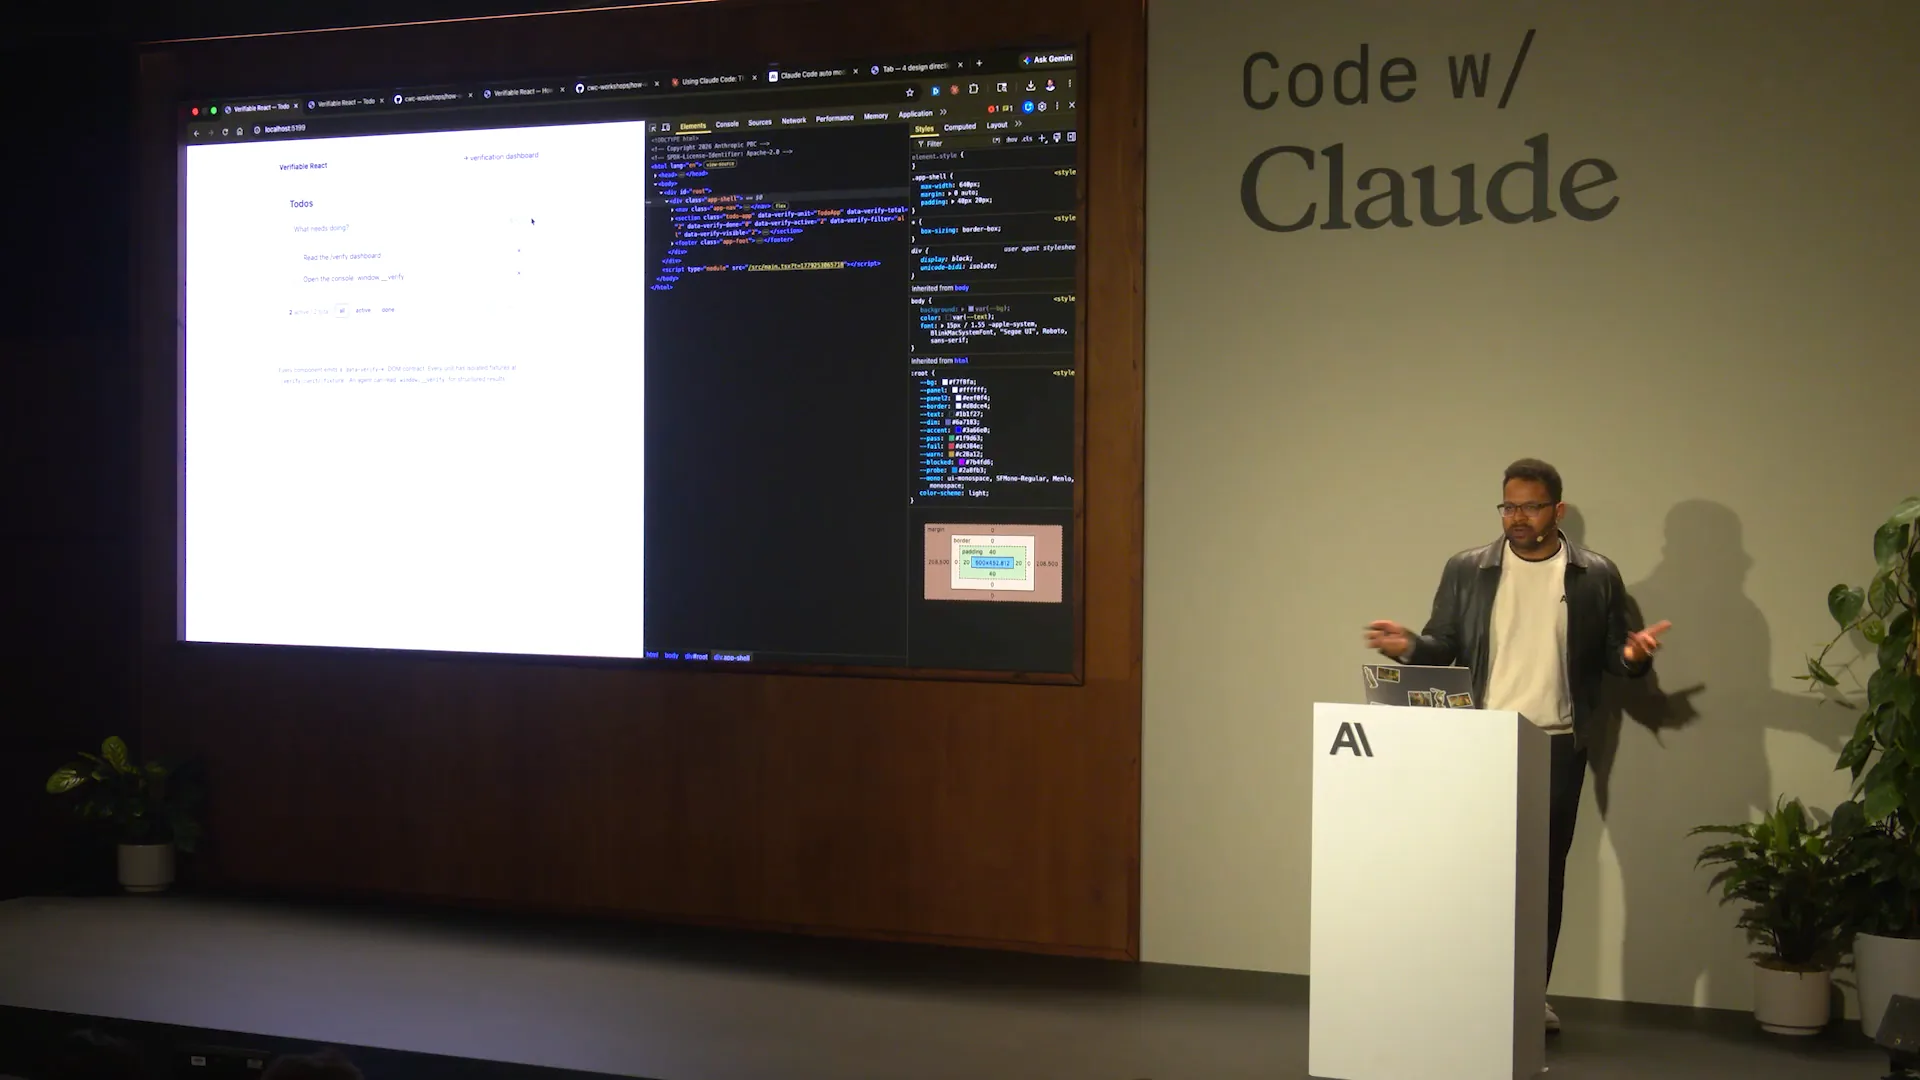
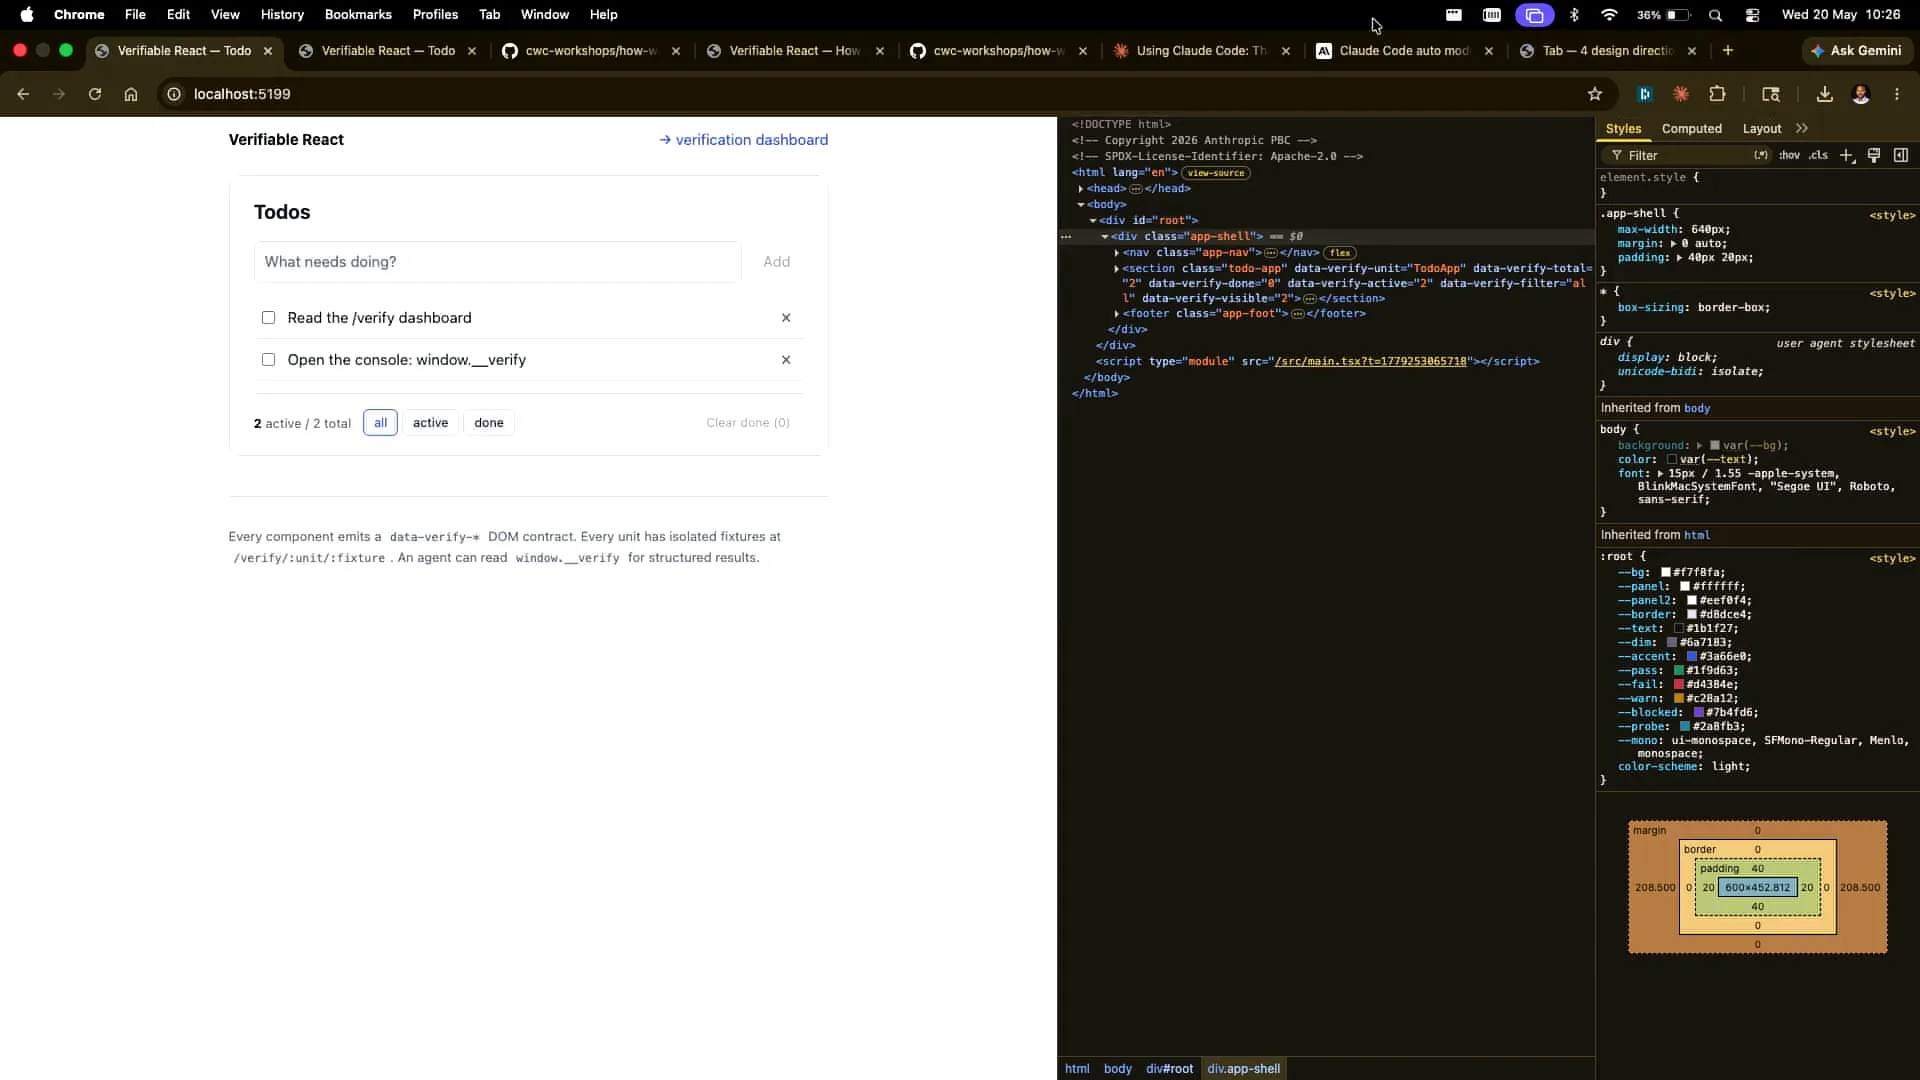
Slide 32 — 16:22 (watch)
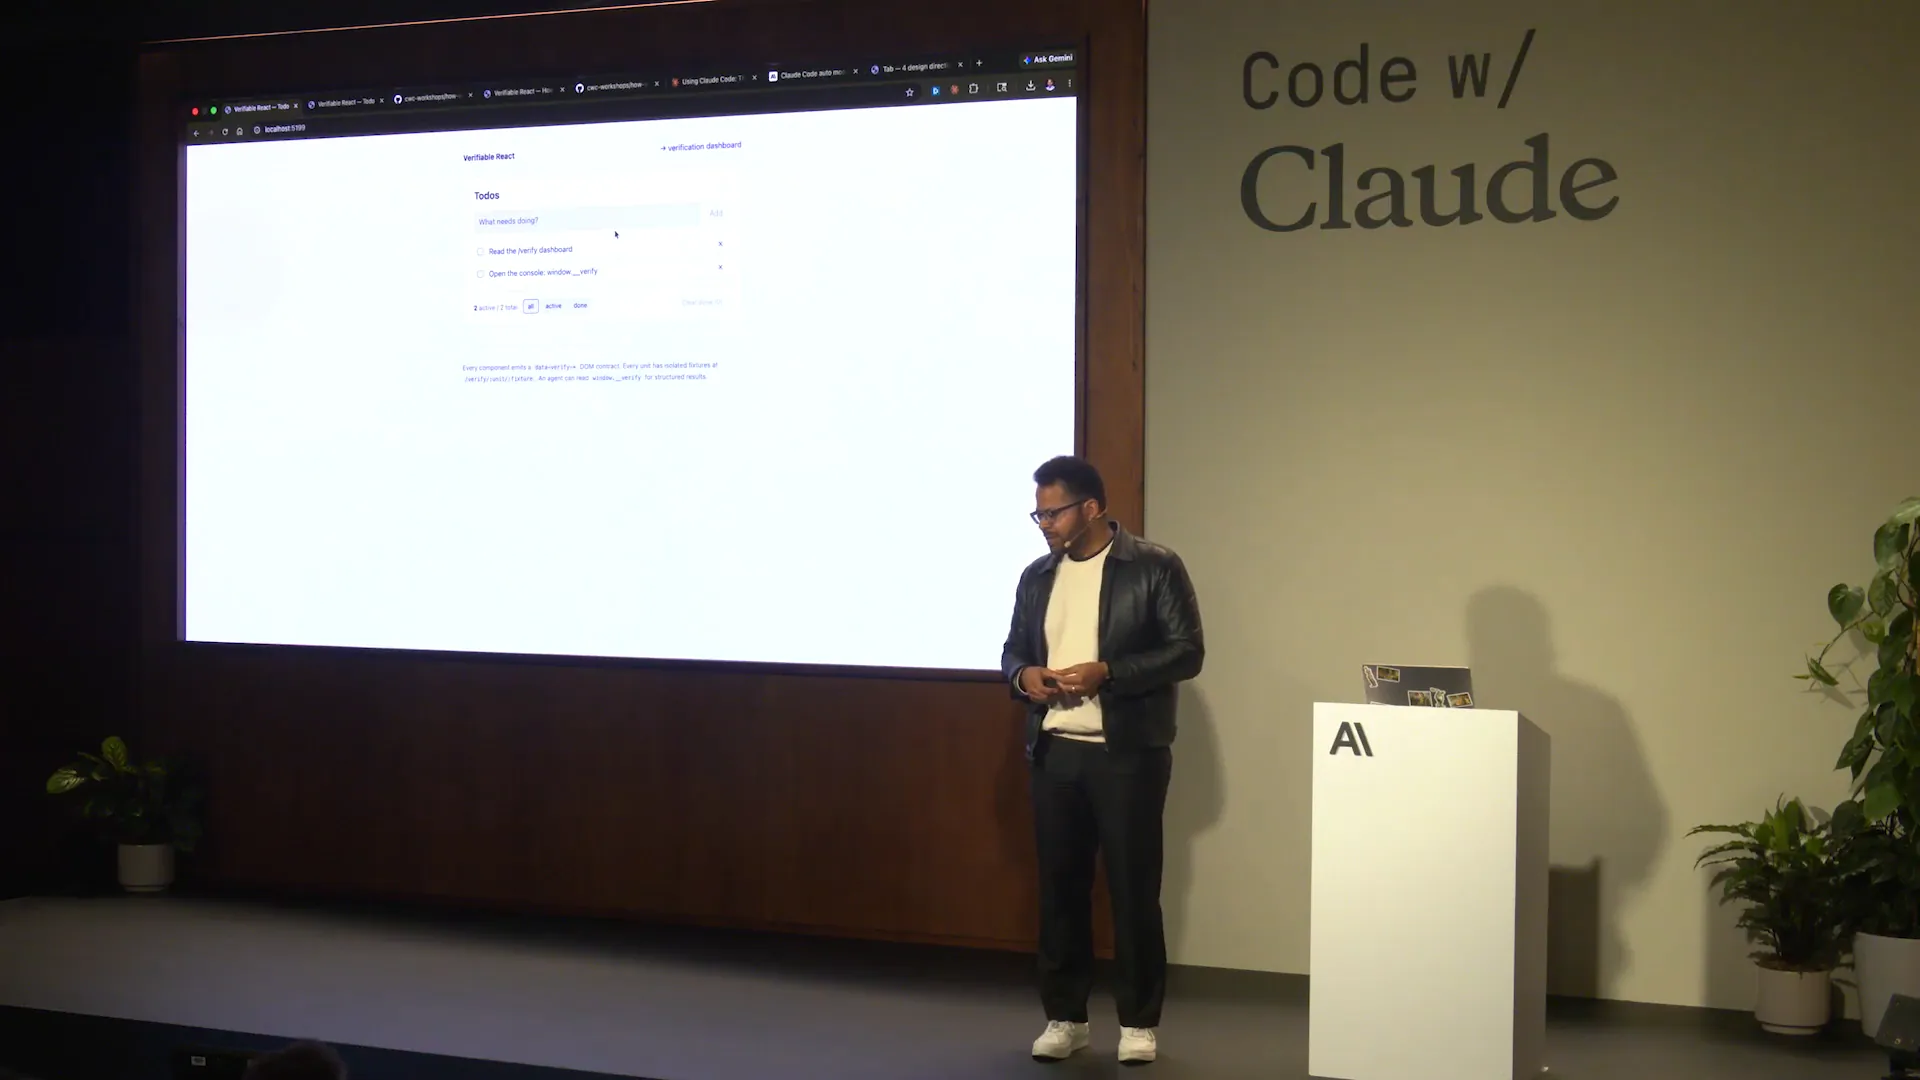
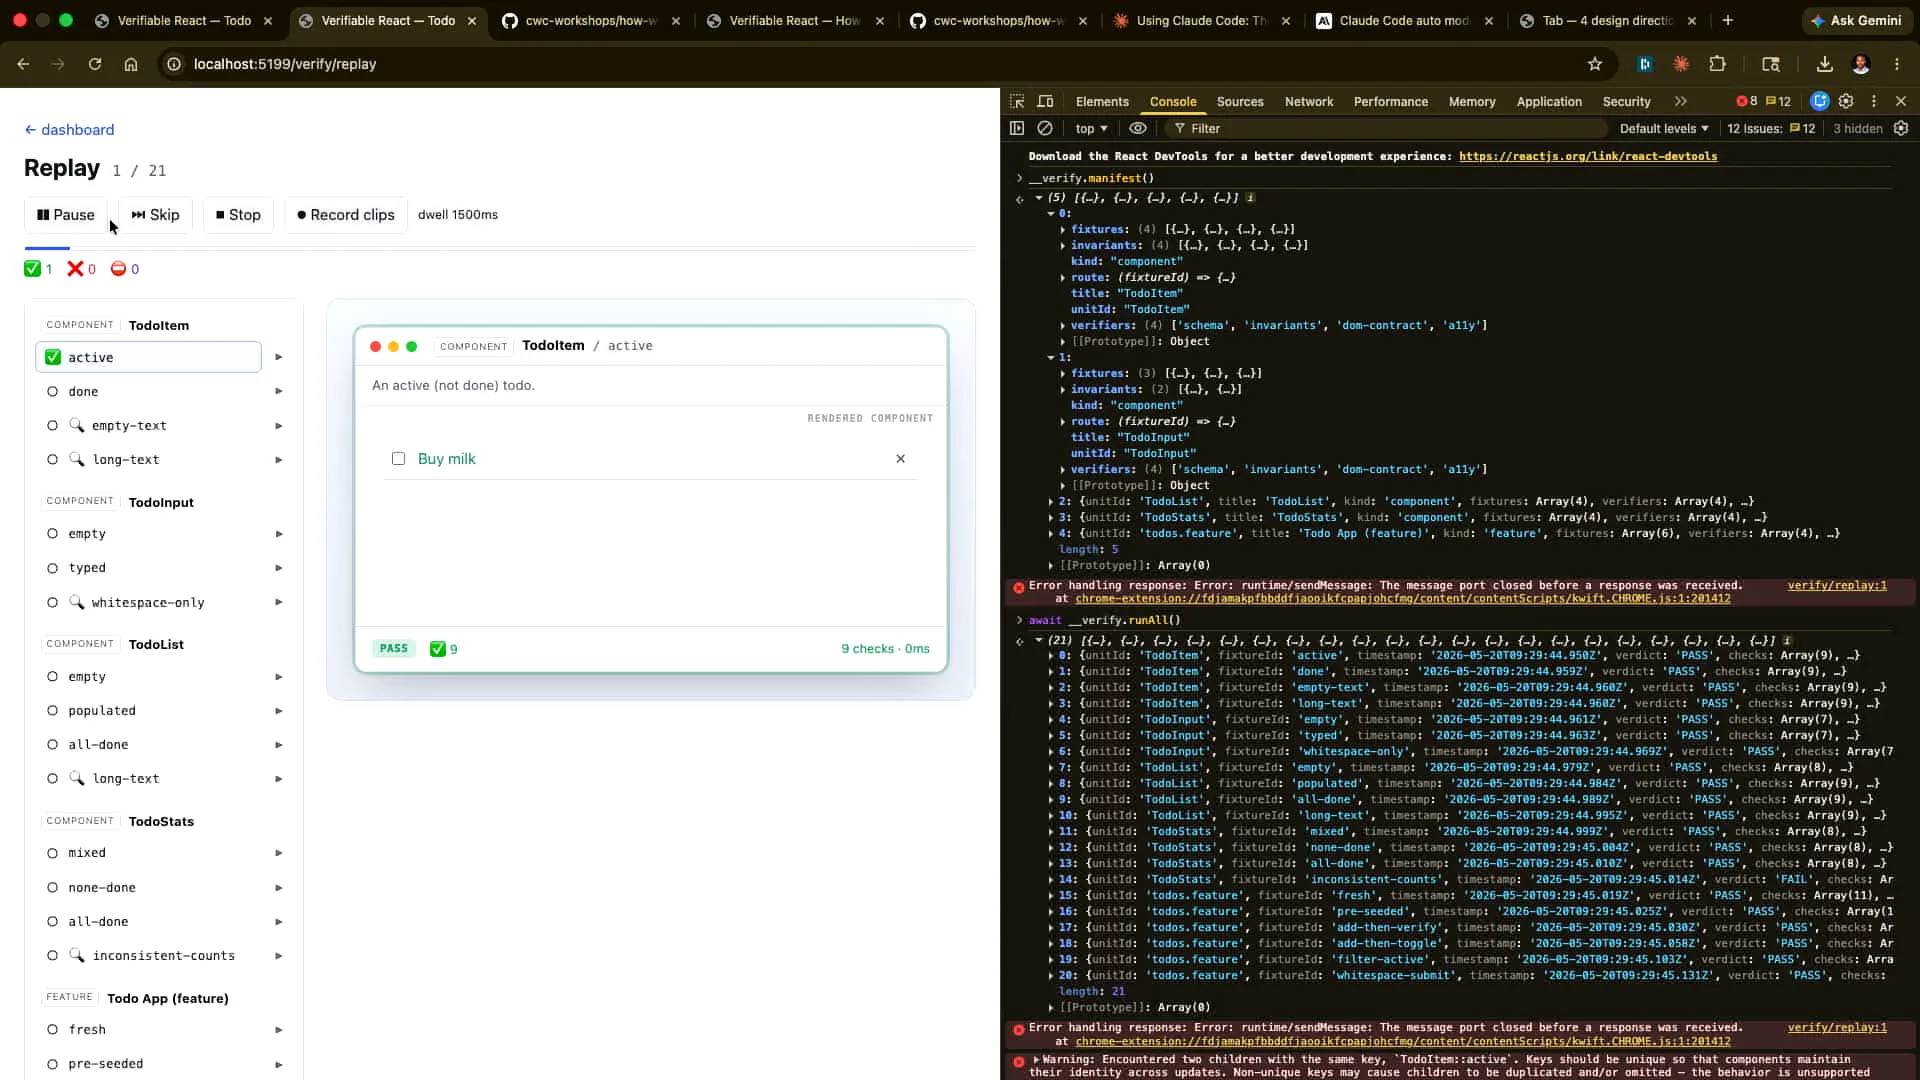
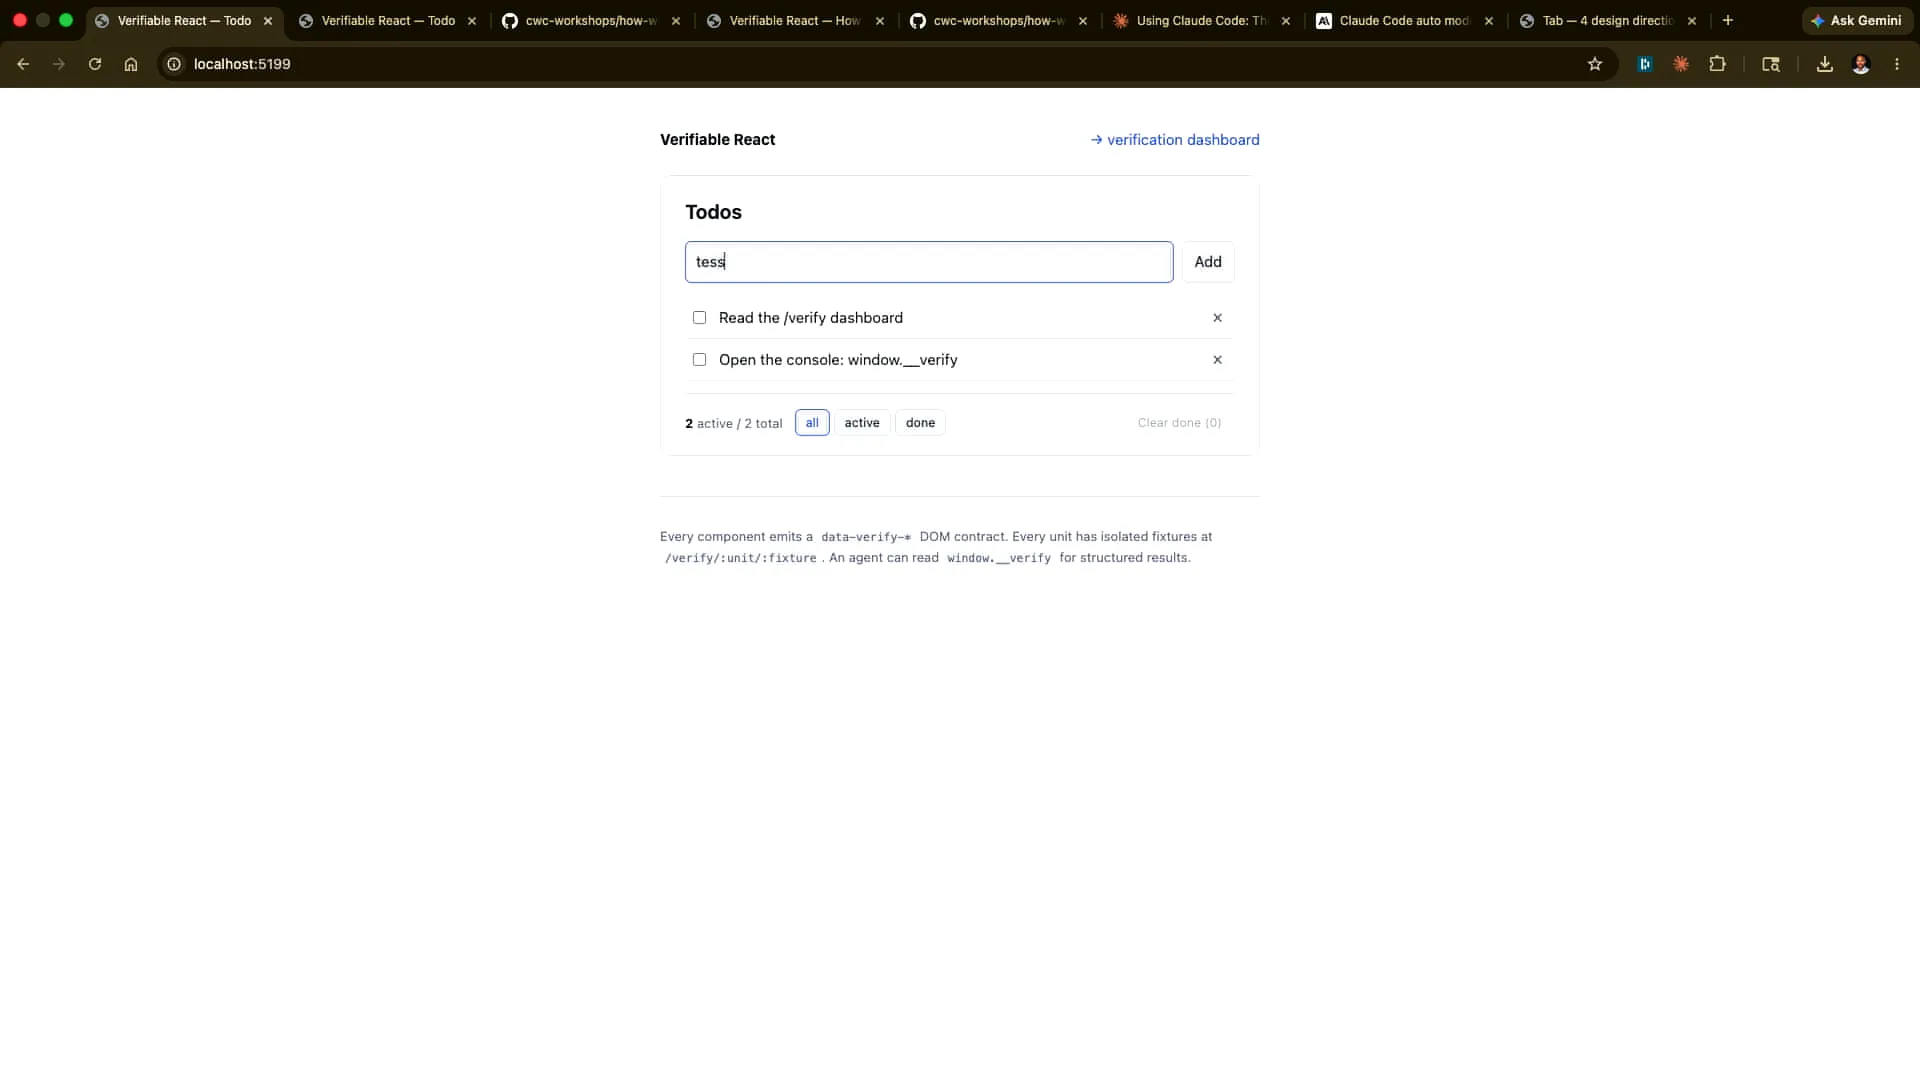 | This app focuses on a small to-do list functionality. I can add an item, such as "test." It's a bit hard to see, but there we go. Now, I can tick it off and remove it as well. I can also clear the finished items. Many actions are happening here regarding the state, and we want to verify that everything is functioning correctly alongside the existing tests. However, we want these verification steps to be driven by an agent. |
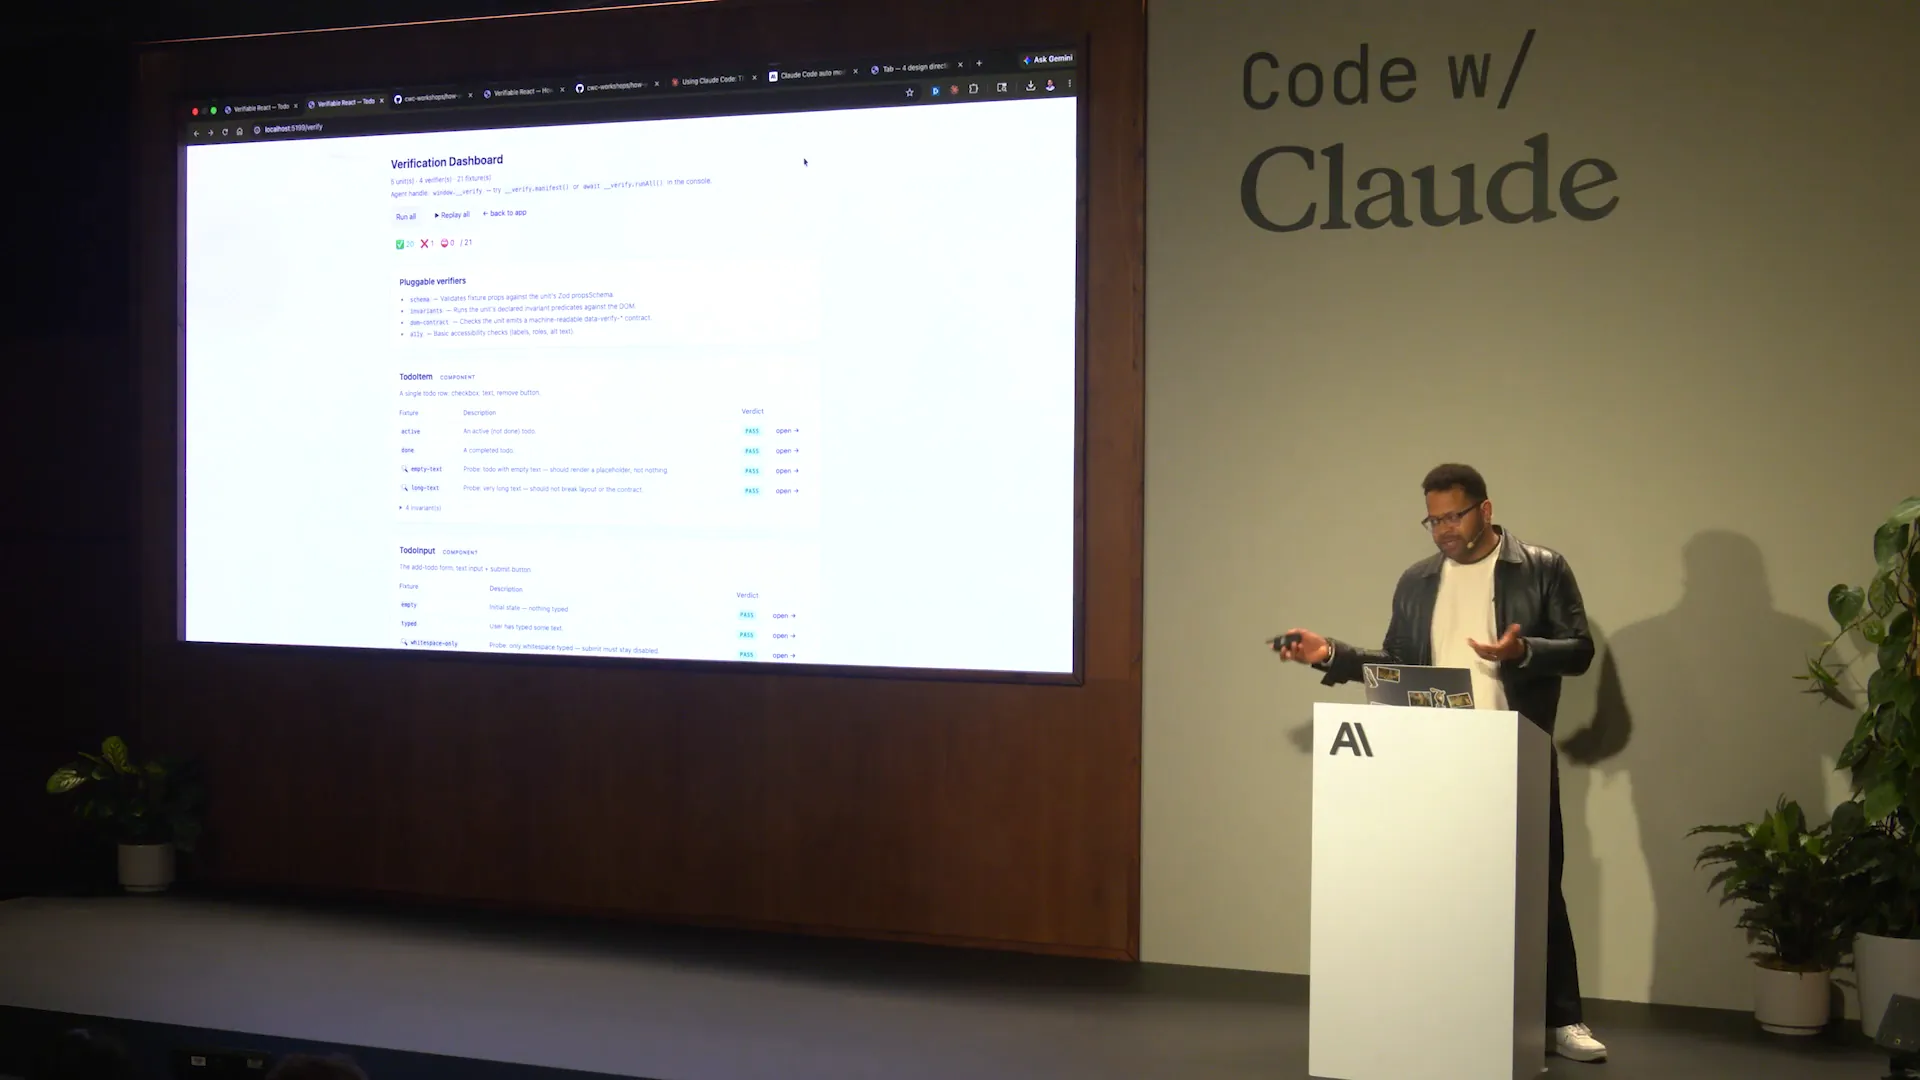
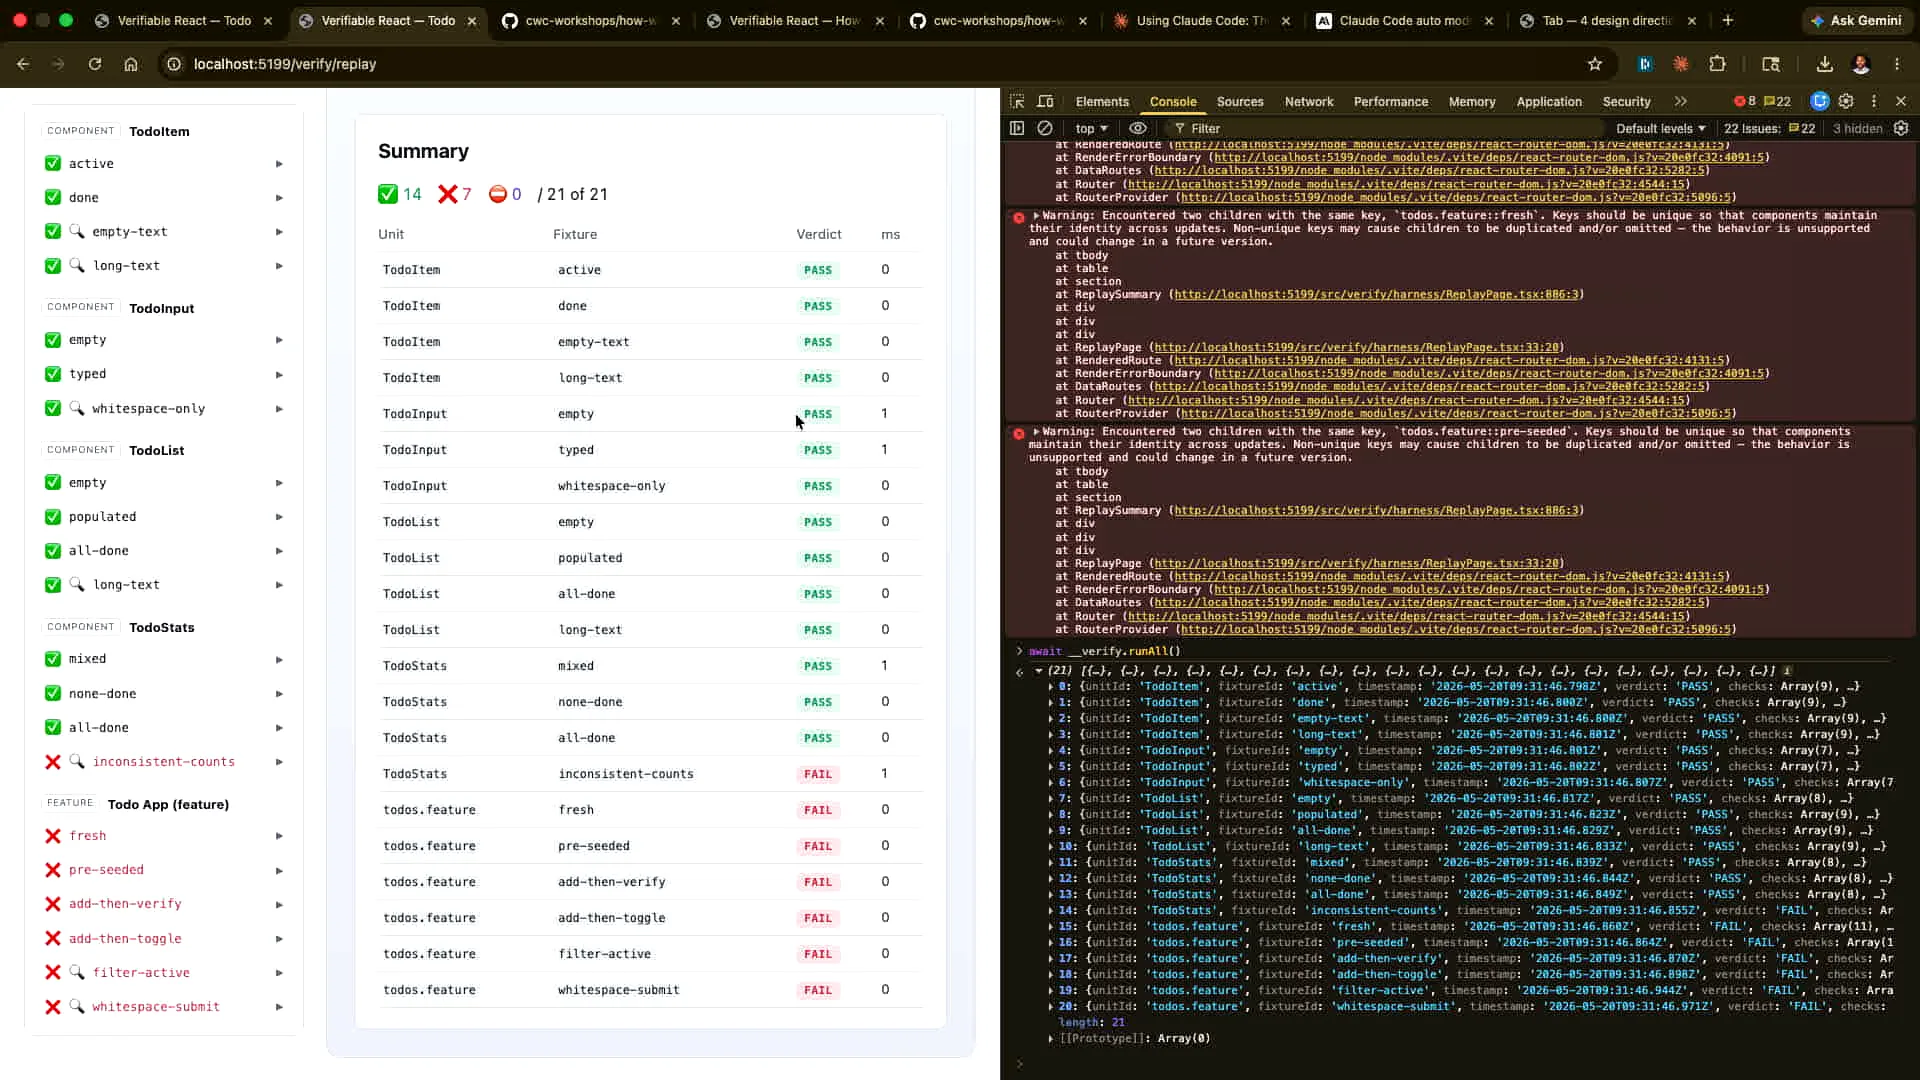
Slide 33 — 16:58 (watch)
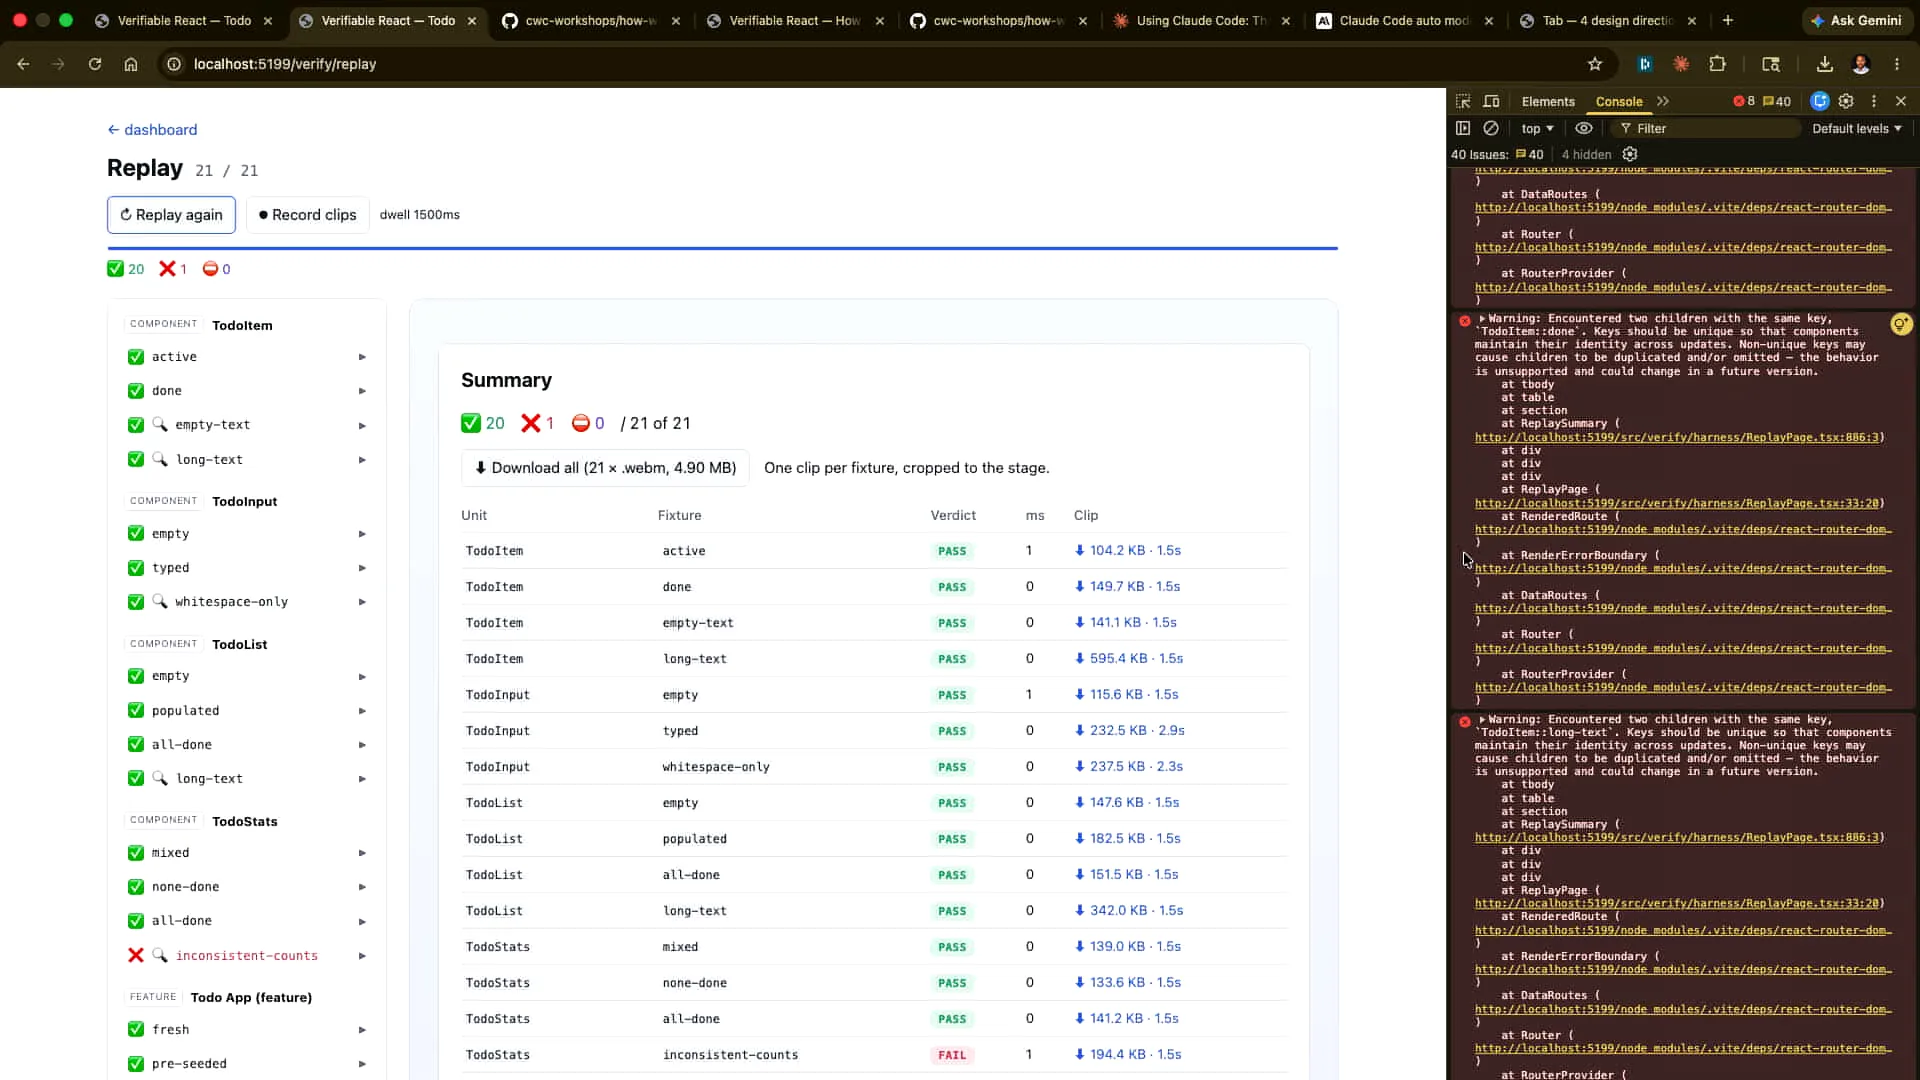
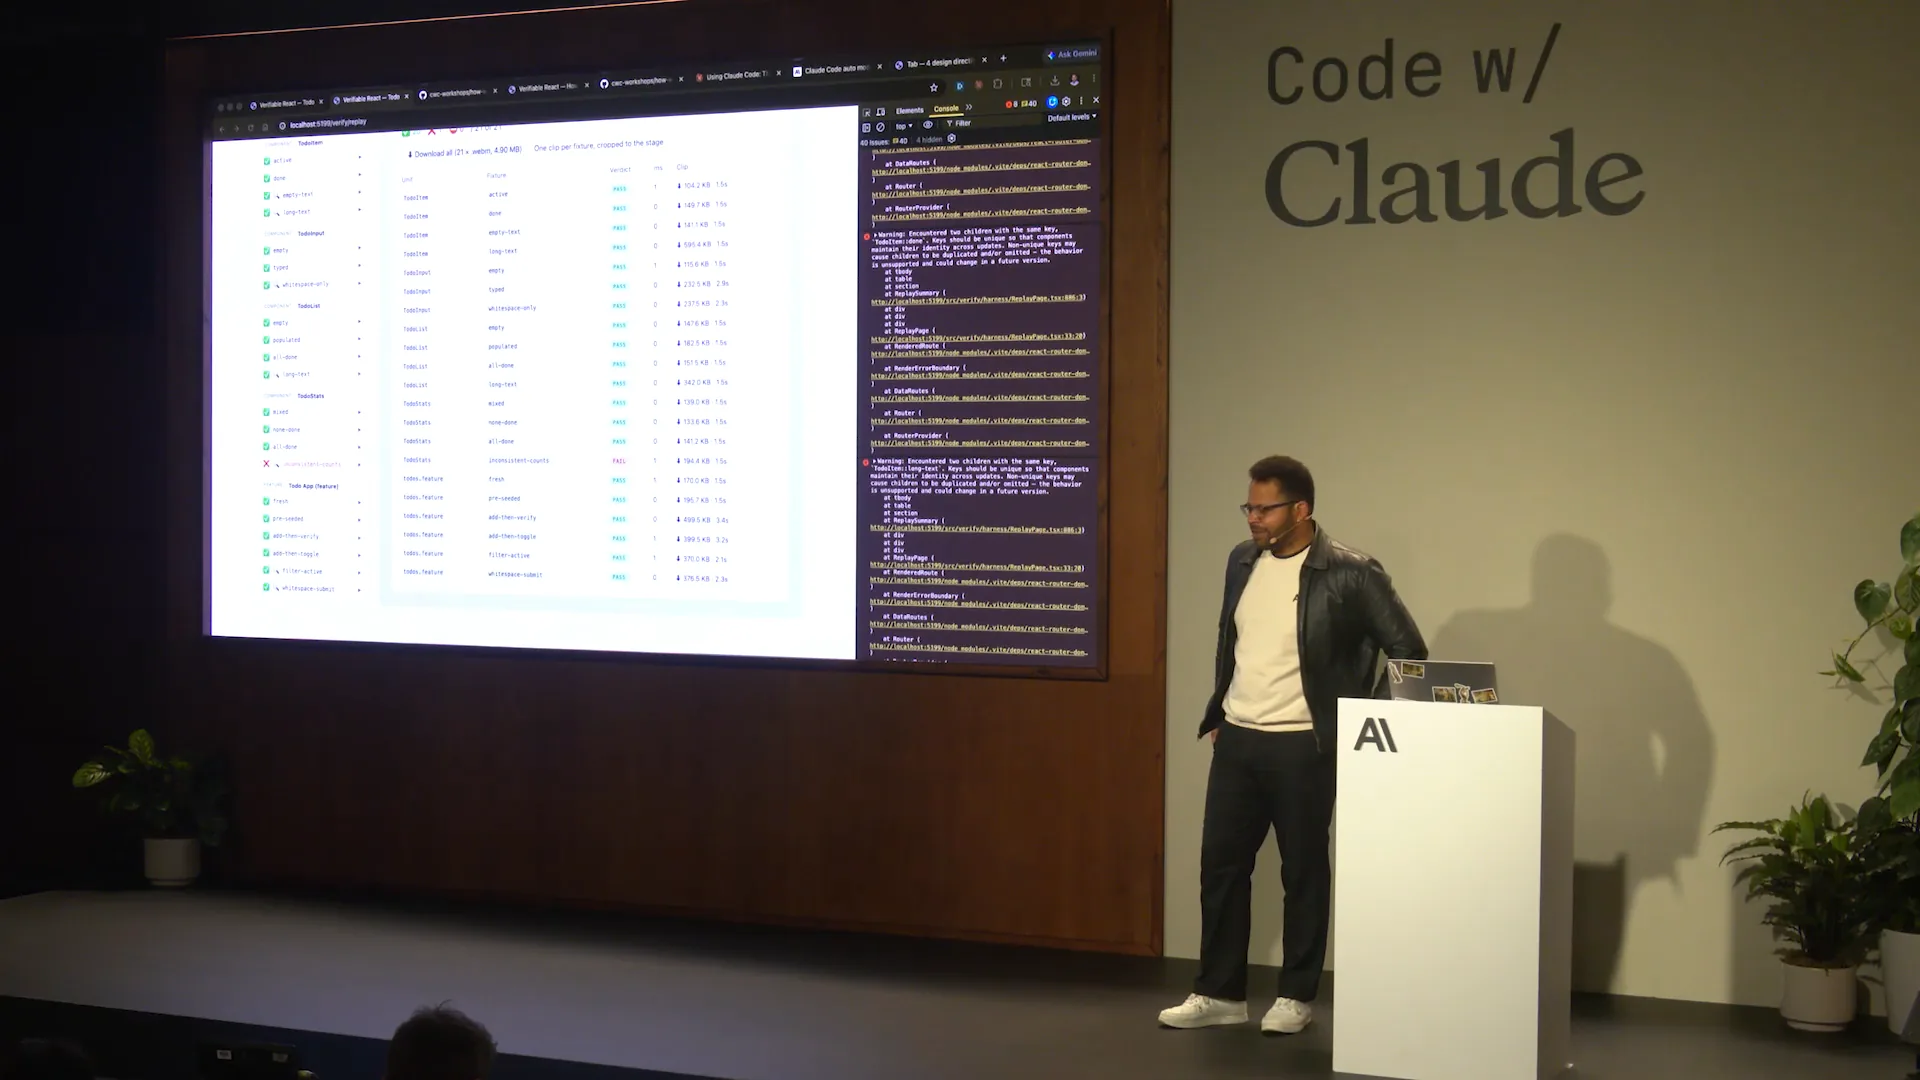
 | We will implement this verification process in three ways. First, we will present it in a human-readable format through a dashboard. Second, we will verify it in an agent-first manner, allowing Claude to handle that separately. Lastly, there is an option in the repository where you can simply run the verification command, which will execute the test matrix. The results may vary slightly between running it from the repository and the dashboard, but the underlying principle remains the same: we will provide a human-readable format, an agent-driven approach from Cloud Code or other environments, and a headless option suitable for continuous integration. |
Slide 34 — 17:22 (watch)
 | Let's examine this in more depth. We'll navigate to the app and take a closer look. |
Slide 35 — 17:30 (watch)
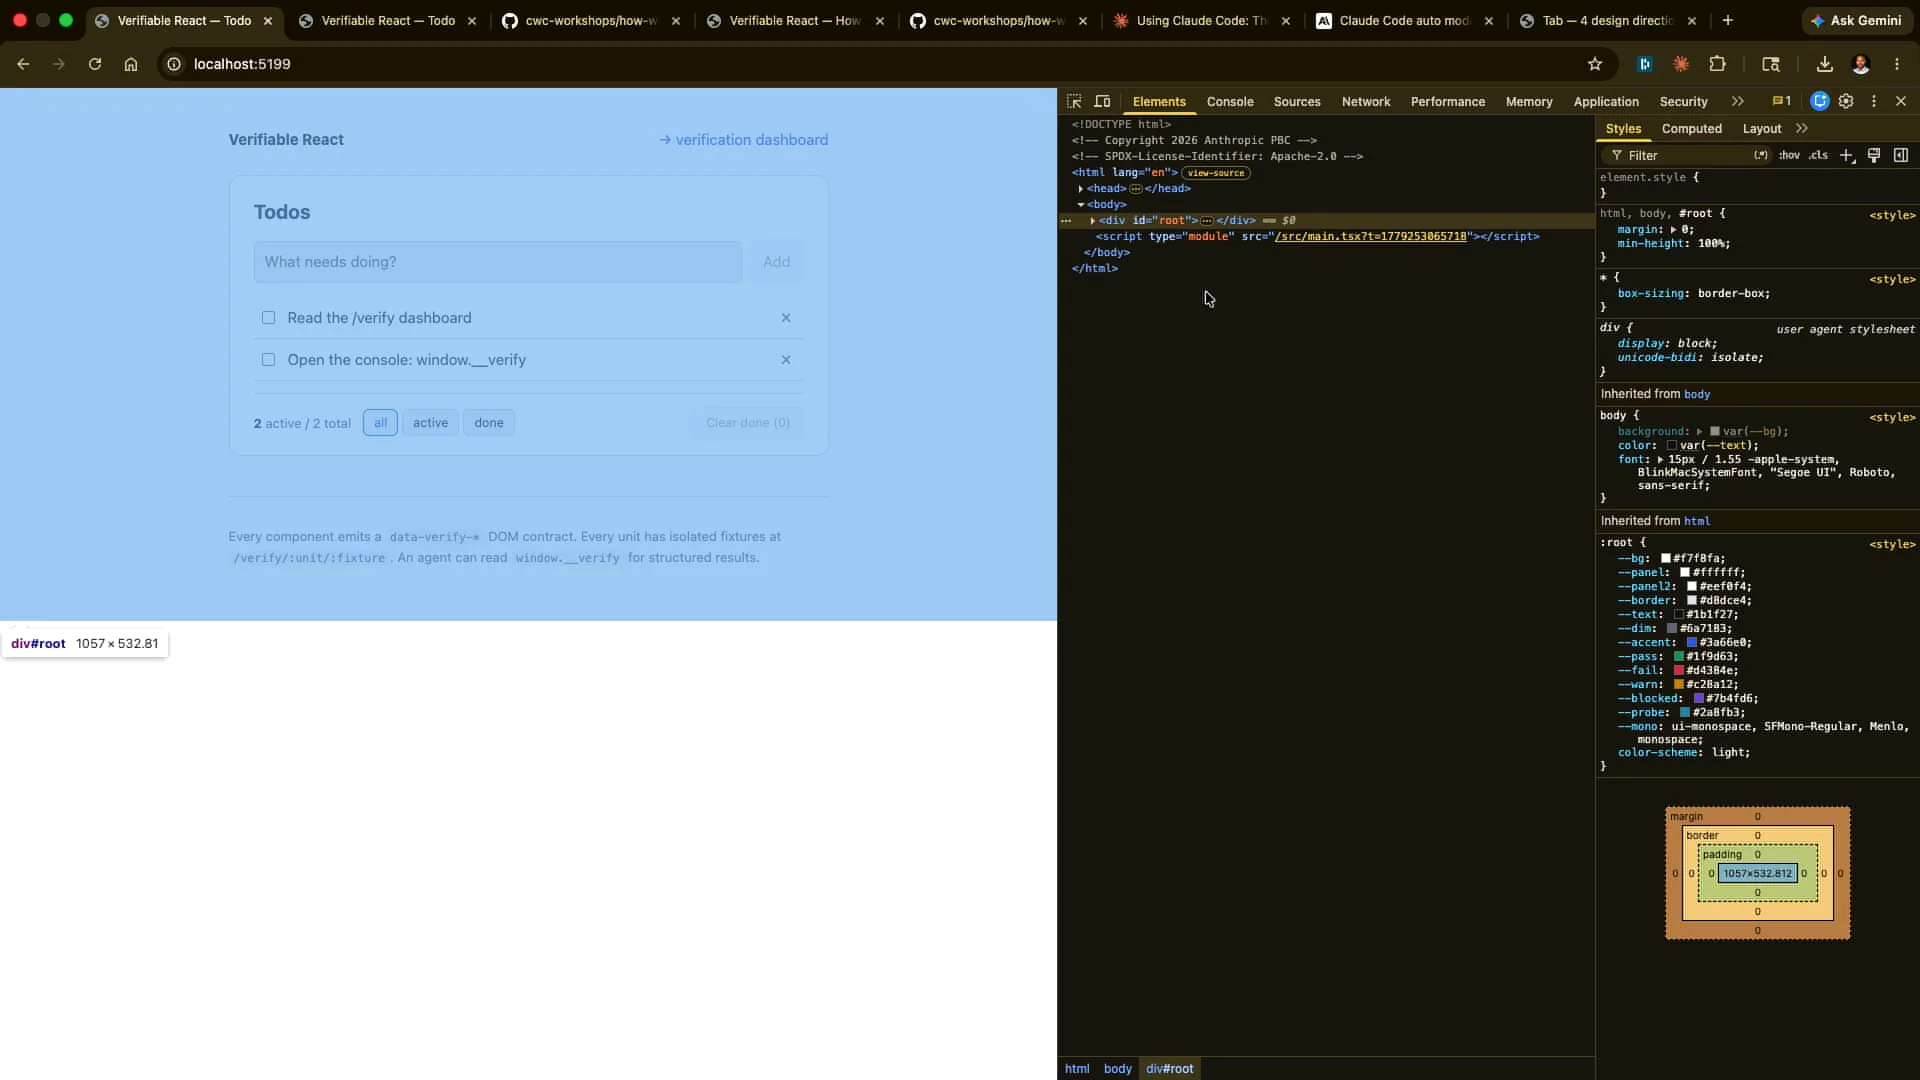 | We will examine the elements. |
Slide 36 — 17:40 (watch)
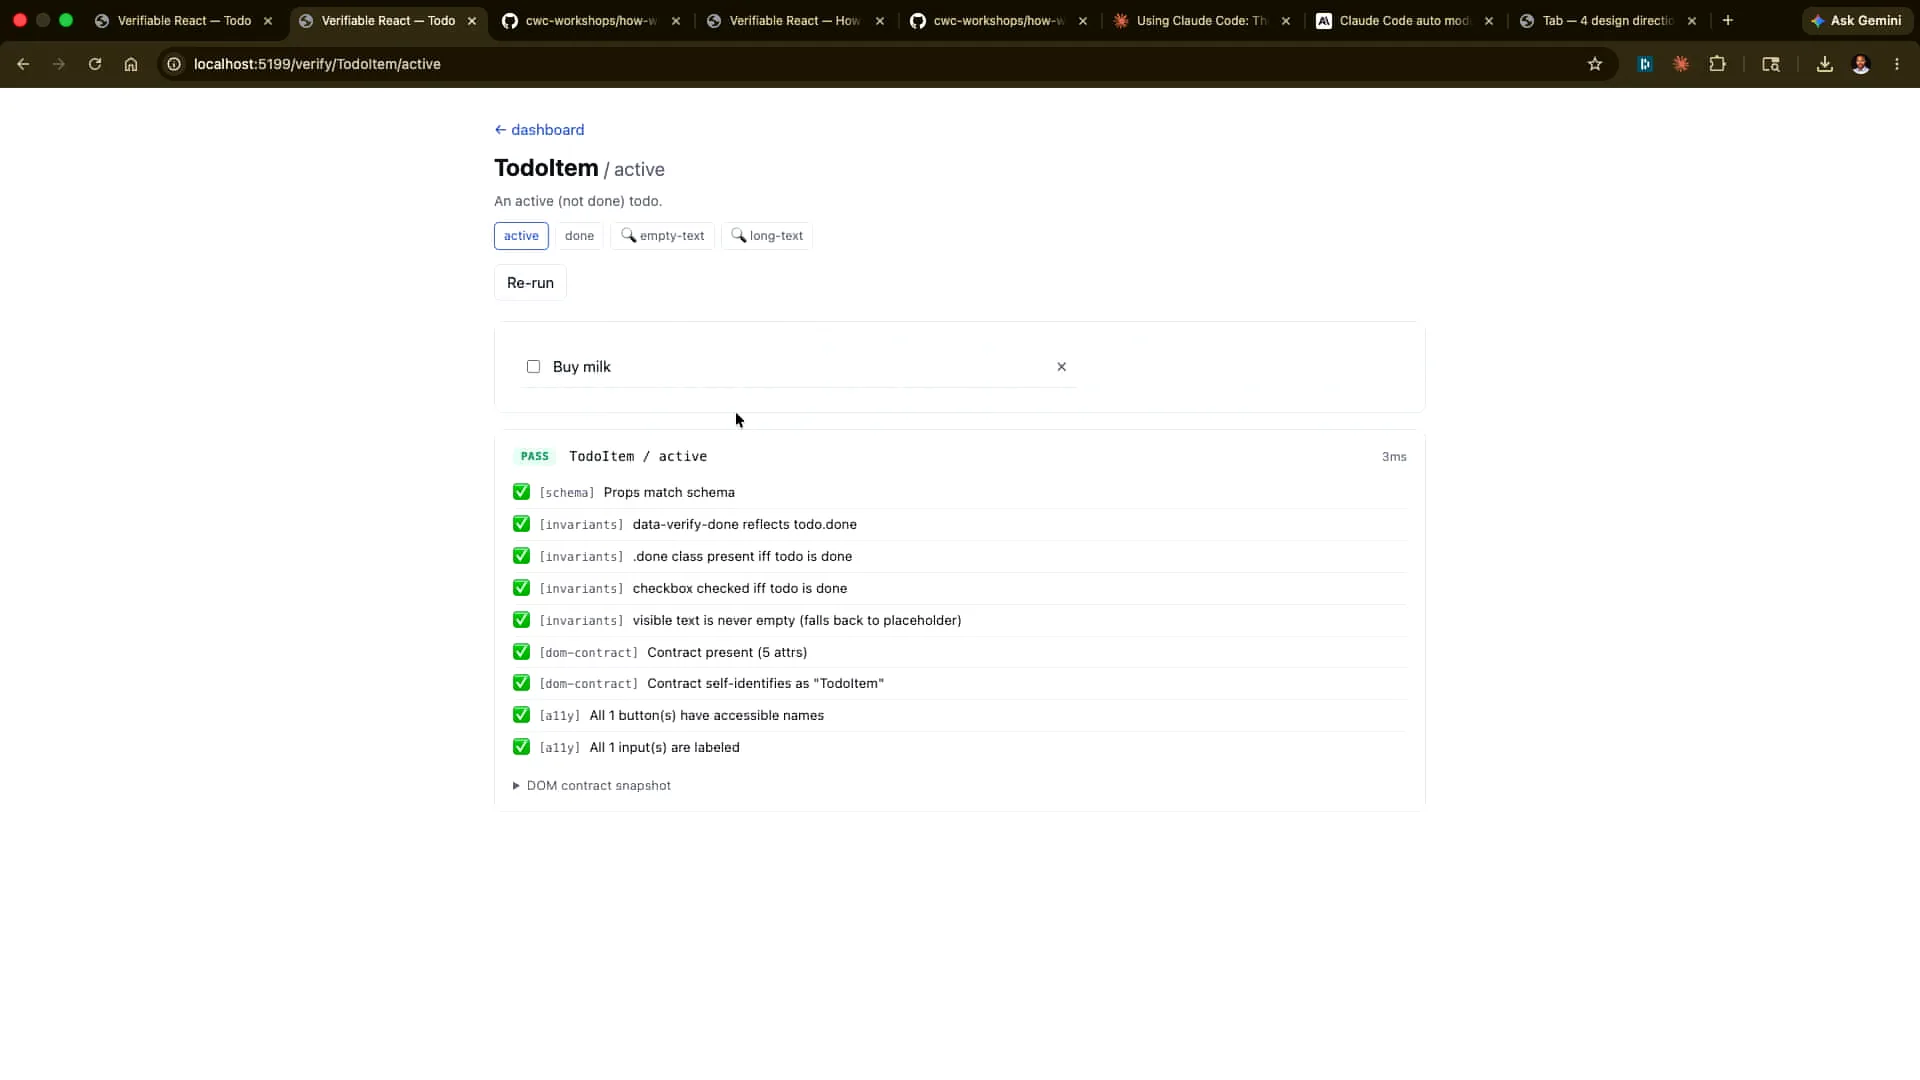
 | We have the actual emitting of different data aspects, including the data verification unit, total done, and active states. The component publishes its state to the DOM, so if I change my state here, I might add a test again. |
Slide 37 — 17:54 (watch)
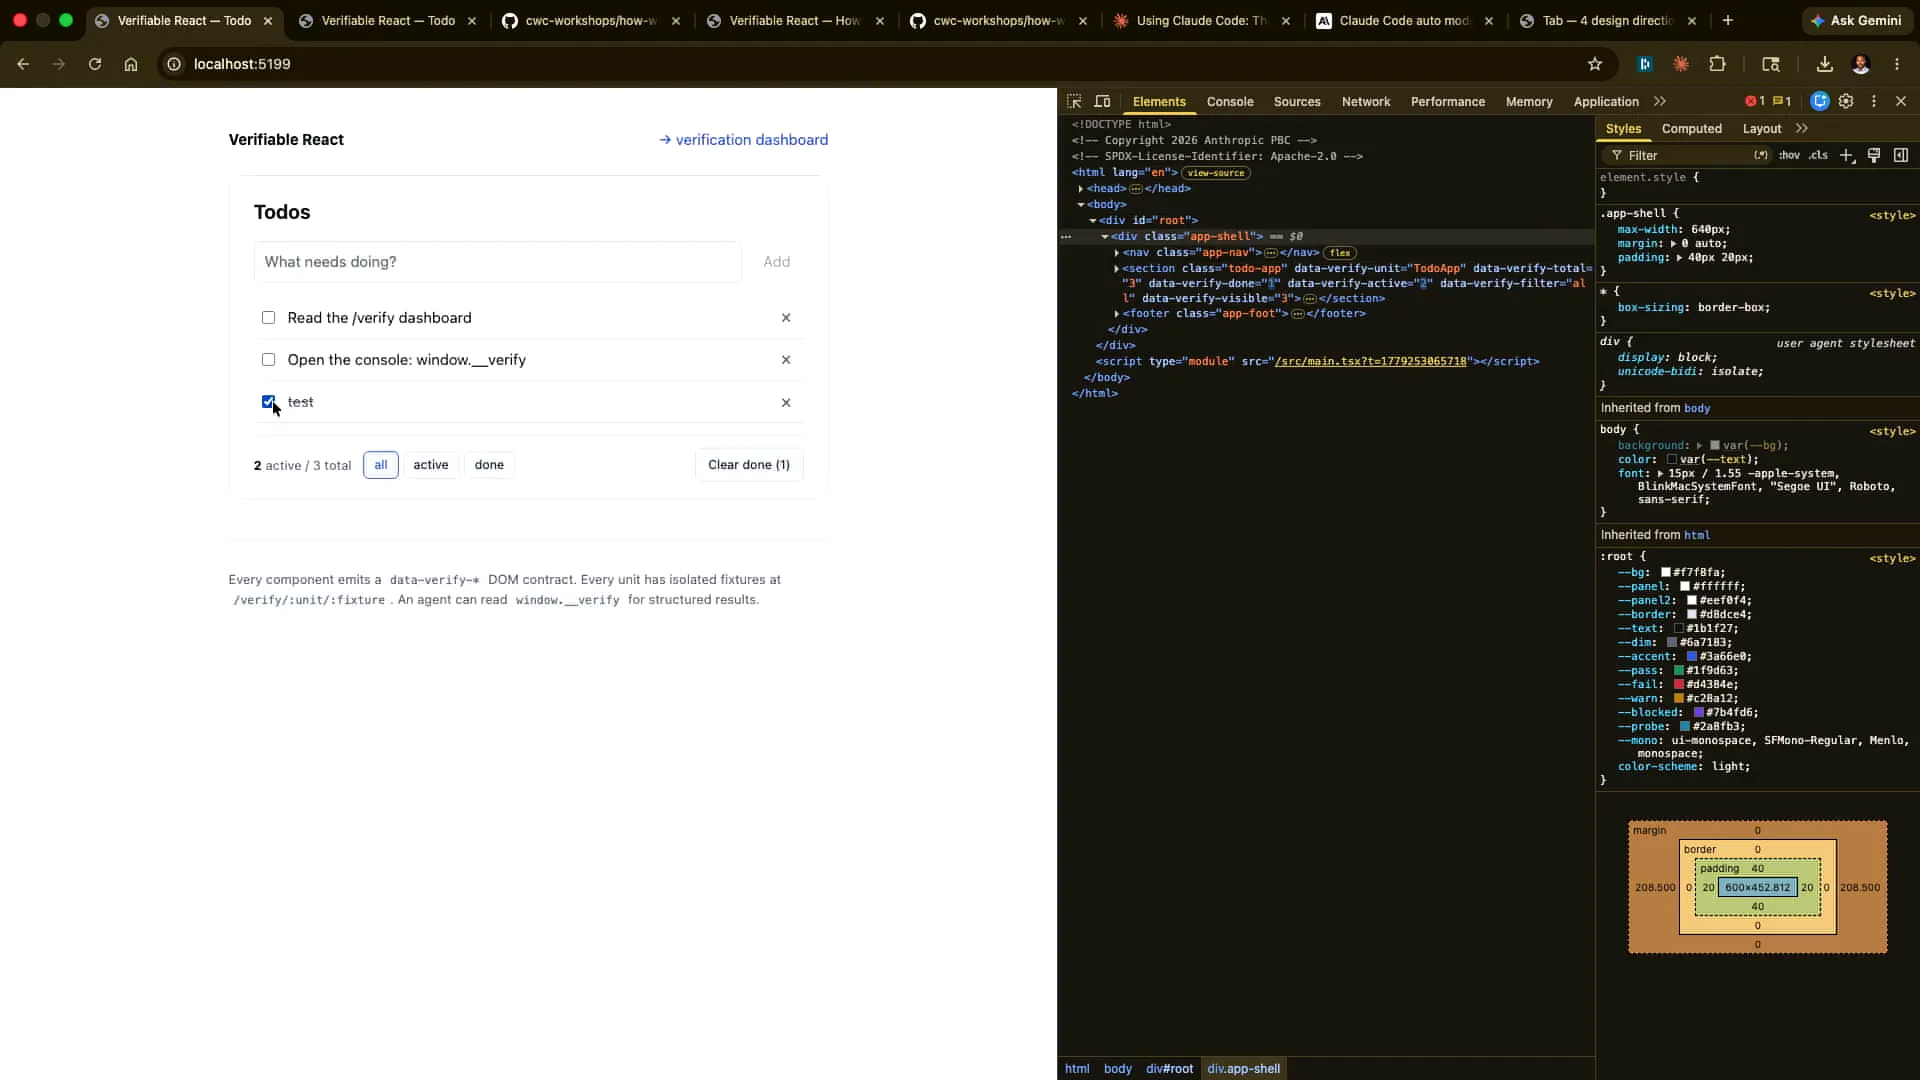 | The updates are visible, and when I drop it, it updates again. This is the information that the agent can read later. |
Slide 38 — 18:12 (watch)
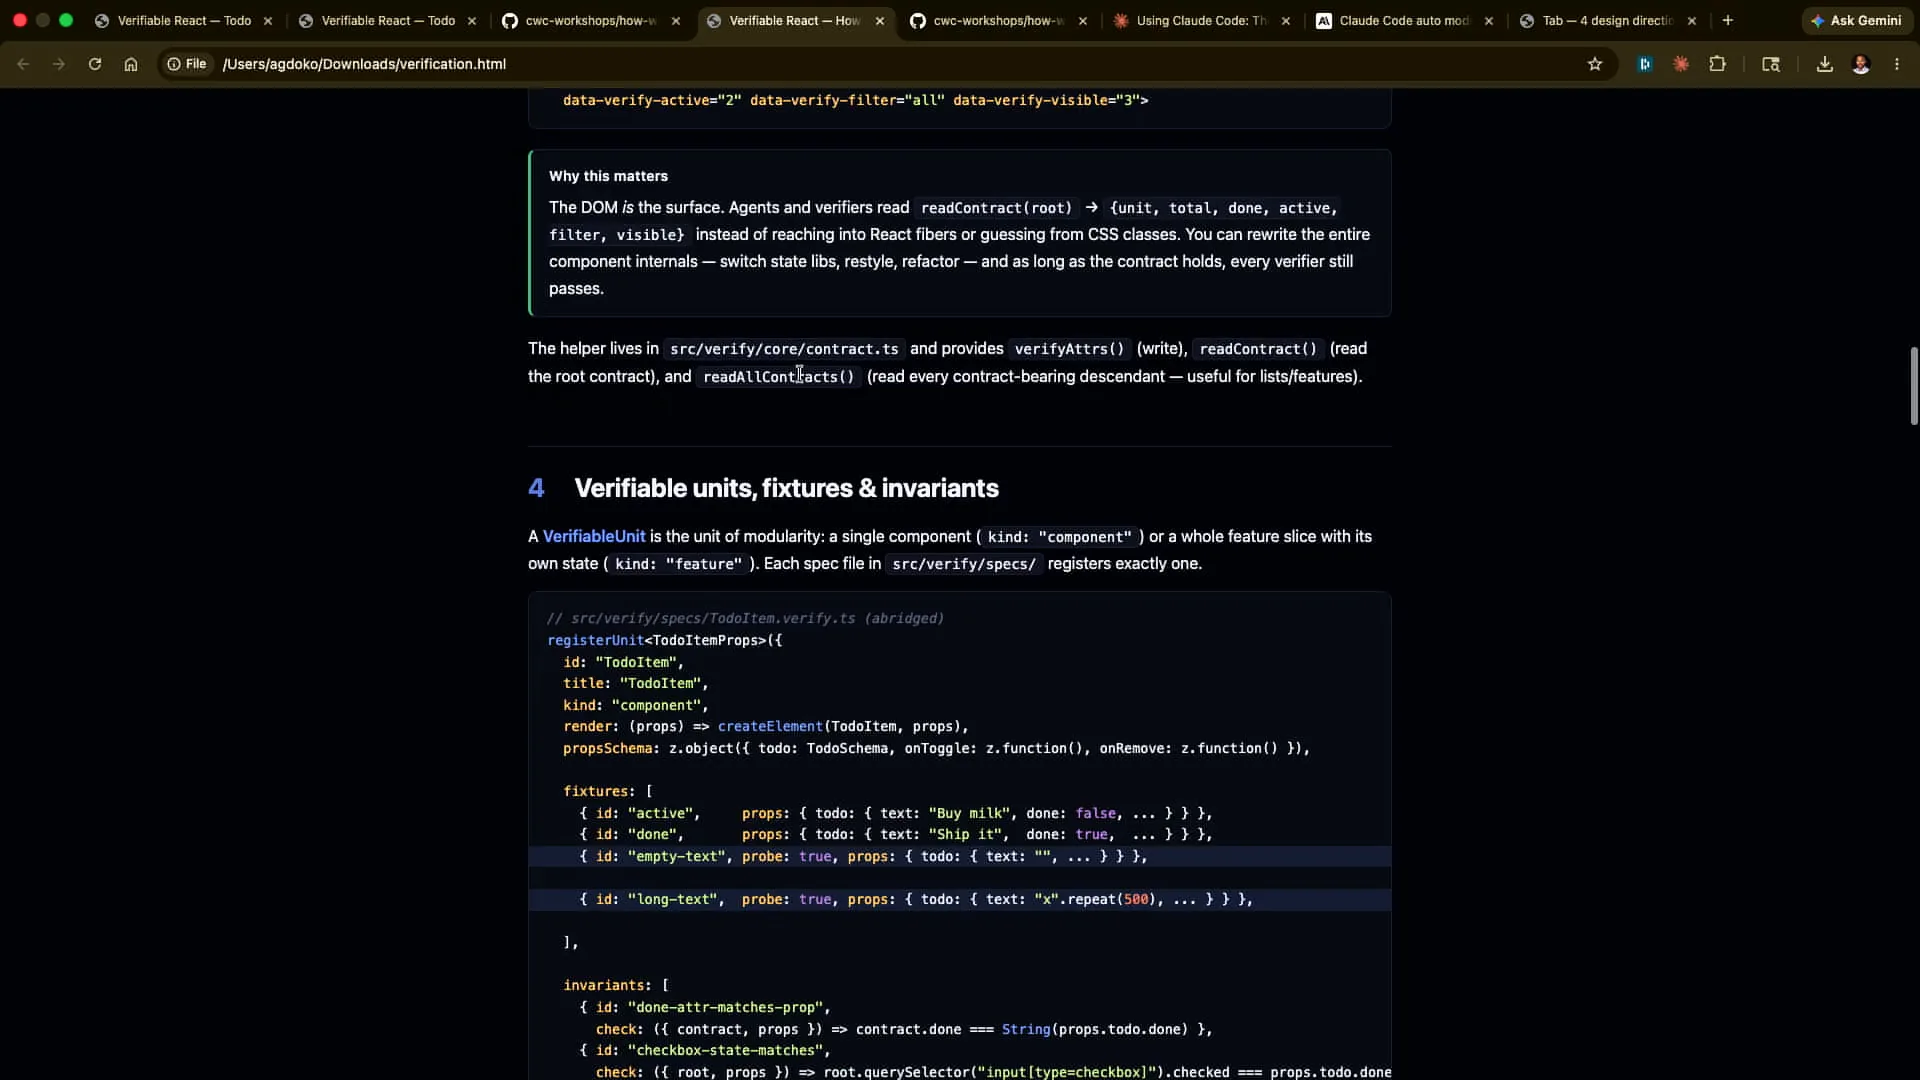
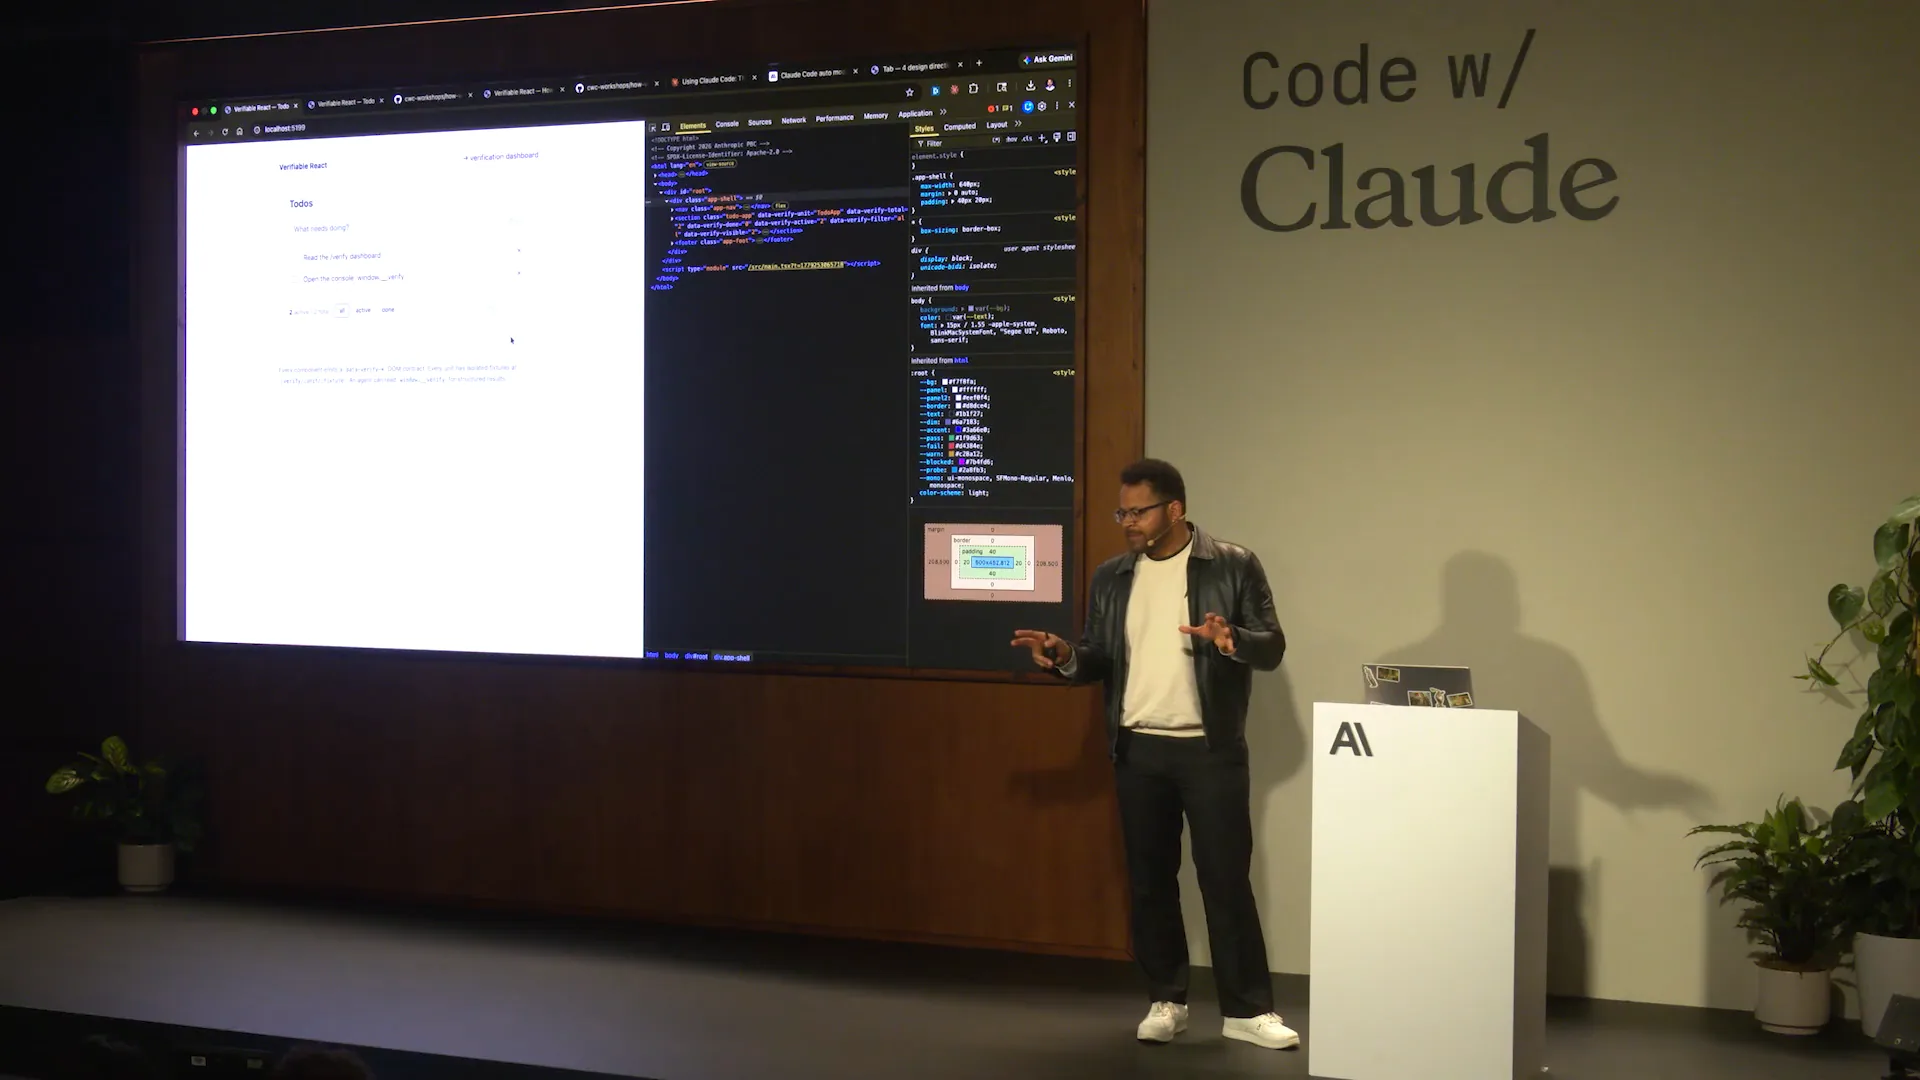 | Instead of scraping the DOM, if you publish the state separately from the React internals, you can run the verification independently of the app's state. This setup allows for further execution down the line. Each component receives this structure. As I pull up the... |
Slide 39 — 18:32 (watch)
 | Every component receives one of these. This includes schemas, fixtures, known states, and invariants. |
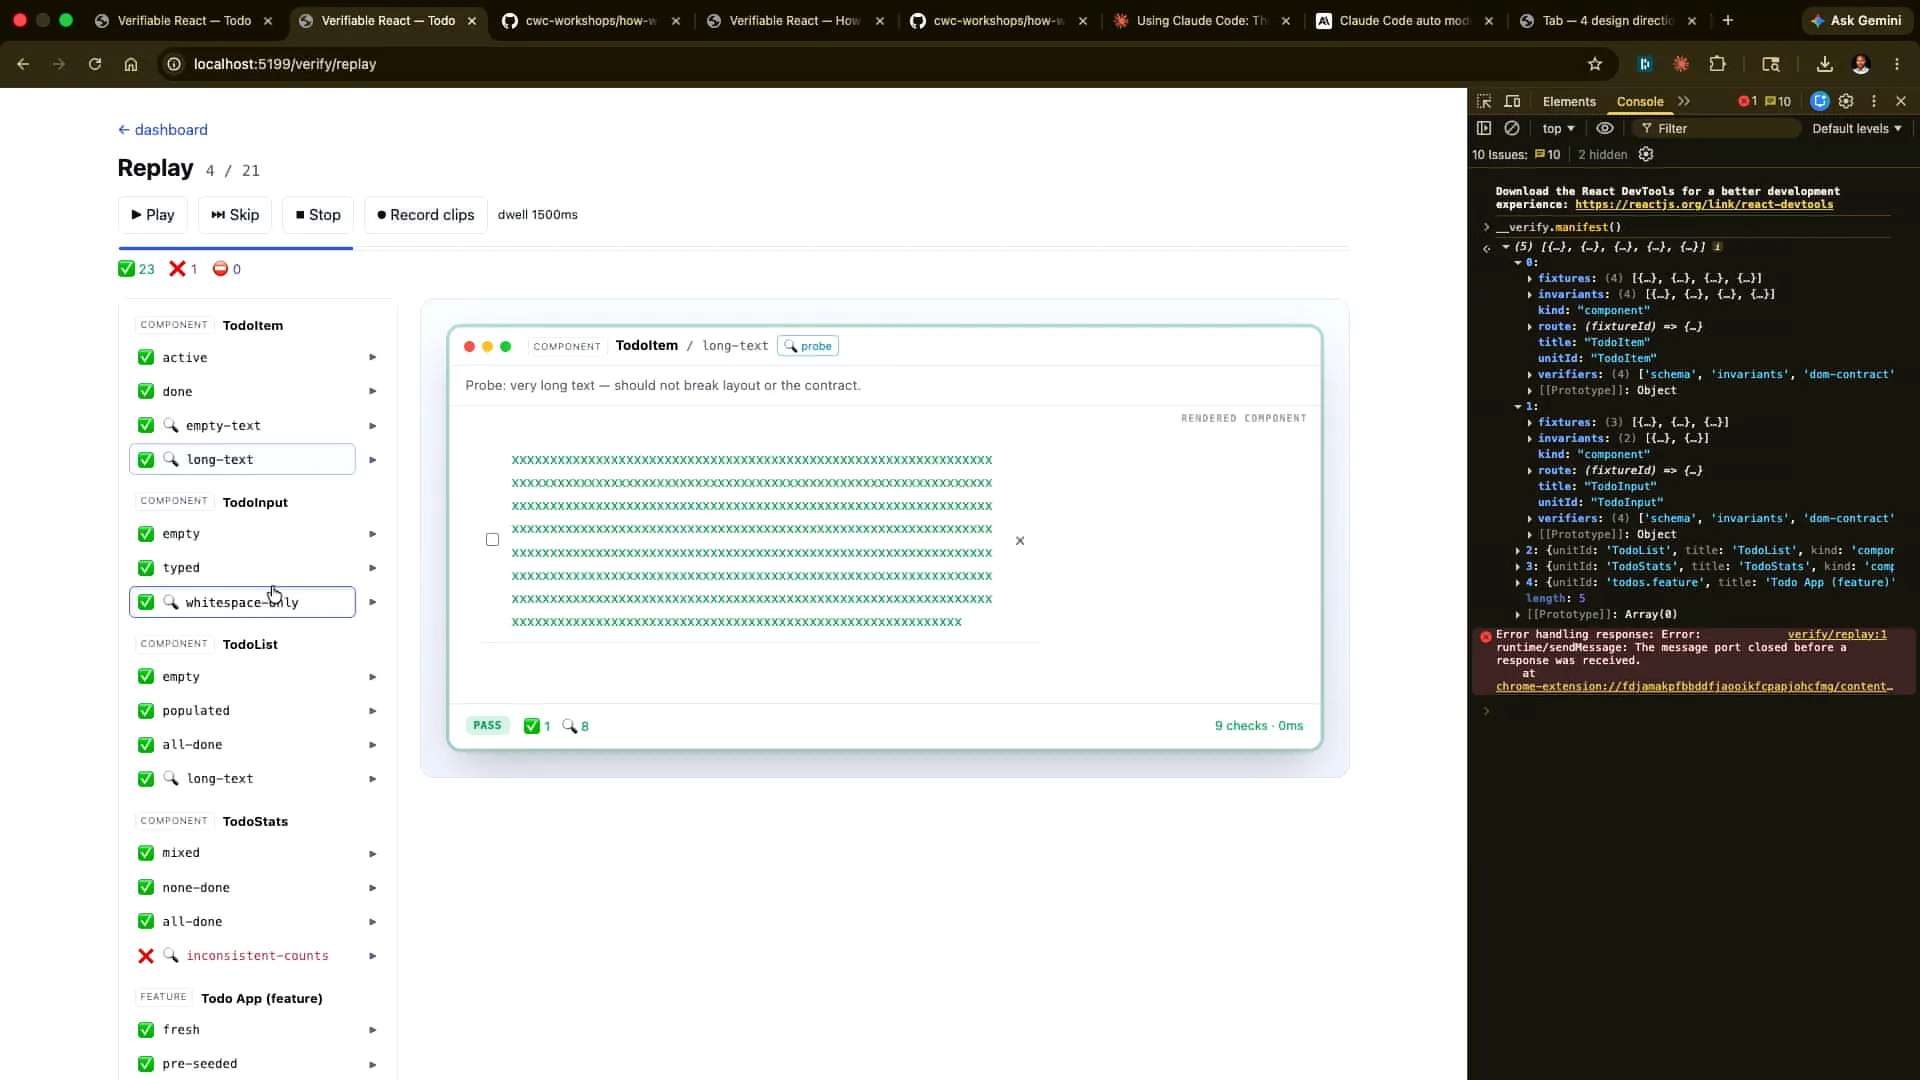
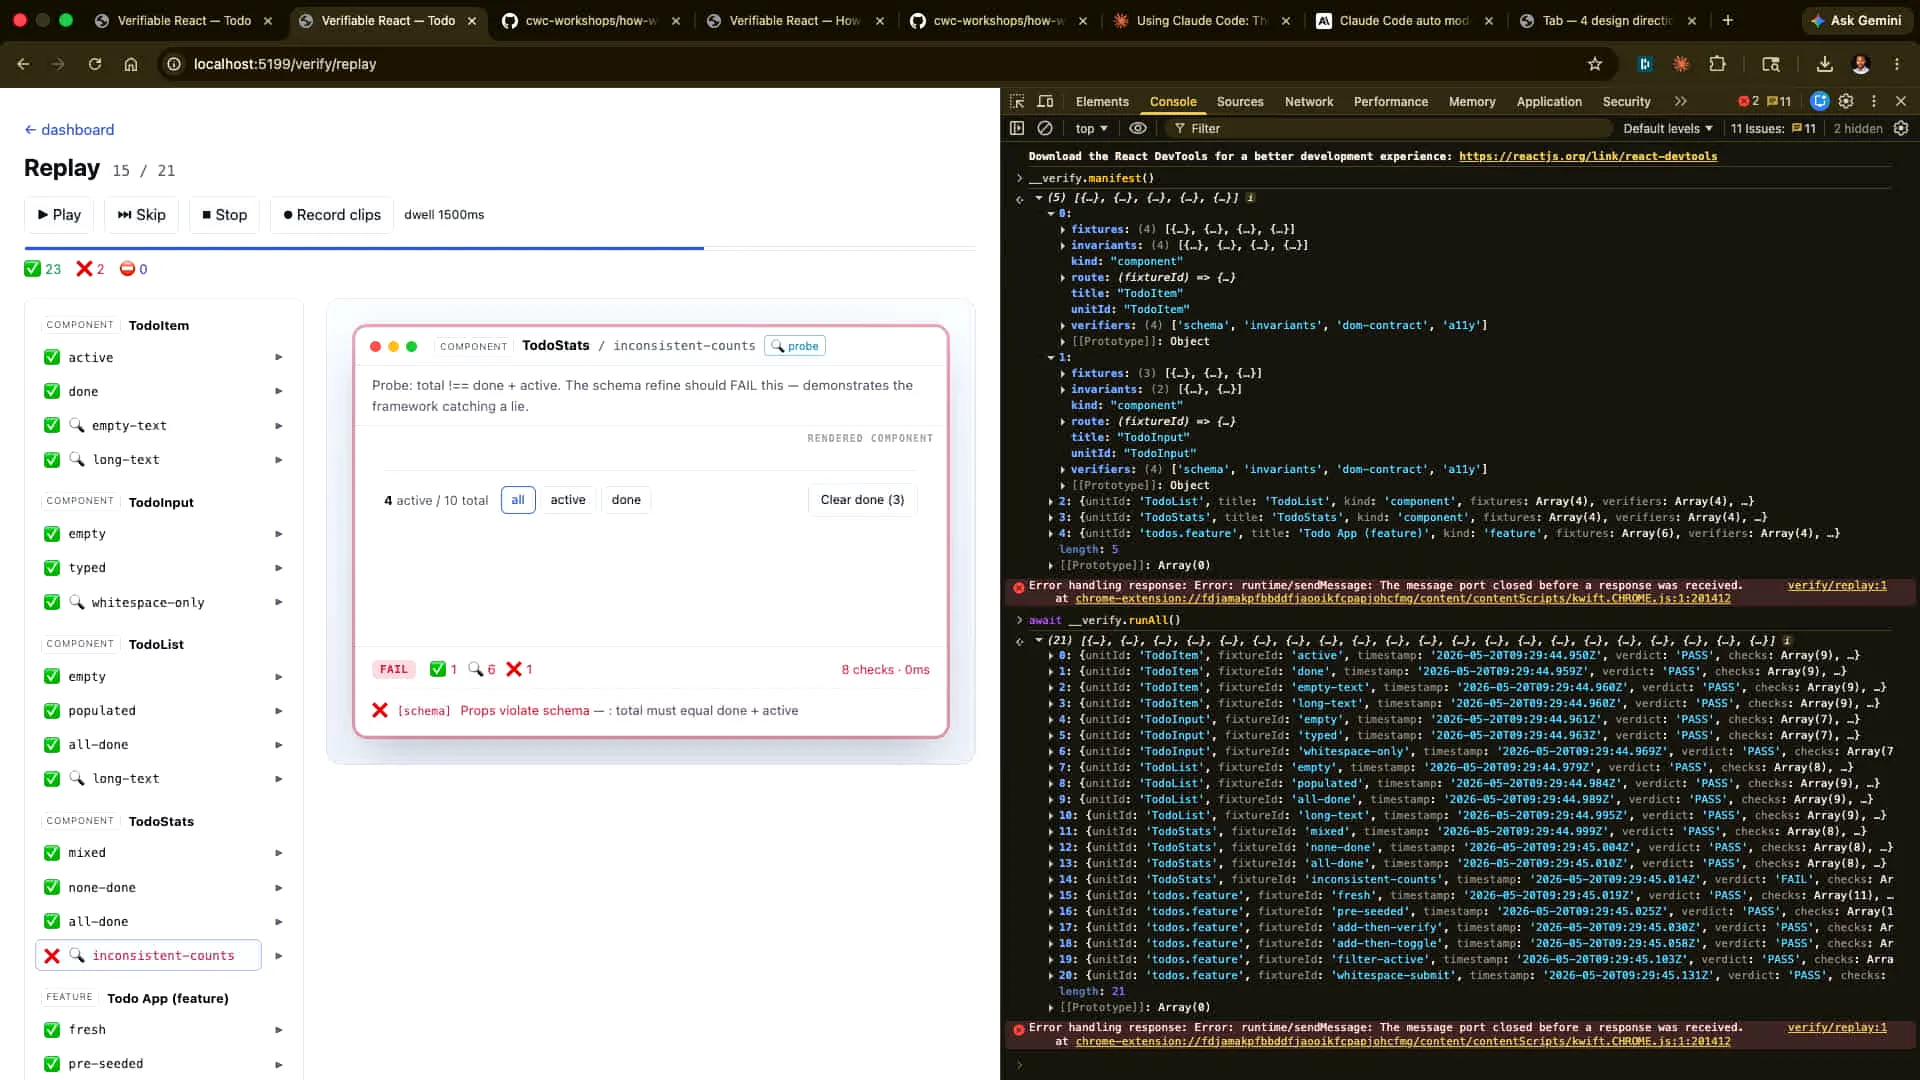
Slide 40 — 18:50 (watch)
 | Certain invariants must always hold. We will test these with probes. For example, we have hard-coded a scenario that will fail verification, allowing the human-verified dashboard to catch it. Additionally, we will enable the agentic method to cache the result, allowing Cloud Code to identify and diagnose the issue for us. |
Slide 41 — 19:06 (watch)
 | That same approach applies in this case as well. |
Slide 42 — 19:16 (watch)
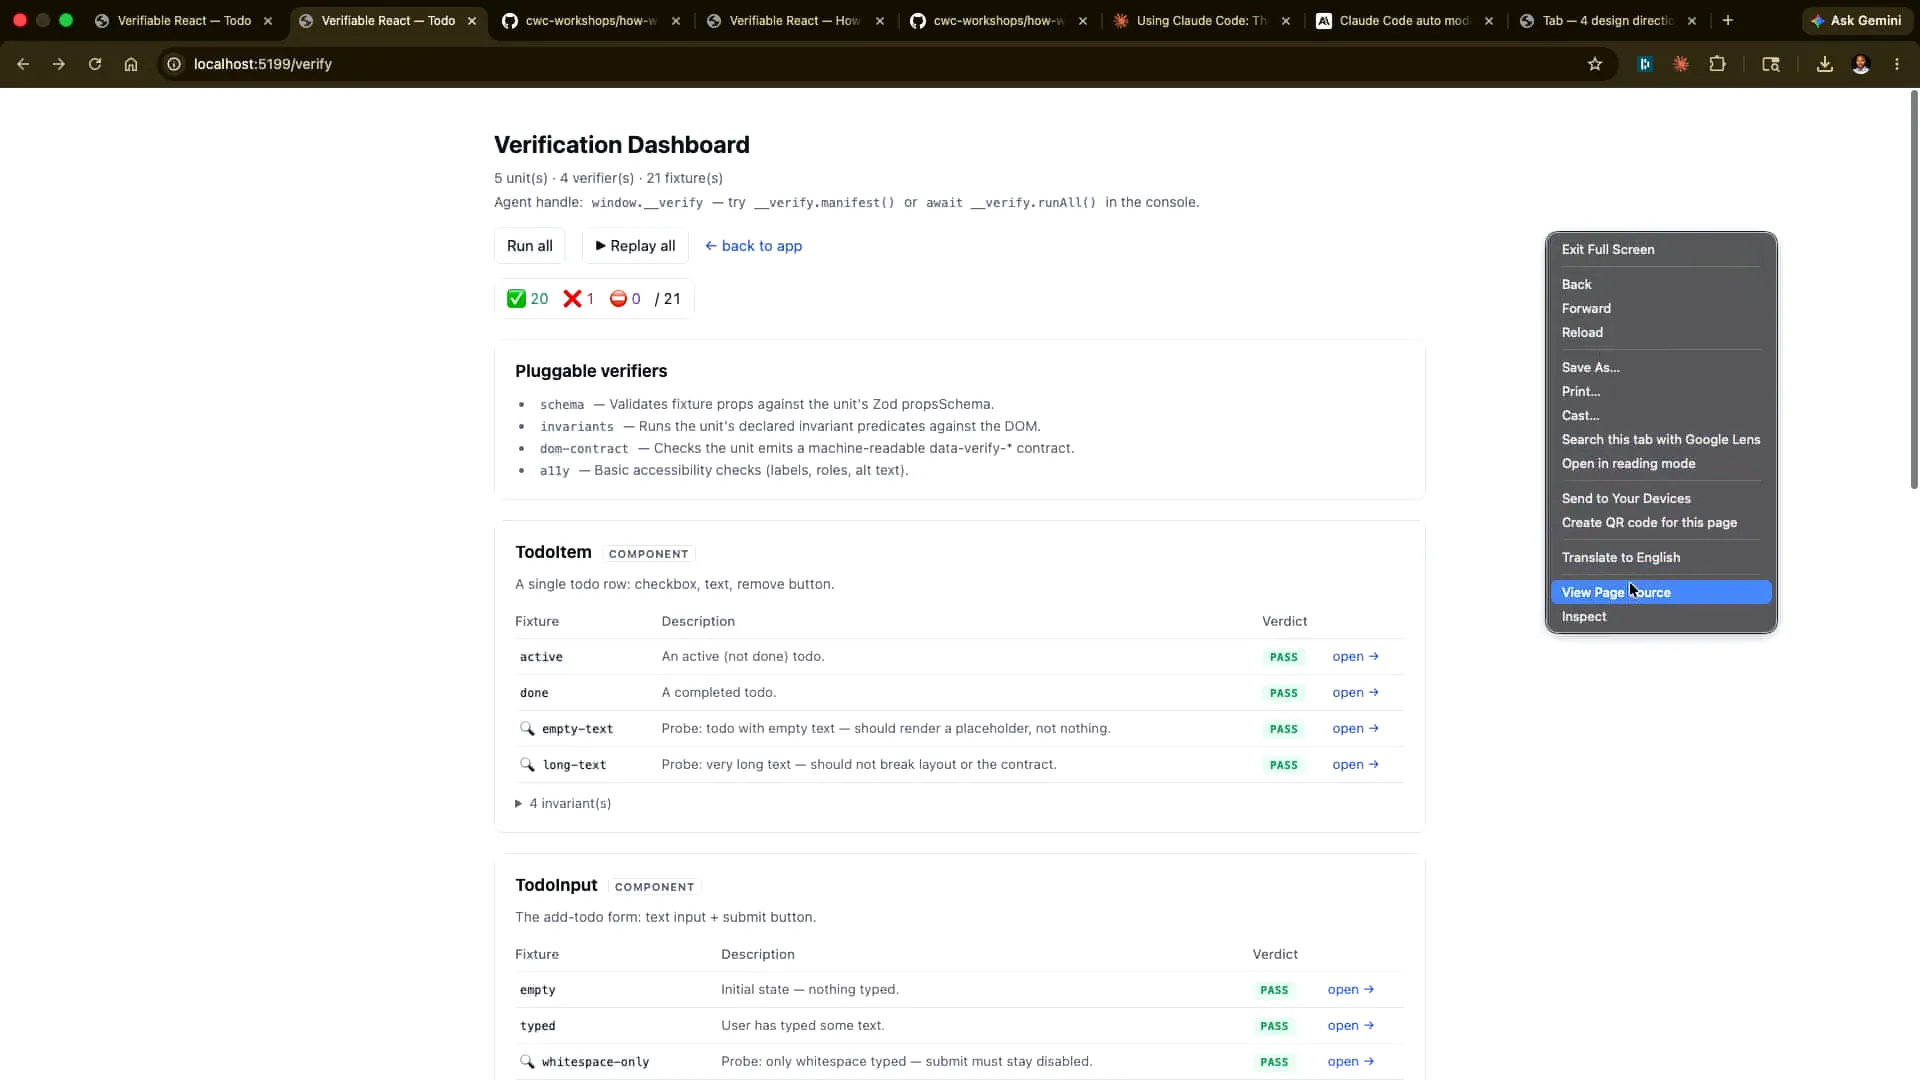
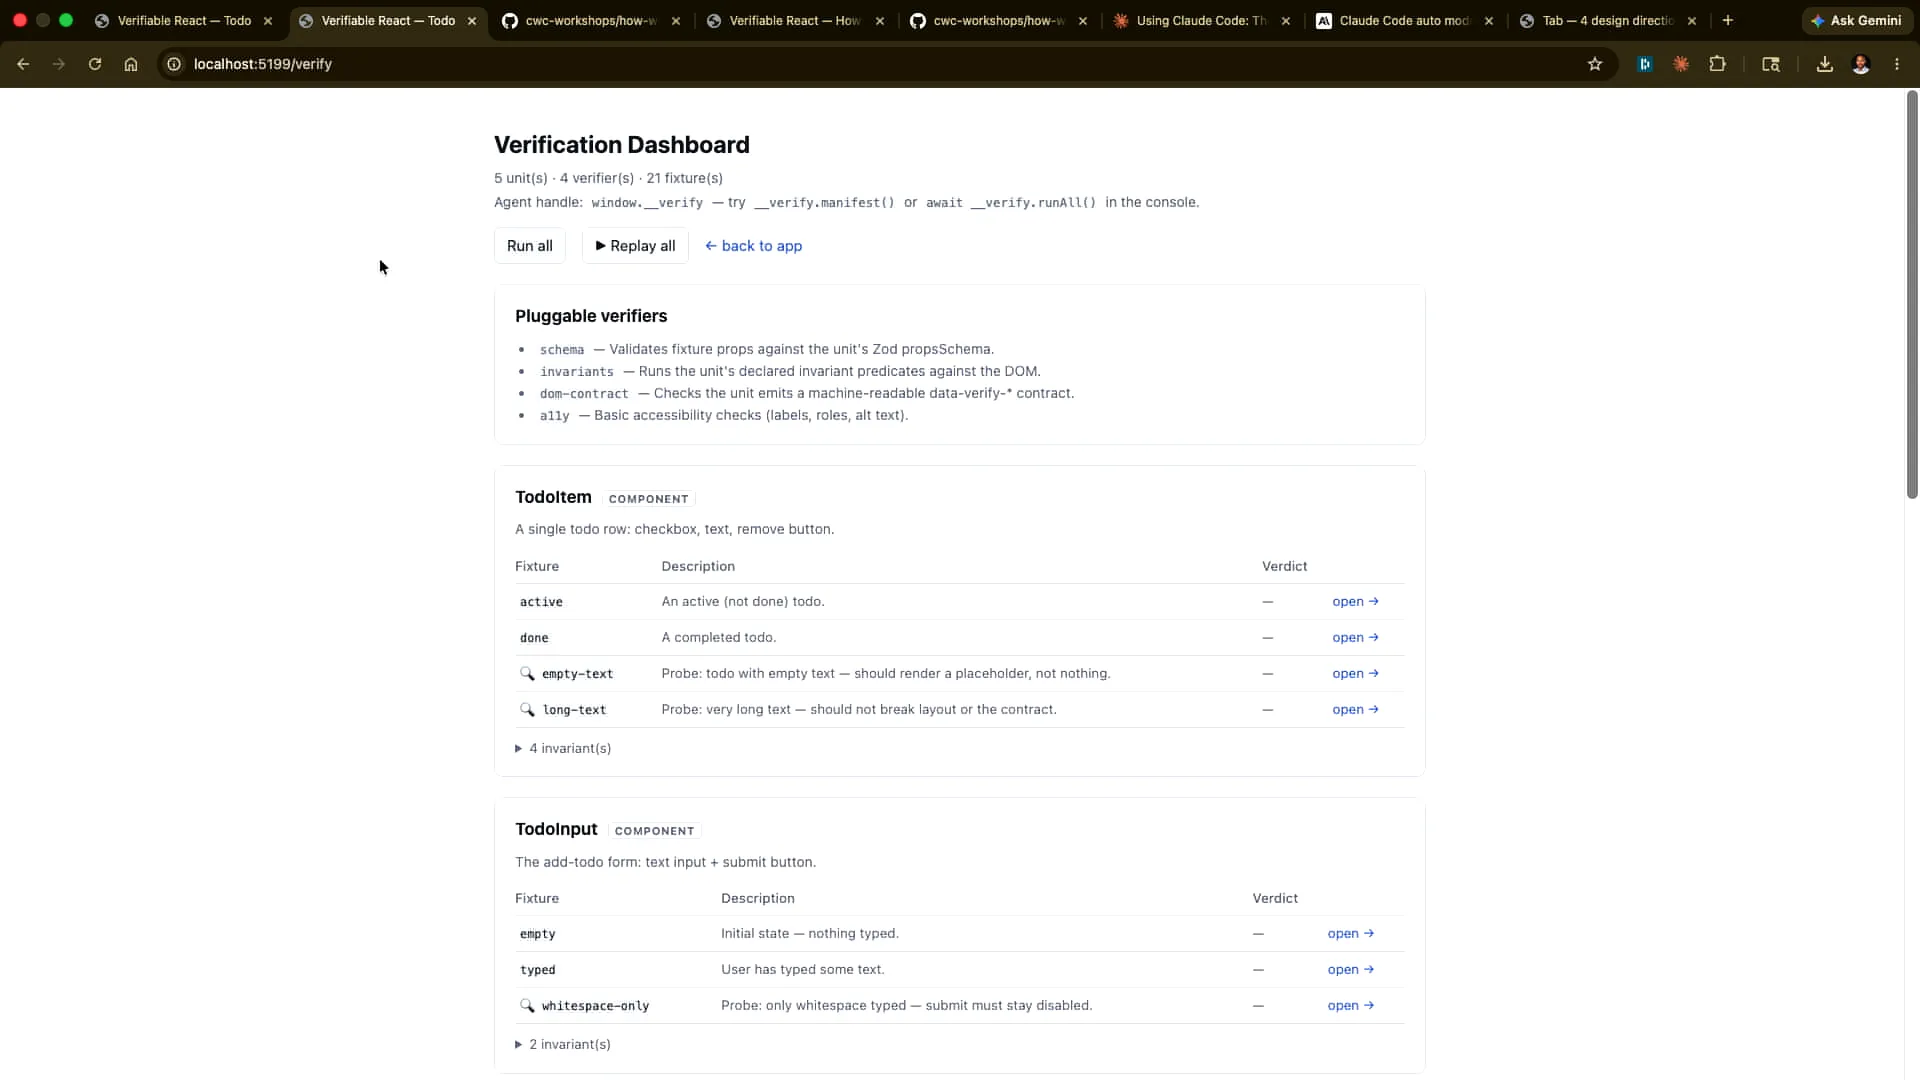 | The dashboard is defined here, displaying the different schemas and the invariants we have established. We can run these individually to observe how they execute. |
Slide 43 — 19:26 (watch)
 | Here is an example. |
Slide 44 — 19:28 (watch)
 | I could run all of them, and in fact, I'm going to do that now. |
Slide 45 — 19:34 (watch)
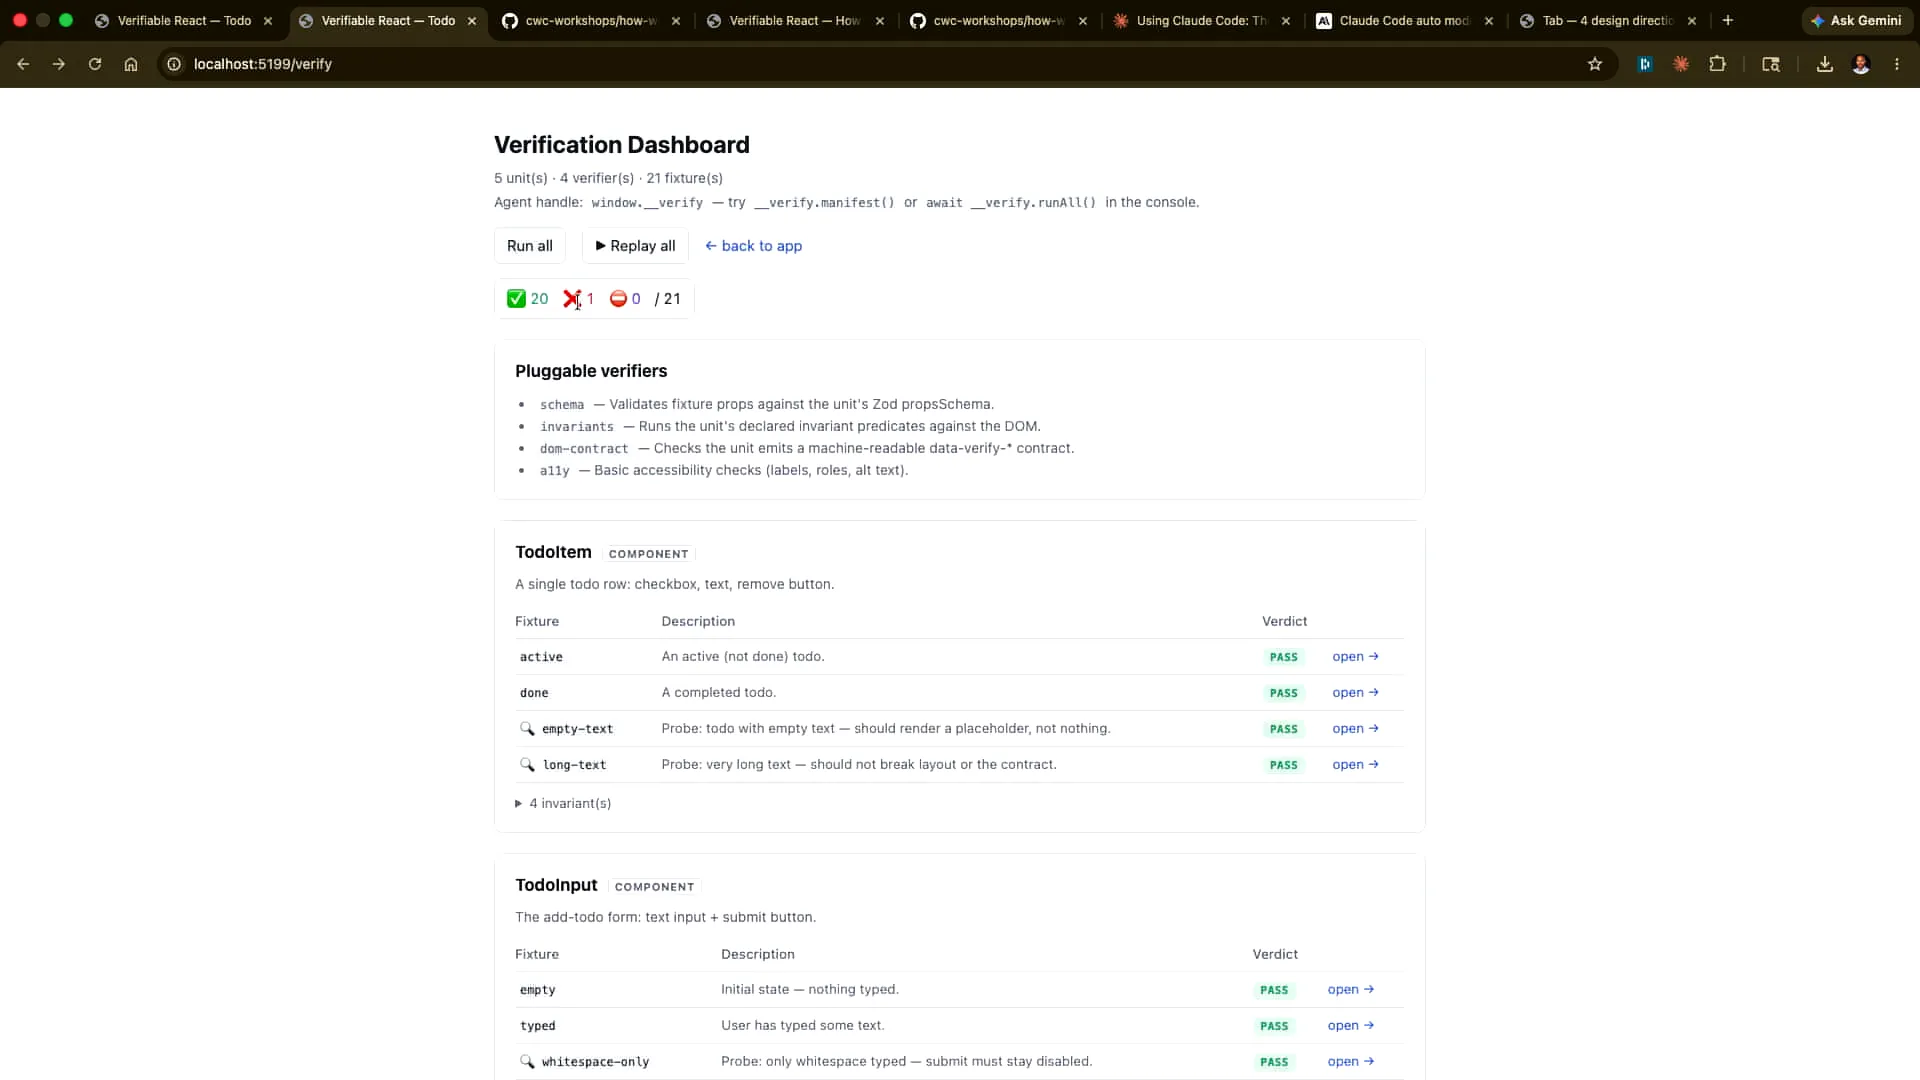 | I run all of them. One of them is triggered artificially because we prompted it earlier. |
Slide 46 — 19:40 (watch)
 | I will scroll down to find out what that is, and here it is. |
Slide 47 — 19:48 (watch)
 | We will examine how to replicate this for an agent as well, and we will do that in the following way. |
Slide 48 — 19:54 (watch)
 | Go to this location and scratch the surface. |
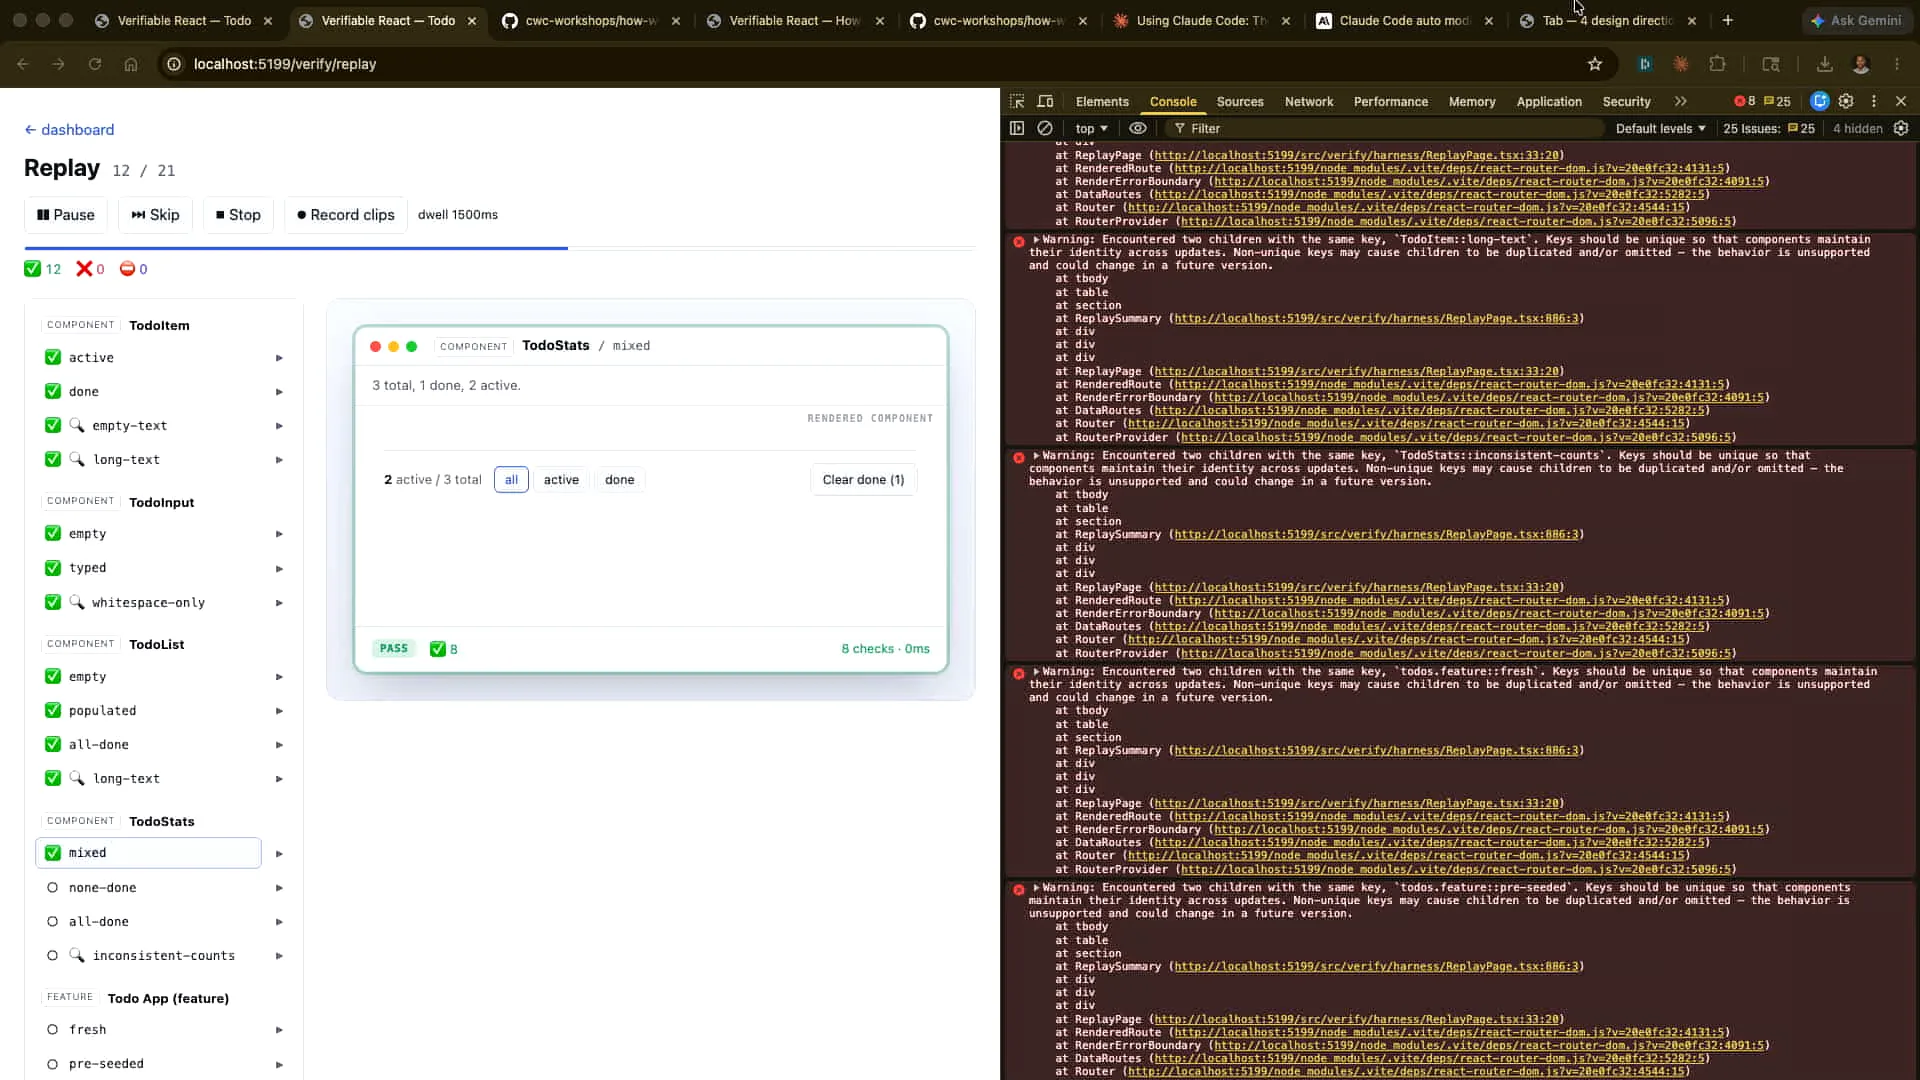
Slide 49 — 20:24 (watch)
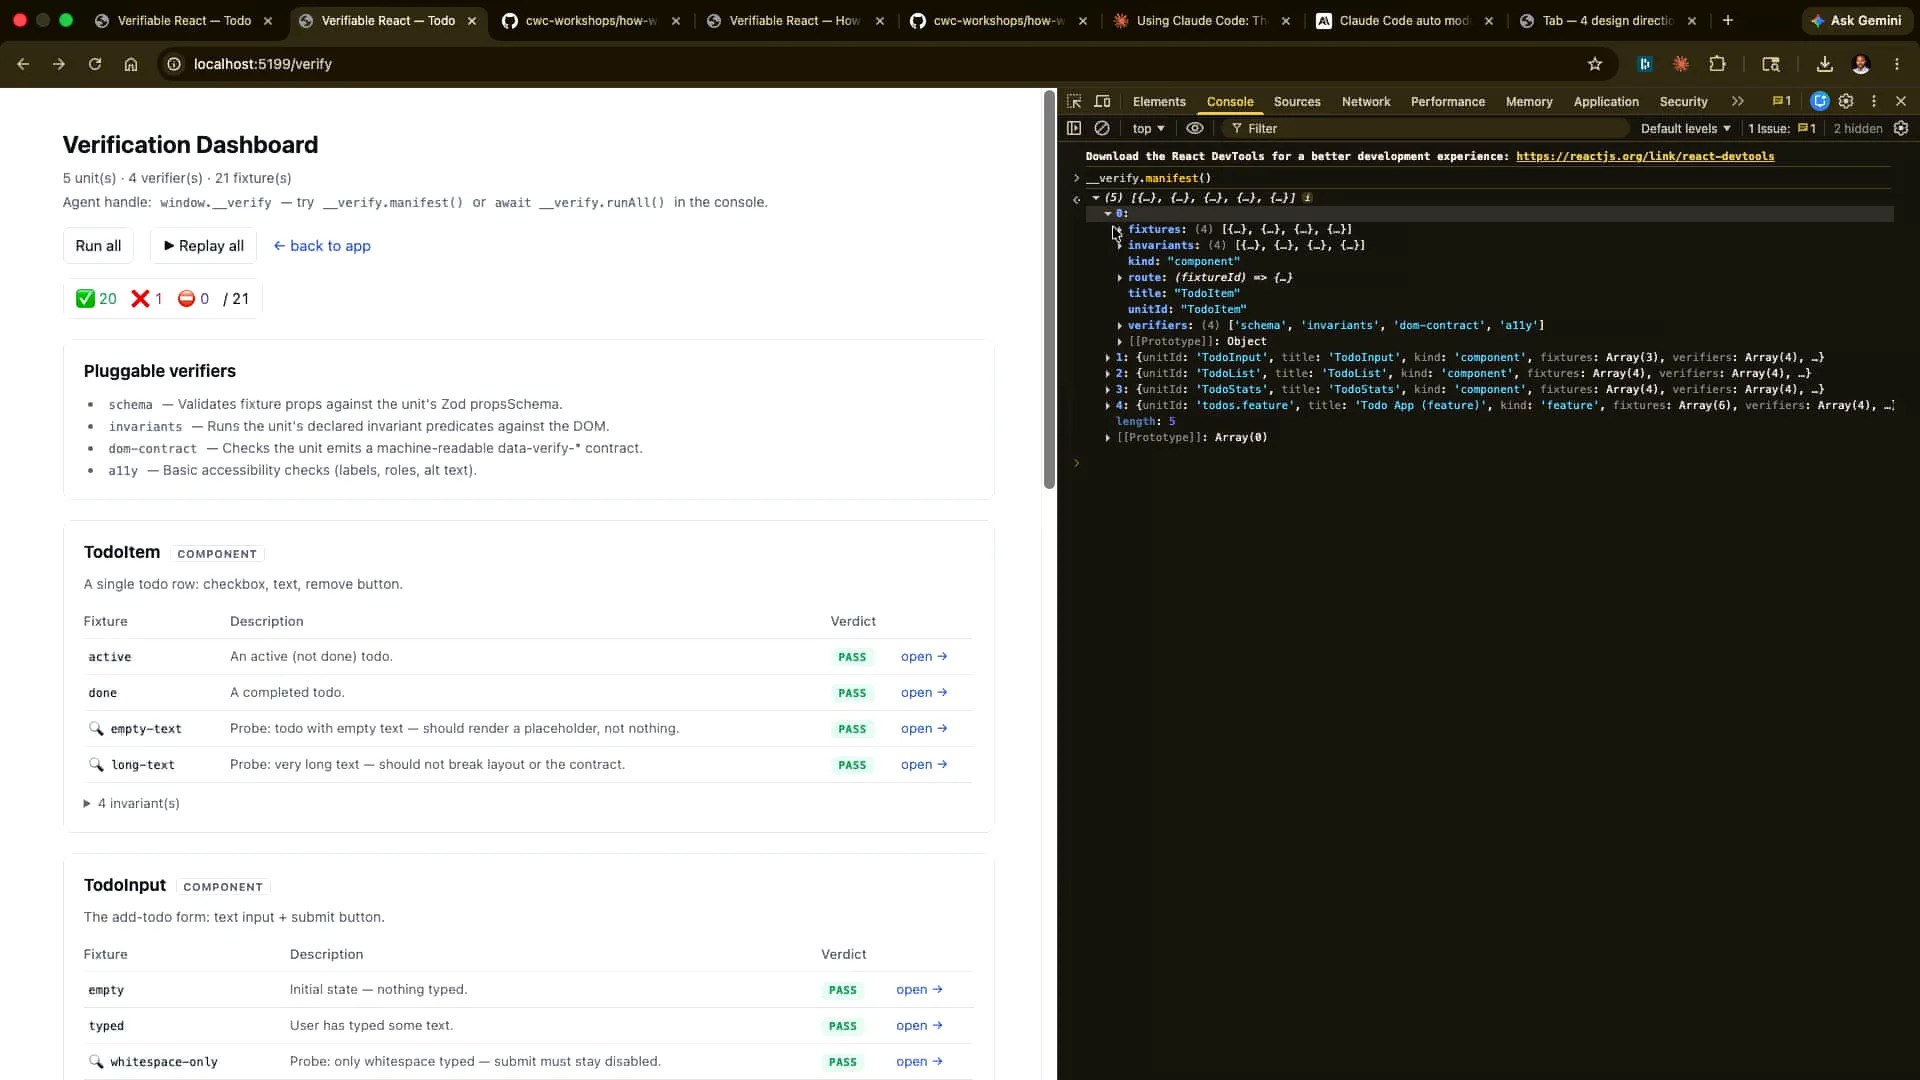 | We can run the manifest of all the different verification steps defined in the DOM. Let me expand this for clarity. As an example, we can run them specifically here. I'll start by doing it manually and replay all of them. |
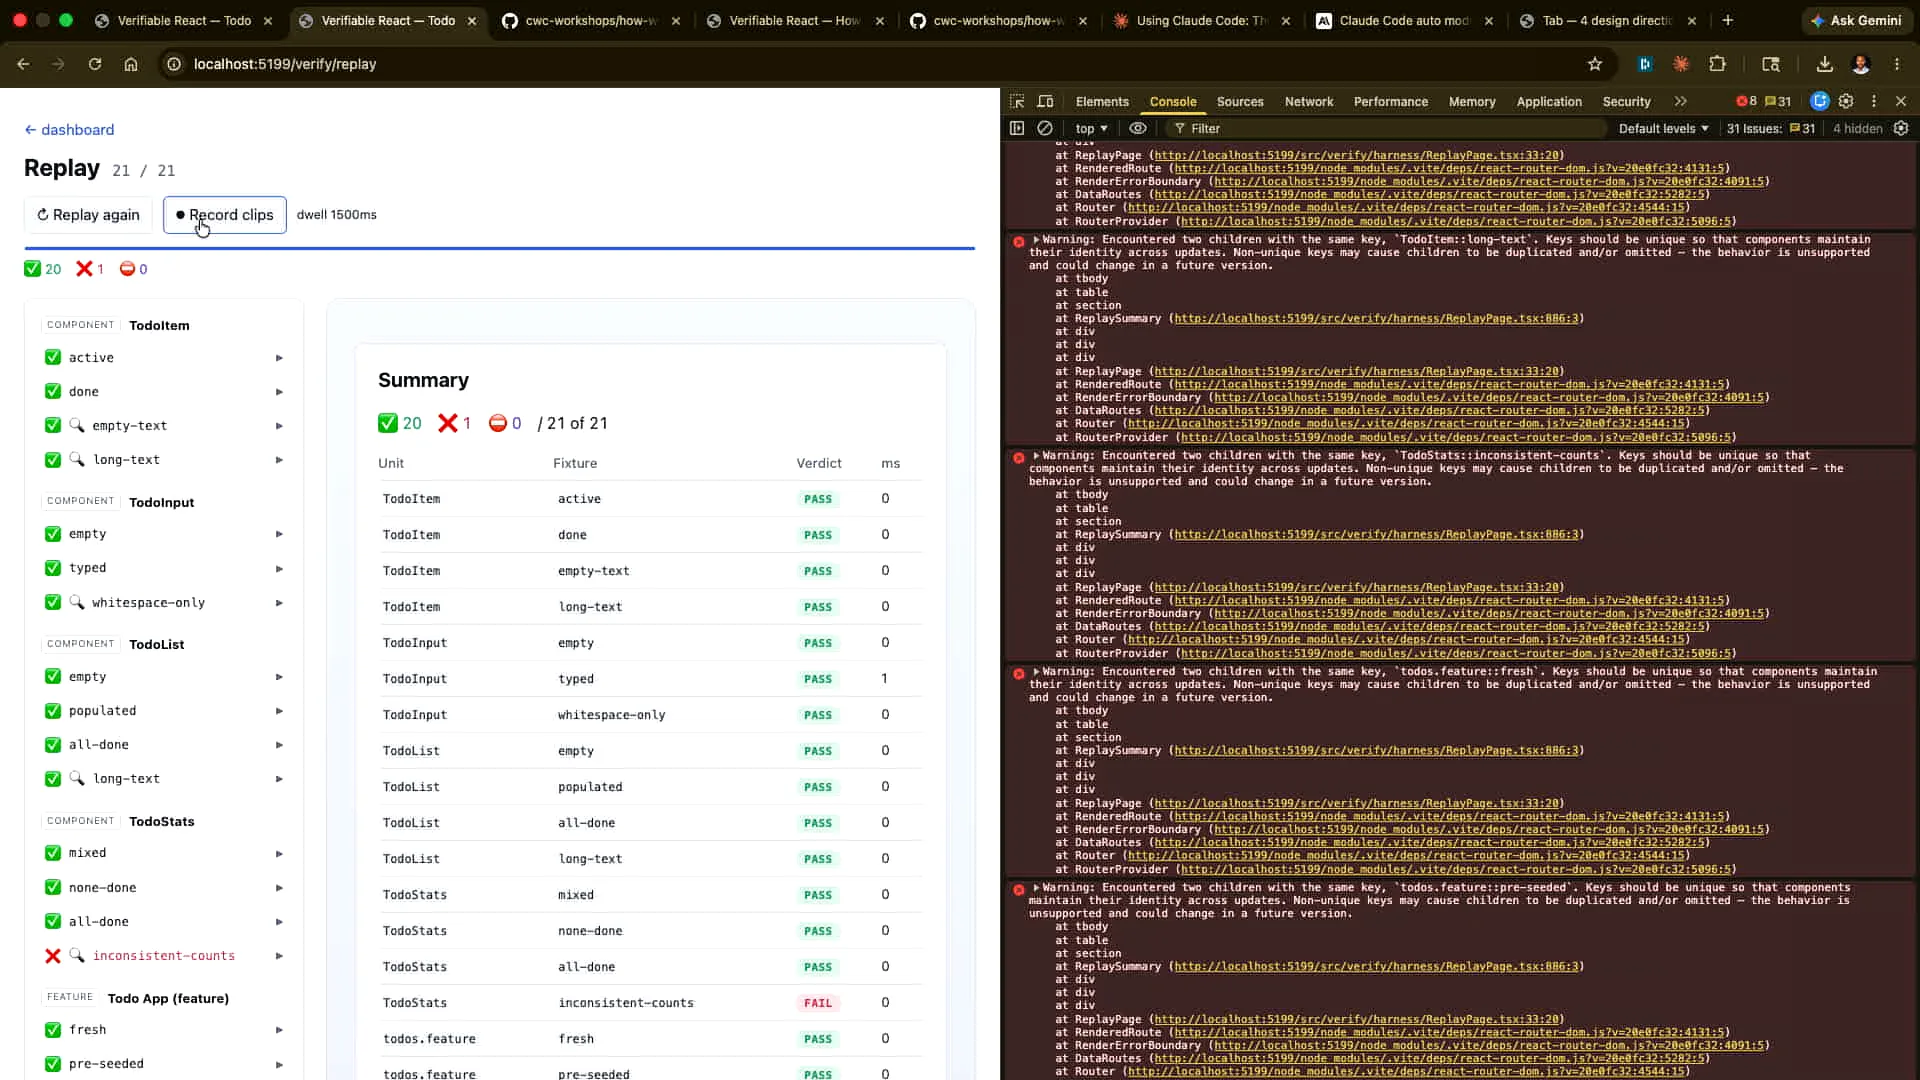
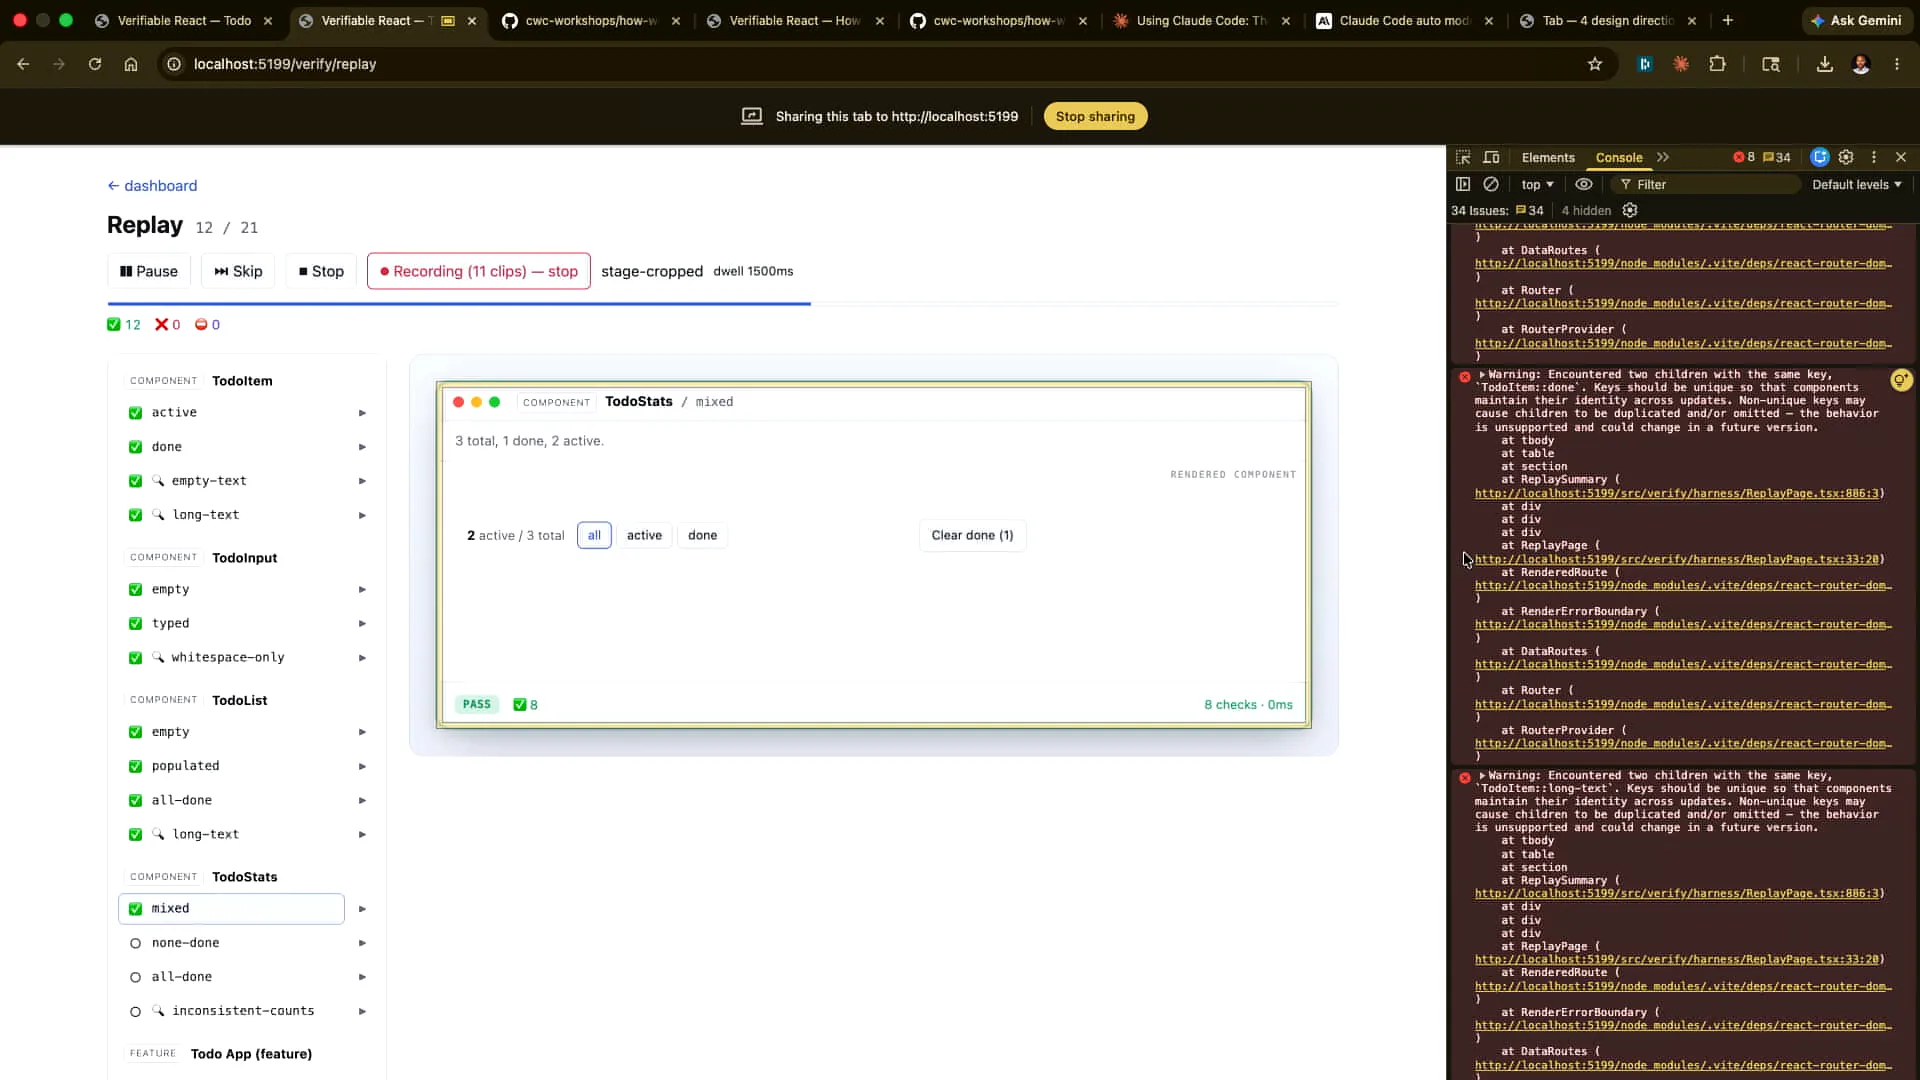
Slide 50 — 21:08 (watch)
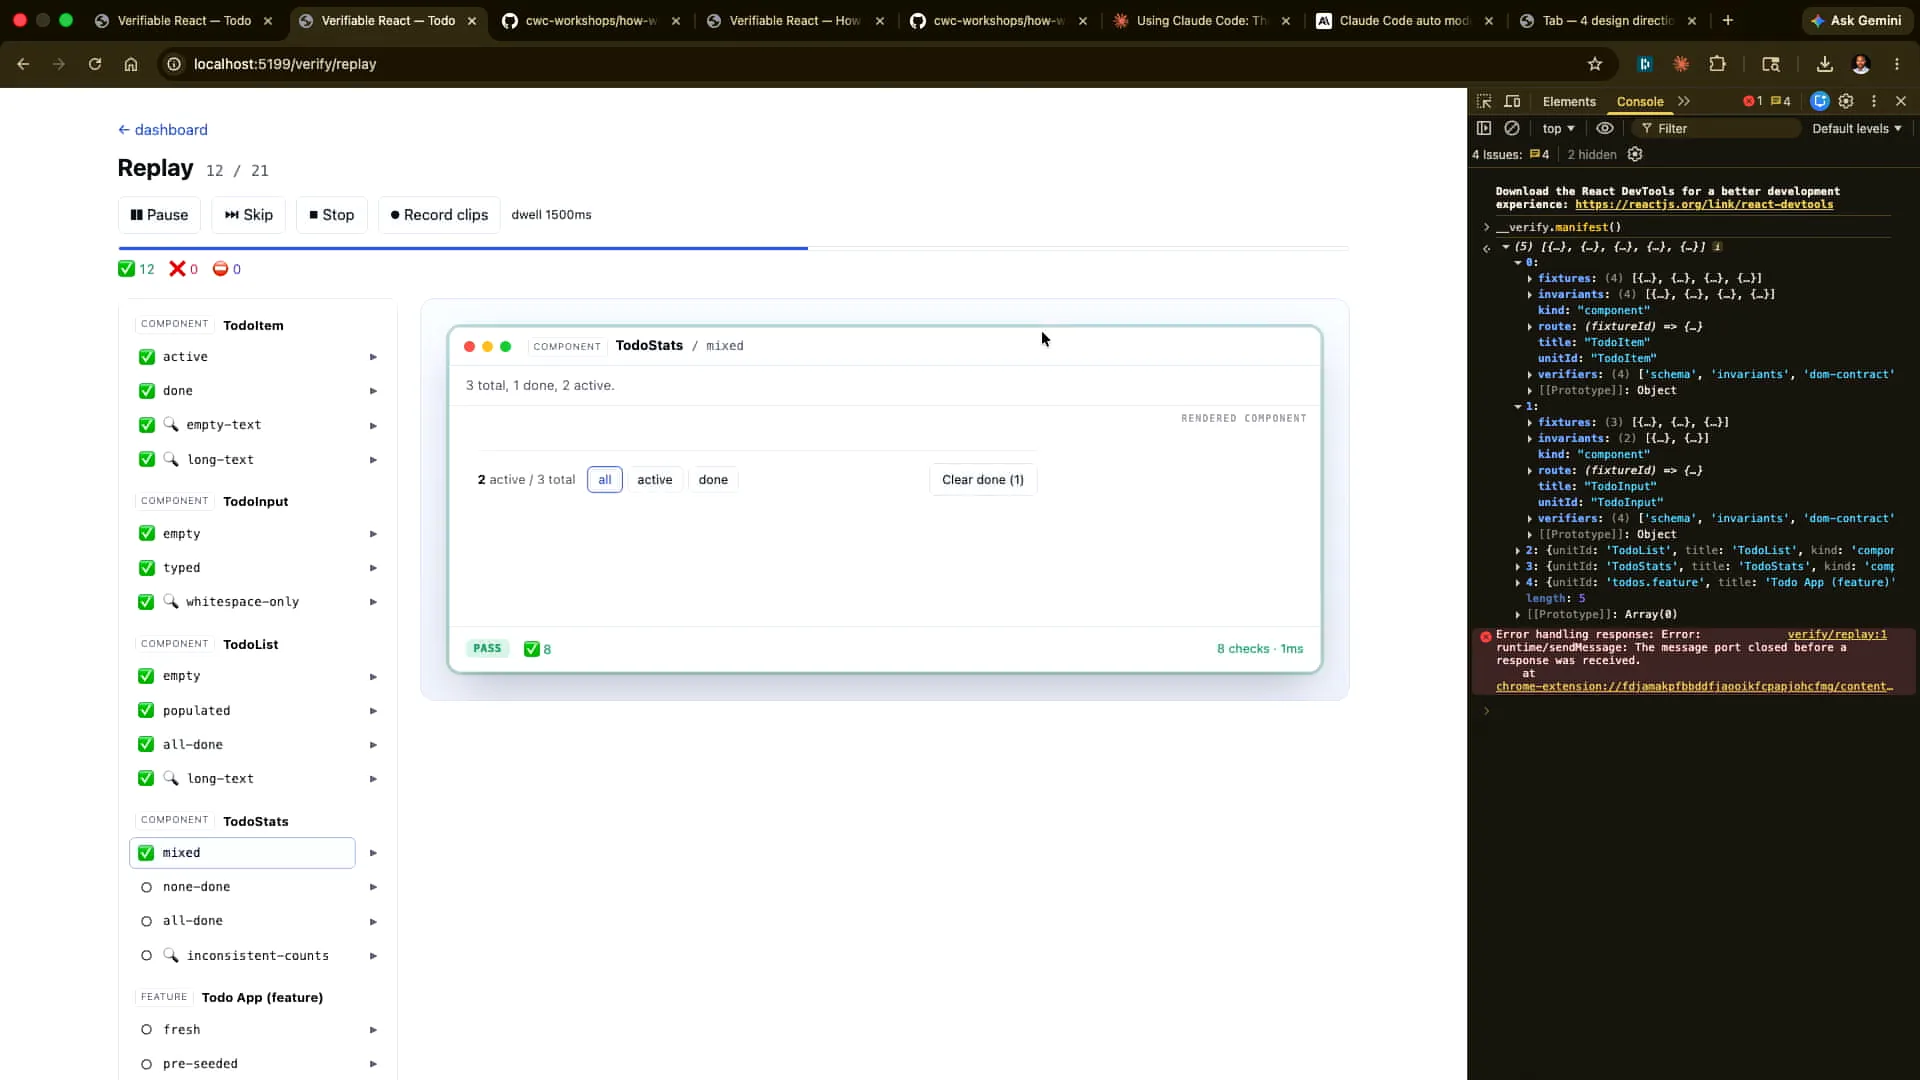 | In this case, we are running this not to perform the verification but to provide evidence of the verification. We can record these as clips, which will be videos that we capture. Then, we can store them, share them with a colleague, or upload them to S3. Here’s our summary: we have one that has deliberately failed, which I will explain in a moment. |
Slide 51 — 21:34 (watch)
 | In each case, you can see the details of how this was accomplished. |
Slide 52 — 21:44 (watch)
 | The key point here is the importance of including the probes to explore paths beyond the happy path. |
Slide 53 — 22:04 (watch)
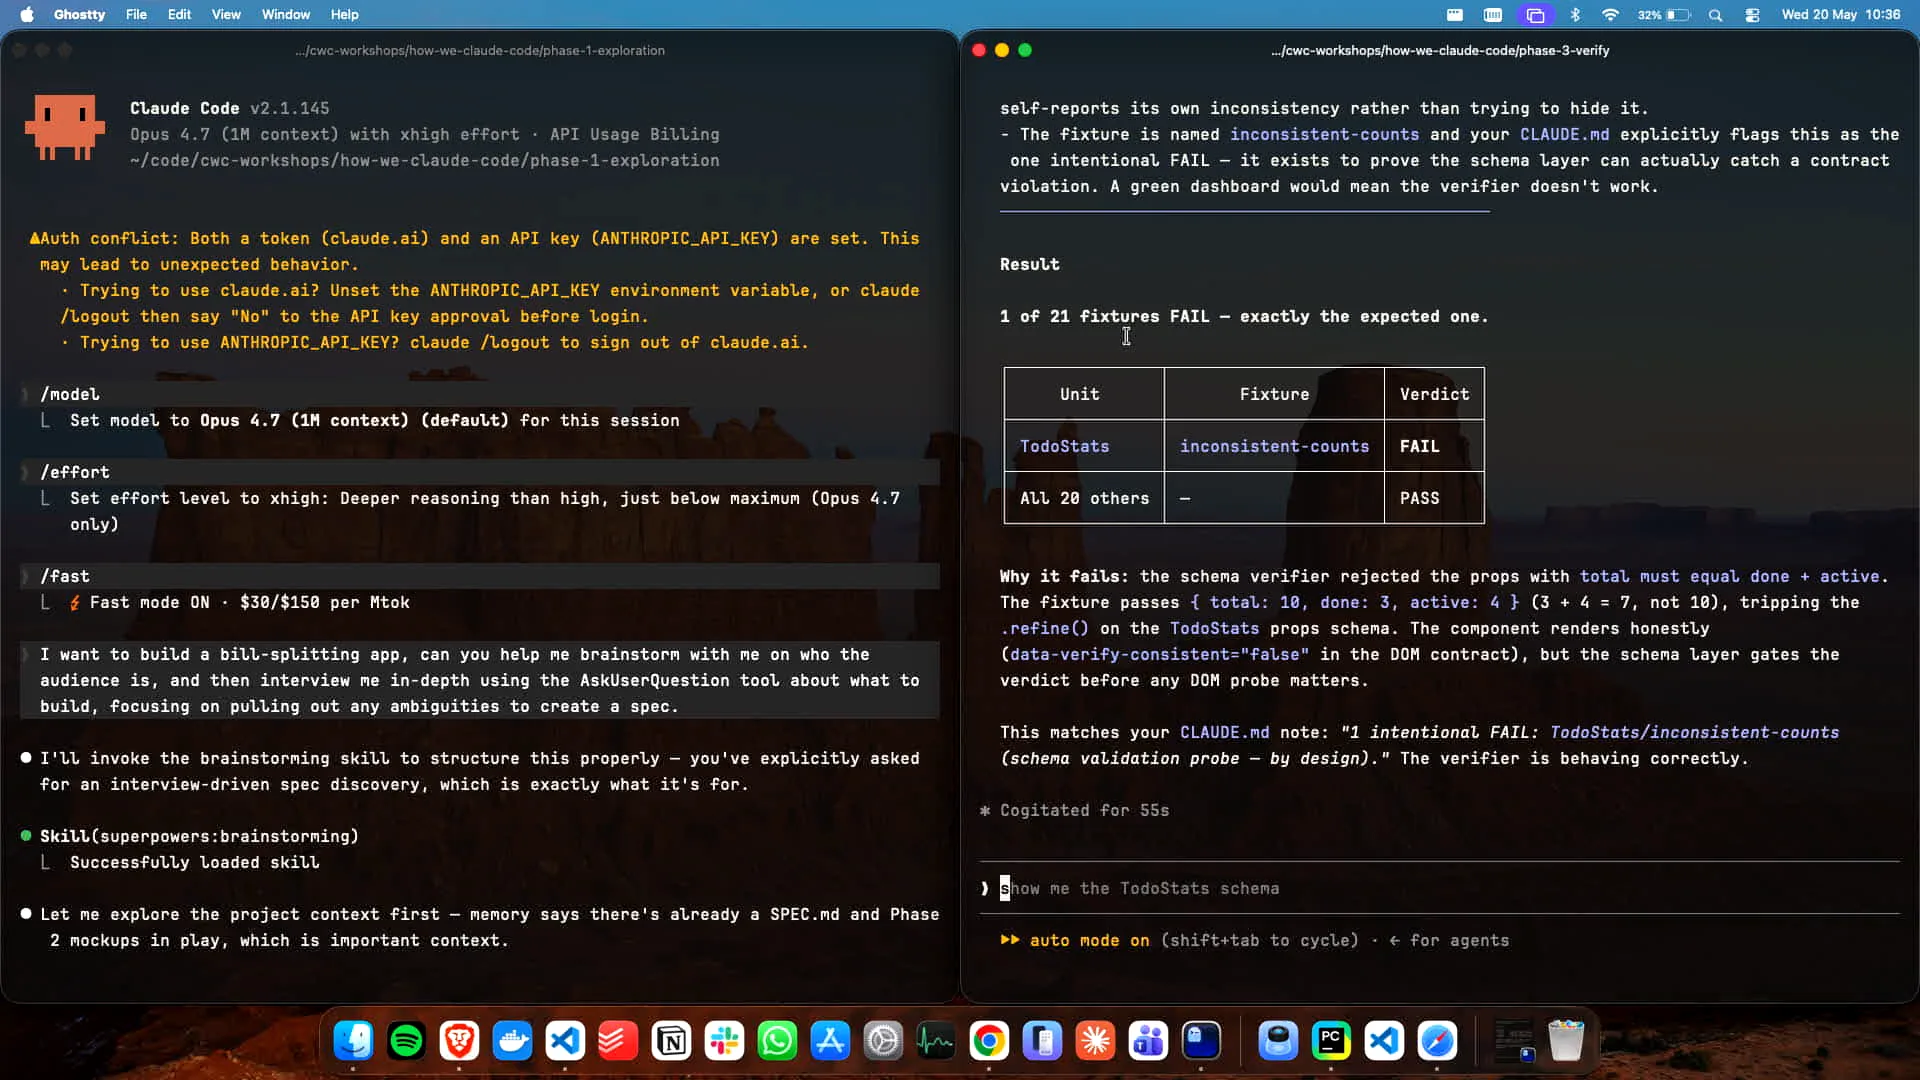
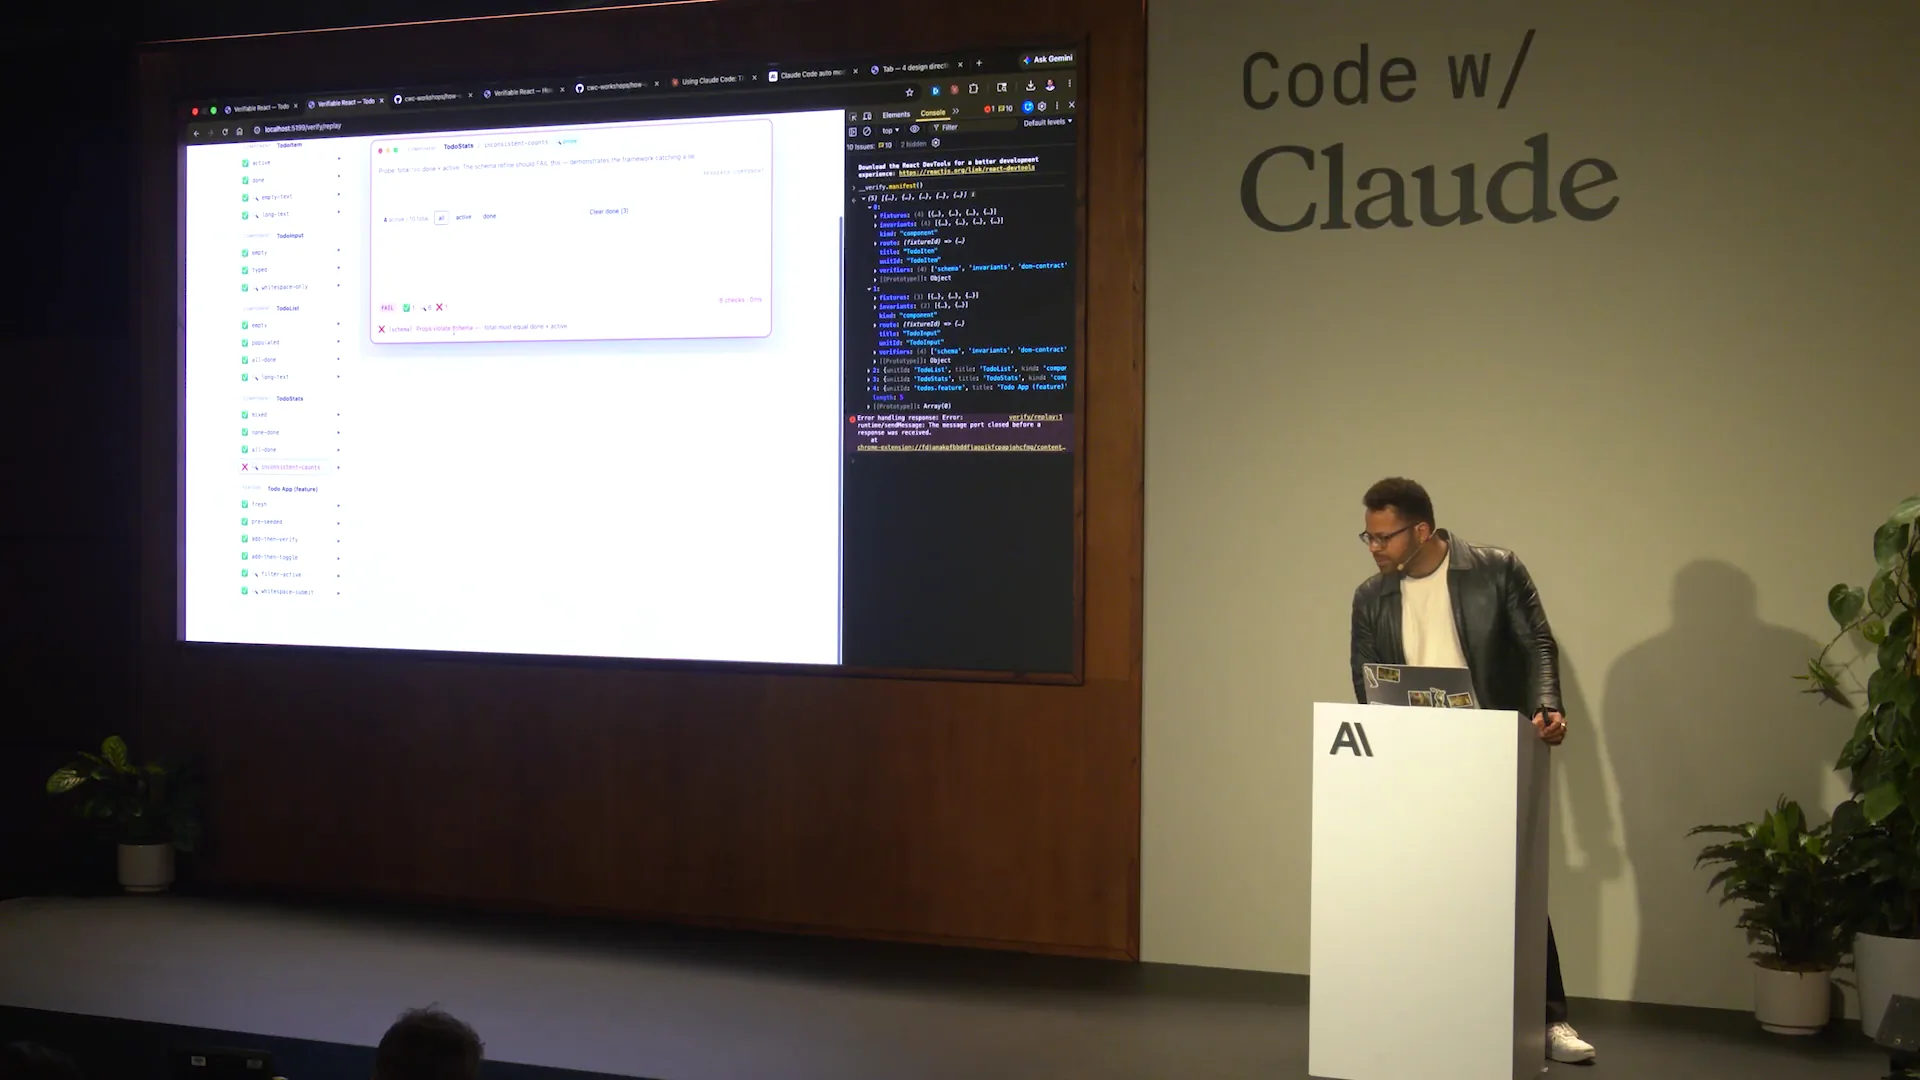 | A lot of this will be generated by Claude for Claude, allowing us to scale further. Ultimately, we'll examine the case that didn't work, where we hard-coded the sums to not match. In this scenario, the state is incorrect; 3 plus 4 does not equal 10. |
Slide 54 — 22:36 (watch)
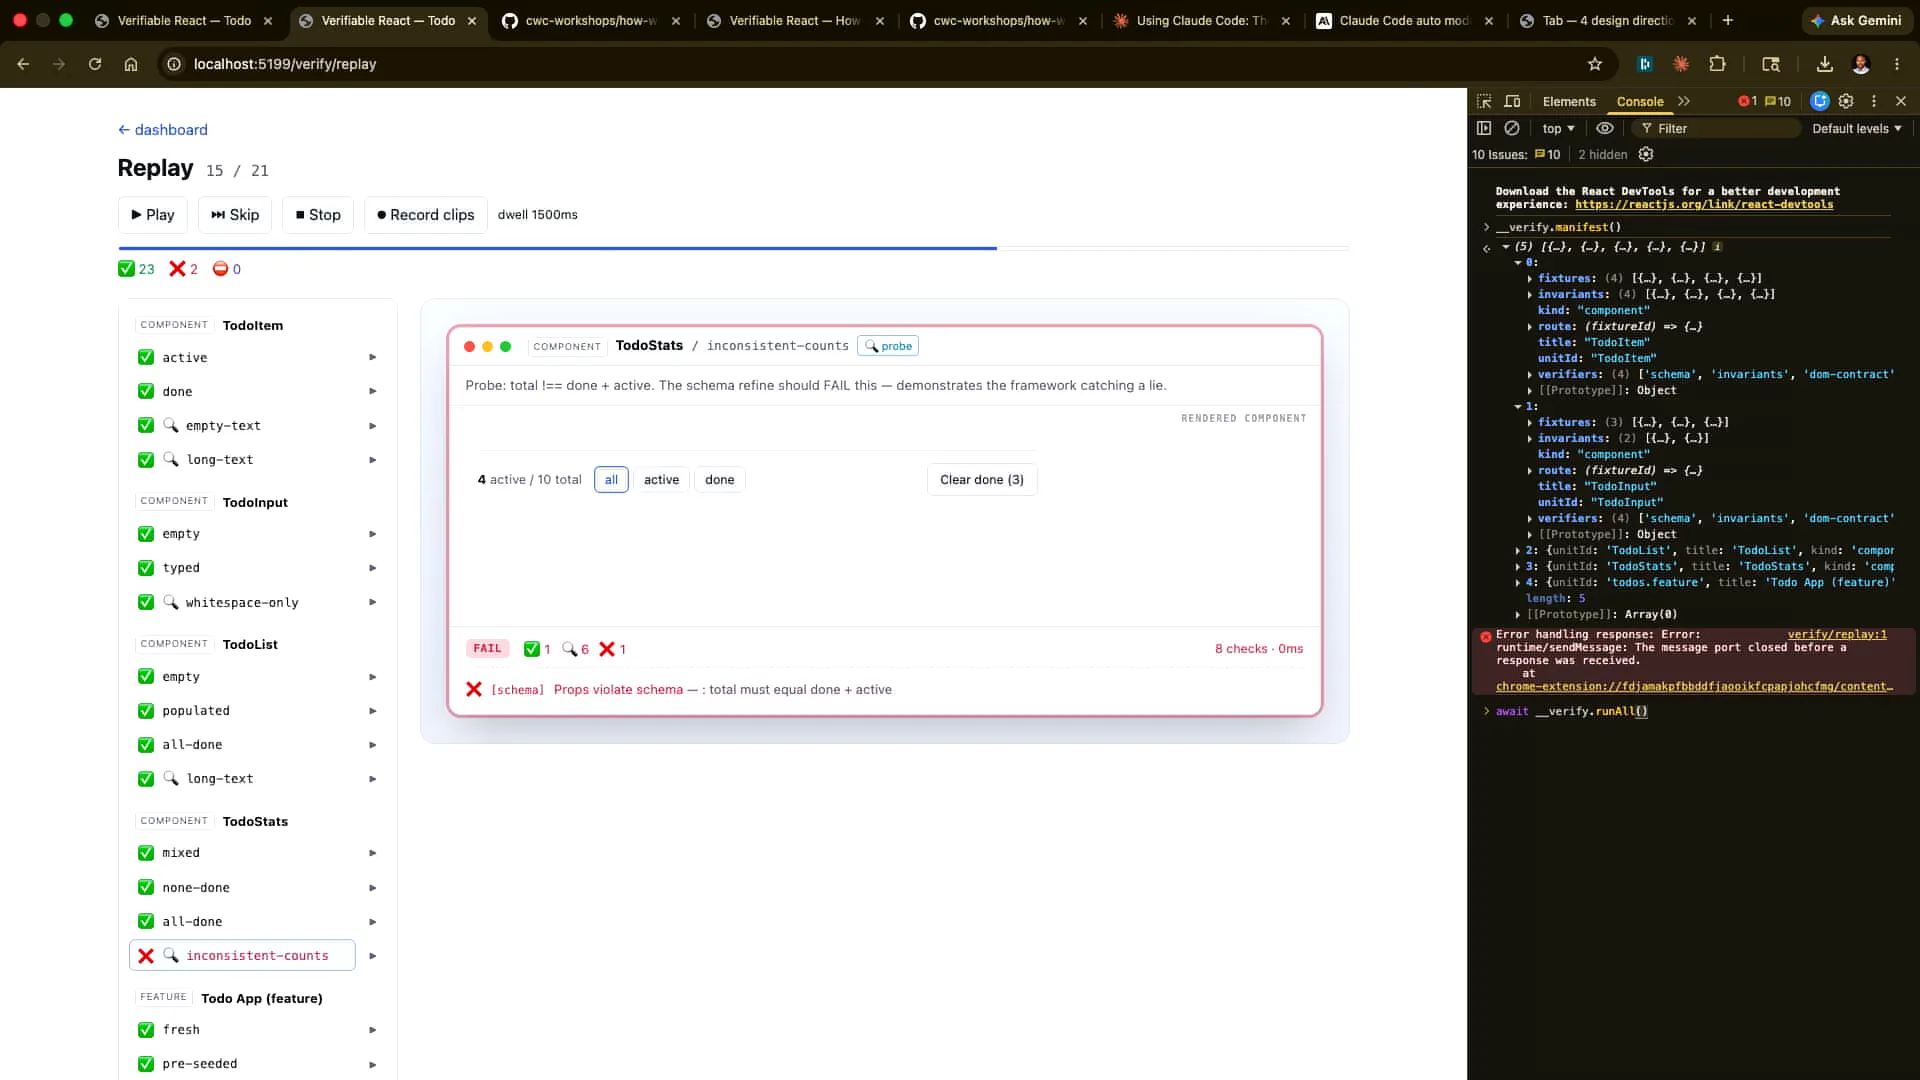 | We will get the same result if we run "verify all" from Claude. Let's allow Claude to do that now. It may be hard to see, but the results show pass, pass, pass, pass, pass, and then fail. |
Slide 55 — 23:14 (watch)
 | We can change this. The goal is to allow something agent-native to be interpreted as the DOM contract. As we established earlier, the state is managed here and is viewable to an agent, which can then perform the verification end-to-end. We will let Claude do that afterwards. Additionally, we can make a change that will introduce more breaks. |
Slide 56 — 23:36 (watch)
 | I will attempt to break the chain or the contract without affecting the app. I’ll demonstrate that now. |
Slide 57 — 23:52 (watch)
 | I can change the total stats under the to-do app by deleting it. I will undo that change afterwards. |
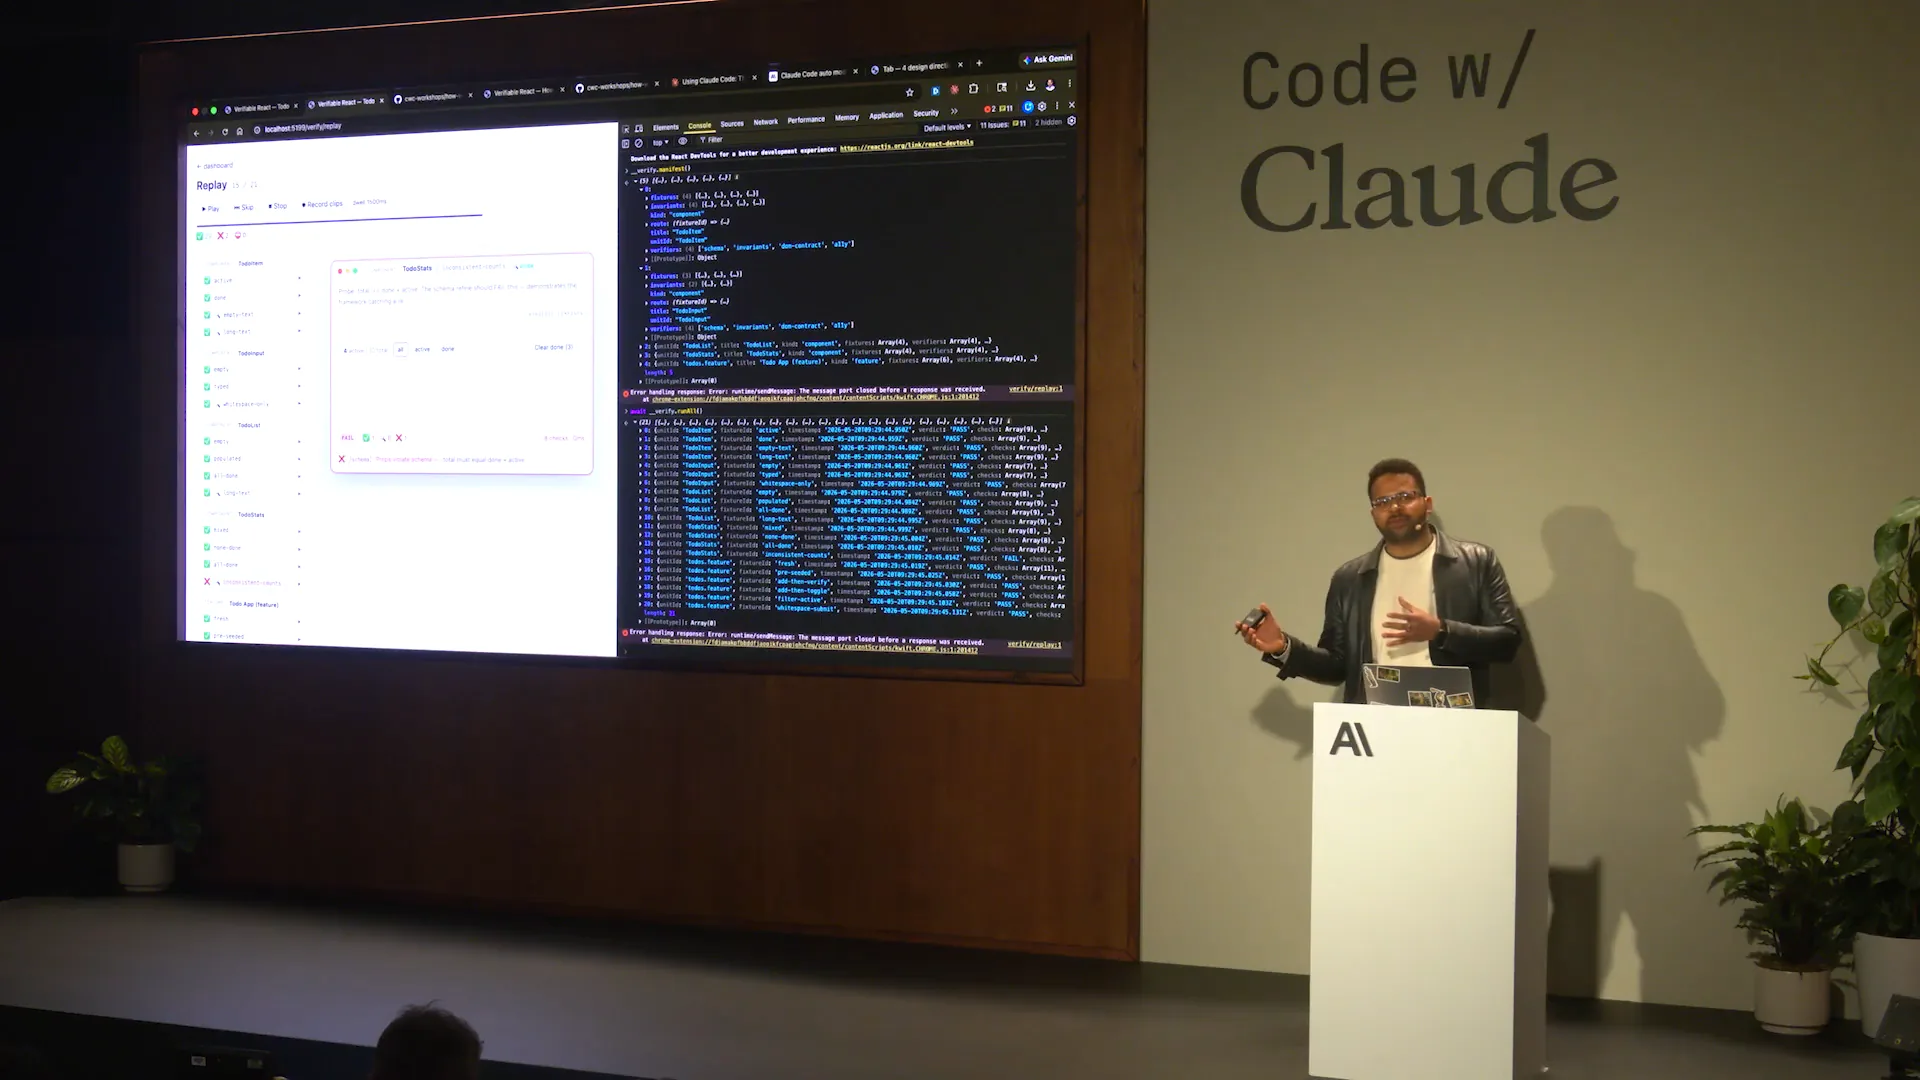
Slide 58 — 24:14 (watch)
 | If we rerun the tests now, all of the ones at the bottom will fail. We will see the same result when we run this again from here. |
Slide 59 — 24:40 (watch)
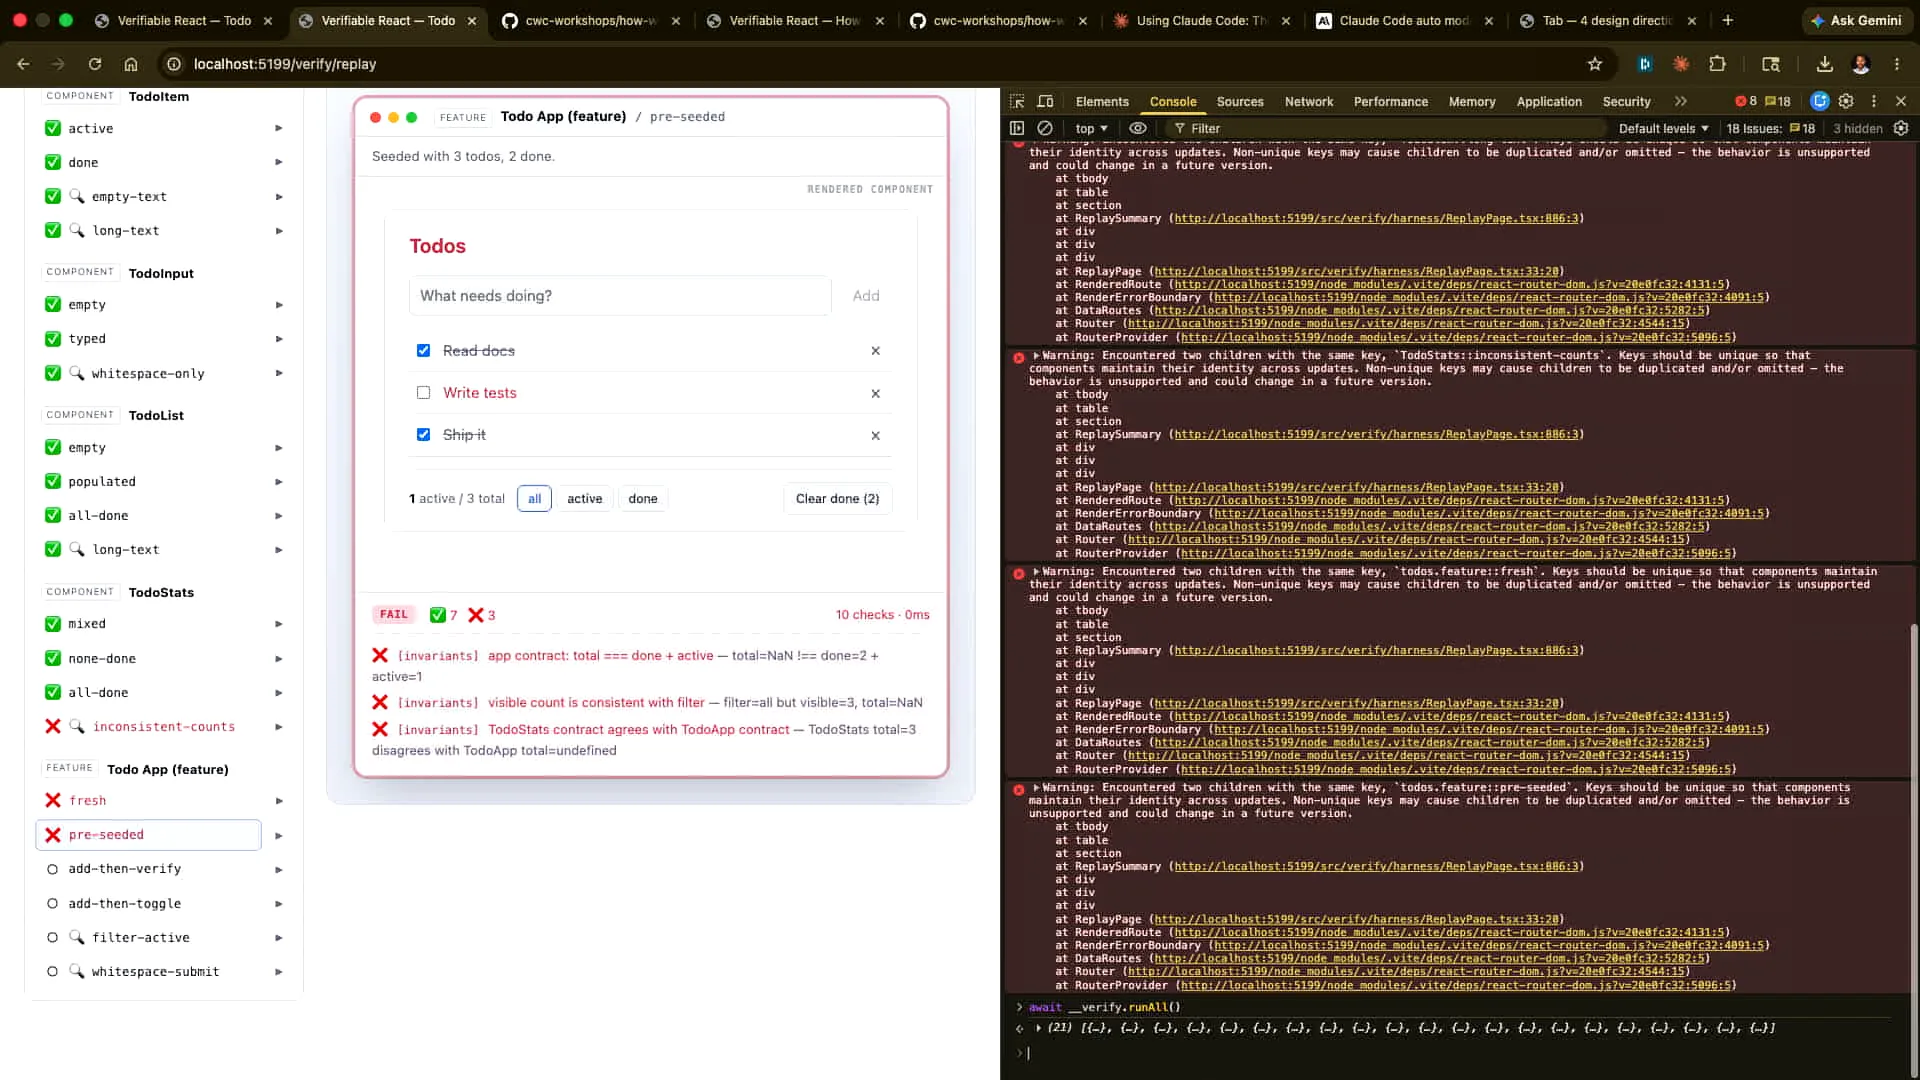 | All of these are failing, not because we broke the app, but because we broke the contract, which Claude can natively verify. |
Slide 60 — 25:06 (watch)
 | I want Claude to inform me about these issues, excluding the ones I caused. I will revert the changes I made, but I would like Claude to explain what is happening with this particular issue. Let me correct the change I made earlier. |
Slide 61 — 25:50 (watch)
 | Control Z, auto-save, and rerun. Now we've manually demonstrated how to match what the agent would see with our actions. However, we can also let Claude run this headlessly. I will open that and let it run. This one is deliberately broken, while the others work correctly. |
Slide 62 — 26:12 (watch)
 | We have Claude running here. |
Slide 63 — 26:26 (watch)
 | I previously mentioned fast mode and auto mode, which are both useful. Now, we will use Opus 4.7 to determine why that specific verification failed. I have already connected the Playwright MCP for this purpose, and it will execute the necessary processes. |
Slide 64 — 26:46 (watch)
 | The schema was rejected because 4 plus 3 does not equal 10. If you run `bun verify`, the tests will pass in this case, as we intentionally set the verification incorrectly for demonstration purposes. However, the test matrix itself will still pass. |
Slide 65 — 27:06 (watch)
 | The idea is to distinguish between tasks that a human can perform and those that can be executed by an agent directly from the browser using the commands demonstrated. Additionally, tasks can also be run headlessly from the command line interface (CLI). |
Slide 66 — 27:24 (watch)
 | You could also record the outcome we discussed. |
Slide 67 — 27:38 (watch)
 | In this setup, you can demonstrate how to record these outcomes. The same delayed running we discussed can be executed and recorded as evidence to confirm its functionality. This recorded evidence can then be stored and run in that manner. |
Slide 68 — 28:12 (watch)
 | The Cloud Code team currently records nearly all code changes, particularly front-end changes, to keep pace with our rapid shipping schedule. Are people able to access the repository and set up the verification? Great! Yes, you can store these recordings in S3 or share them with colleagues. |
Slide 69 — 28:50 (watch)
 | We have an internal system that automates the recording process. We do record the clips as part of a regular cadence, although I'm not certain how long we retain them or in what context. Each clip can be downloaded individually or all at once, and this bundle serves as proof that the verification worked. |
Slide 70 — 29:30 (watch)
 | To summarize what we've covered so far, there are three different surfaces: the human surface, the agent-first surface from the browser, and the continuous integration surface, which you can access using run `verify`. The goal is to embed the verification process into the artifact itself. For more details, I encourage you to check out the repository, run a few examples, and conduct some tests. |
Slide 71 — 30:00 (watch)
 | You can modify the code, observe what breaks, and rerun it yourself. The documentation is quite detailed, and this is what Tarek and the team use in the Claude Code team for their work. |
Slide 72 — 30:14 (watch)
 | This demo was developed quickly, just a week and a half ago, so I encourage you to check it out. |
Slide 73 — 30:24 (watch)
 | What's new is the remixing and rearrangement of familiar primitives to make them available to the agent first. |
Slide 74 — 30:32 (watch)
 | That concludes what I wanted to cover. I encourage you to spend more time on the repository. |
Slide 75 — 31:06 (watch)
 | There is excellent documentation available, and you can gain a lot from it using Opus 4.7. Opus 4.7 performs exceptionally well due to its improved vision model. I recommend using Opus 4.7 instead of Sonnet. Additionally, consider using FastMode; while it is more expensive, it is effective for quickly iterating on specifications. Some may ask if an HTML specification is more token inefficient. Generally, the answer is no. In the long run, you will iterate less with a well-structured and rich HTML specification, even if it requires more tokens in one-off instances. You can also experiment with FastMode. That concludes my recommendations. I enjoyed speaking with you, and thank you for your attention. |